For inspiration, ideas, tutorials, techniques and classes on paper crafting, card making, scrapbooking and more using quality Stampin' Up!® products. gerlach@iinet.net.au 0421 482 578
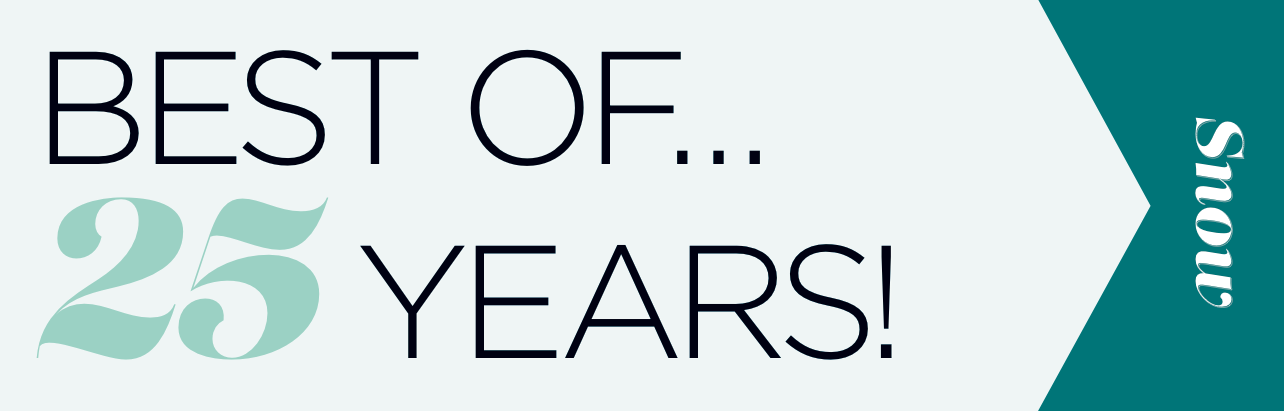
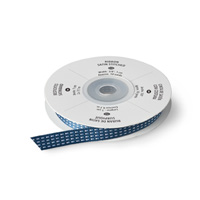
This is the last month for the Best Of stamp sets celebrating Stampin’ Up!’s 25th anniversary year and this one, Best of Snow, is perfect for getting a head start on your Christmas Cards.
All Best of stamp sets include 3-5 images, including a never-before seen image, and are $25.95.
All of the Best of sets will be available until 30 April 2014.
All Best of stamp sets are available in Clear-Mount only.
The stamp images may be sized differently from the originally released stamp sets.
All of the Best of Stamp sets are only available until the end of April or while stocks last, so if there is one that you love, I’d advise to order it sooner rather than later here.
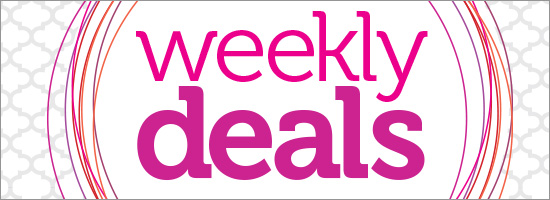
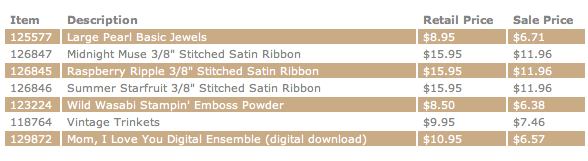
YAY not only is this my birthday month, but Stampin’ Up! are also making it a super exciting month by introducing weekly deals! Yes every Wednesday there will be different deals being offered, so make sure you come back each week to check them out – or if you subscribe to my newsletter you can get them in your inbox each week or follow me on FaceBook and I will be listing them there as well. This week, April 2nd – 8th the following seven items are on sale:
I will have an order going in on Tuesday the 8th of April next week (i.e. the evening before these deals finish) so you can email me your order gerlach@iinet.net.au and I can place the order for you, or you can order online yourself, the current hostess code is 7ZETFPPY
Last year at the Stampin’ Up! leadership day for managers and above, we set a number of personal goals. One of the last goals I had to achieve for myself was to start making some You Tube videos of different stamping techniques, cards, tips, scrap pages and the like. Well like most things in my life, my personal goals took a backseat to a number of other things, but as I had just received my invitation to the 2014 leadership day at this years national Convention for Stampin’ Up! I figured I’d better get a wriggle on and tick the last item off the list.
So here it is a super simple card made using one of the pretty patterned tissues that we were able to buy at Convention last year in Momento Mall in the Stampin’ Up! colours. Well for the price and prettiness of them there was no way that I was using the tissues for blowing my nose and as my craft room is currently undergoing major renovations I can’t hoard stuff forever, so I decided to use them and in the process make my first video – there’s lots of room for improvement, but at least I’ve made a start.
As requested the card layer dimensions are:
Base Pear Pizzazz – 21cm x 14.8cm (scored at 10.5cm to fold it in half)
Whisper White with tissue layer – 10cm x 14.3cm
Pear Pizzazz layer – 7.5cm x 10.5cm
So Saffron – 7cm x 10cm
Greeting flag: Calypso Coral 2.5cm wide & Whisper White 2.2cm wide
If you have any feedback on the video, have made a card using the above technique, please share them with me in the comments below as I love seeing other peoples work. Alternatively if you have other suggestions for topics you would like me to cover in my future videos, please get in touch with me either below in the comments or by email gerlach@iinet.net.au
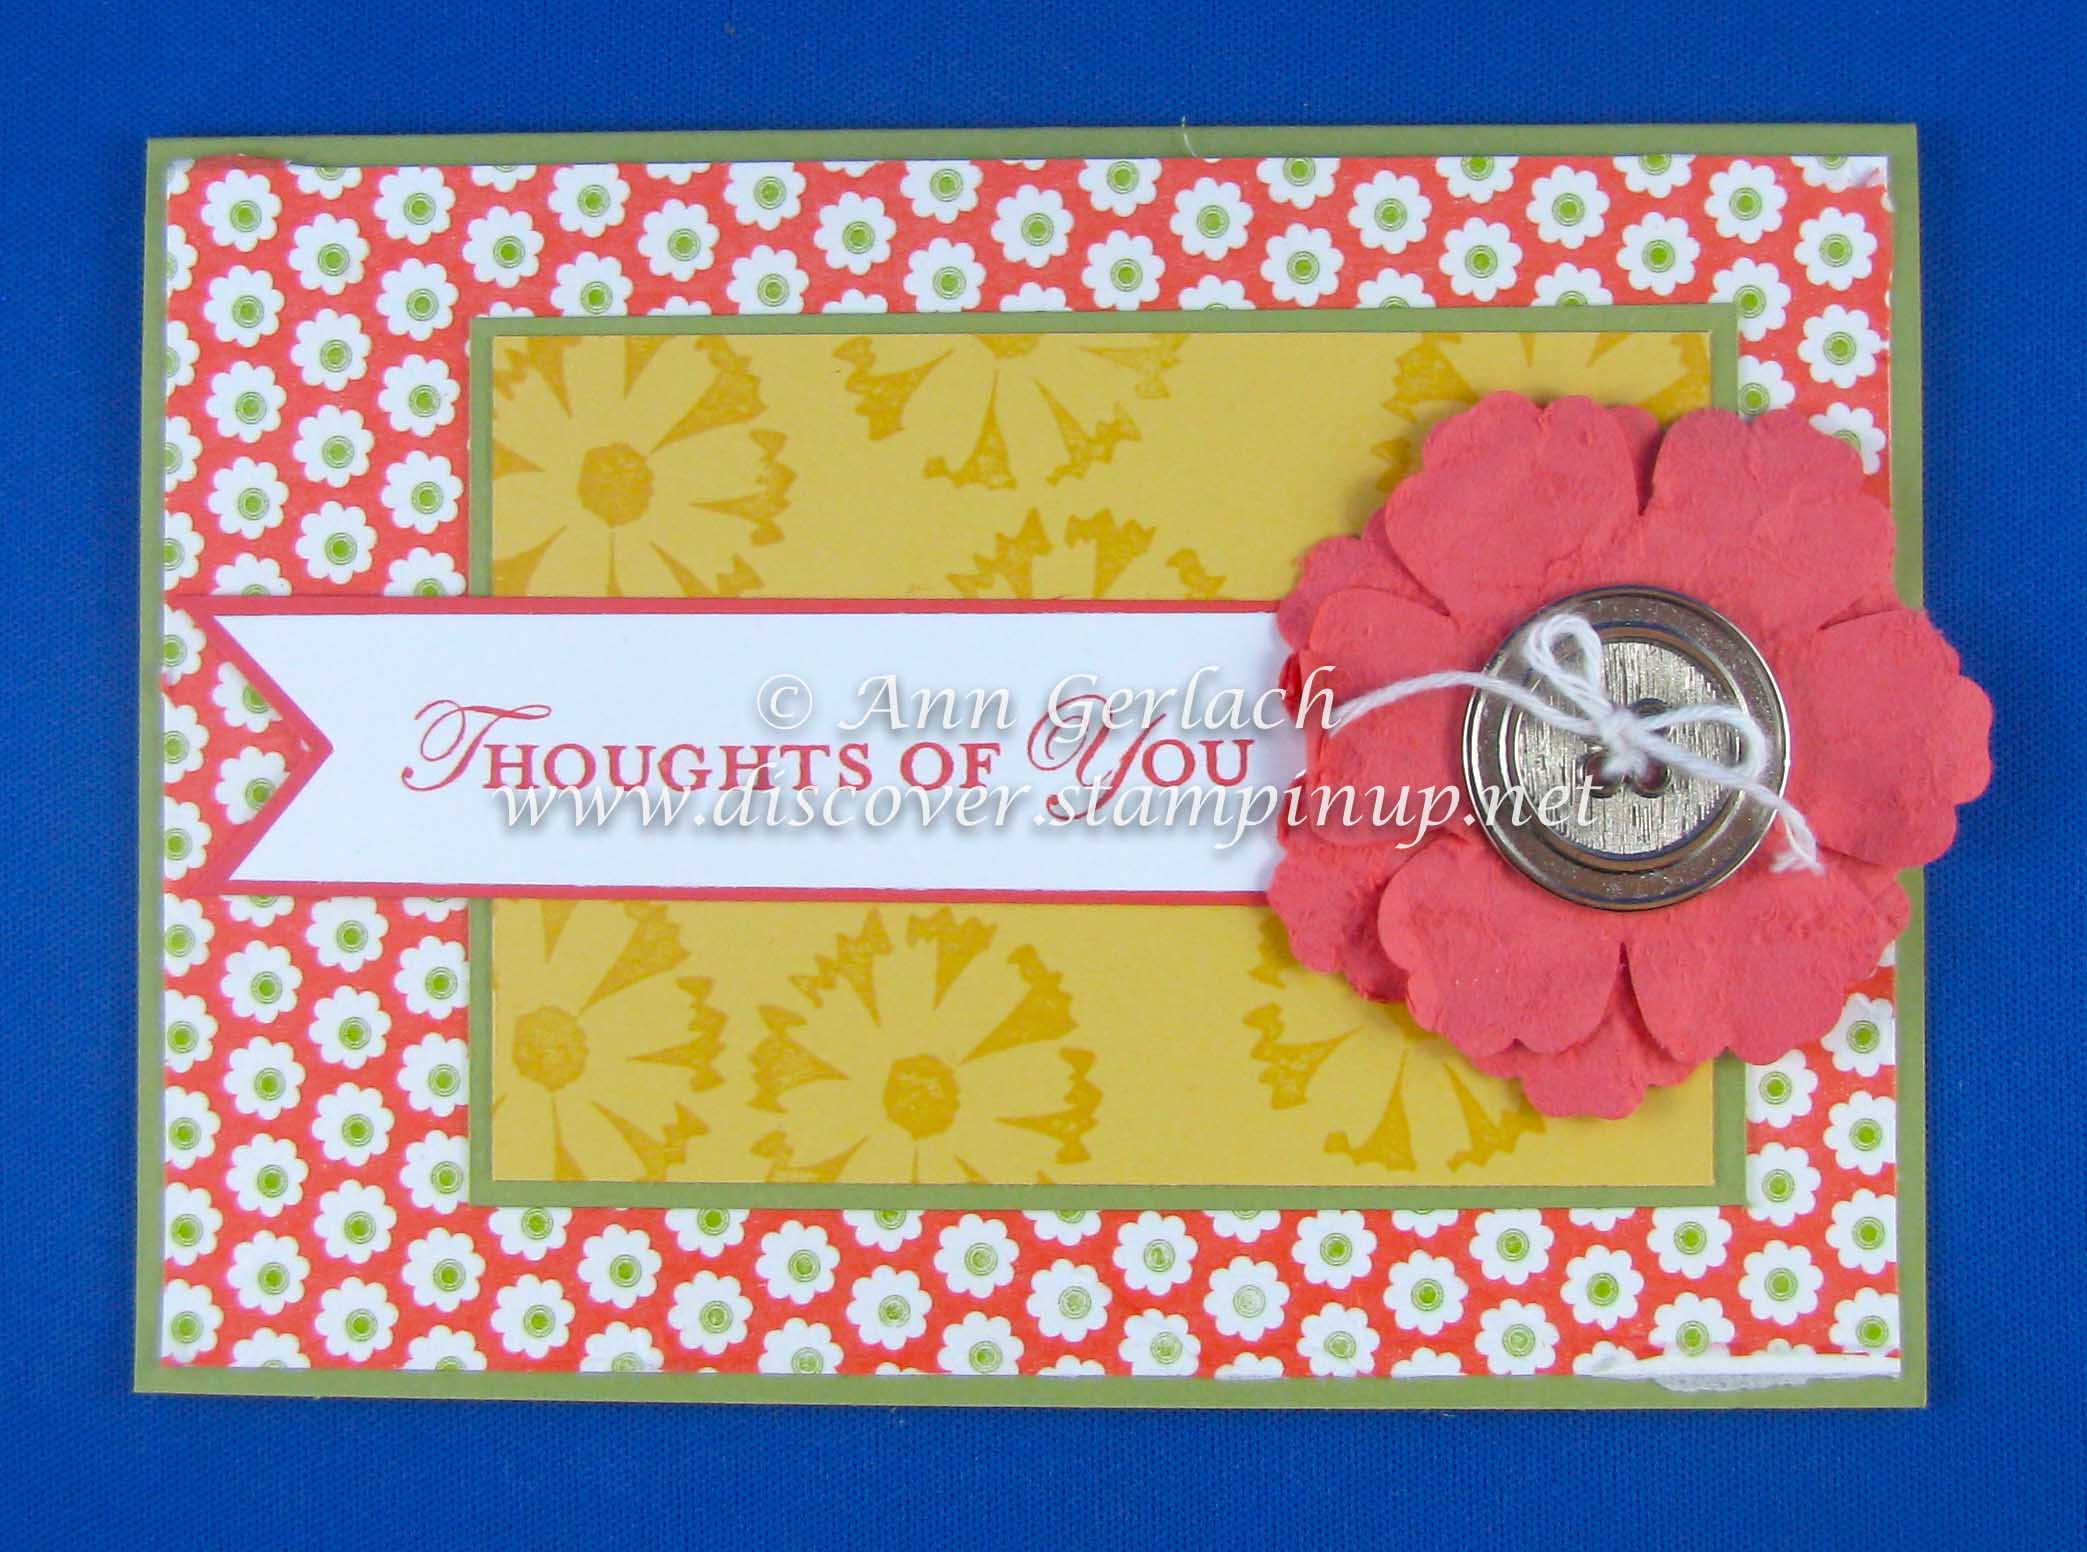
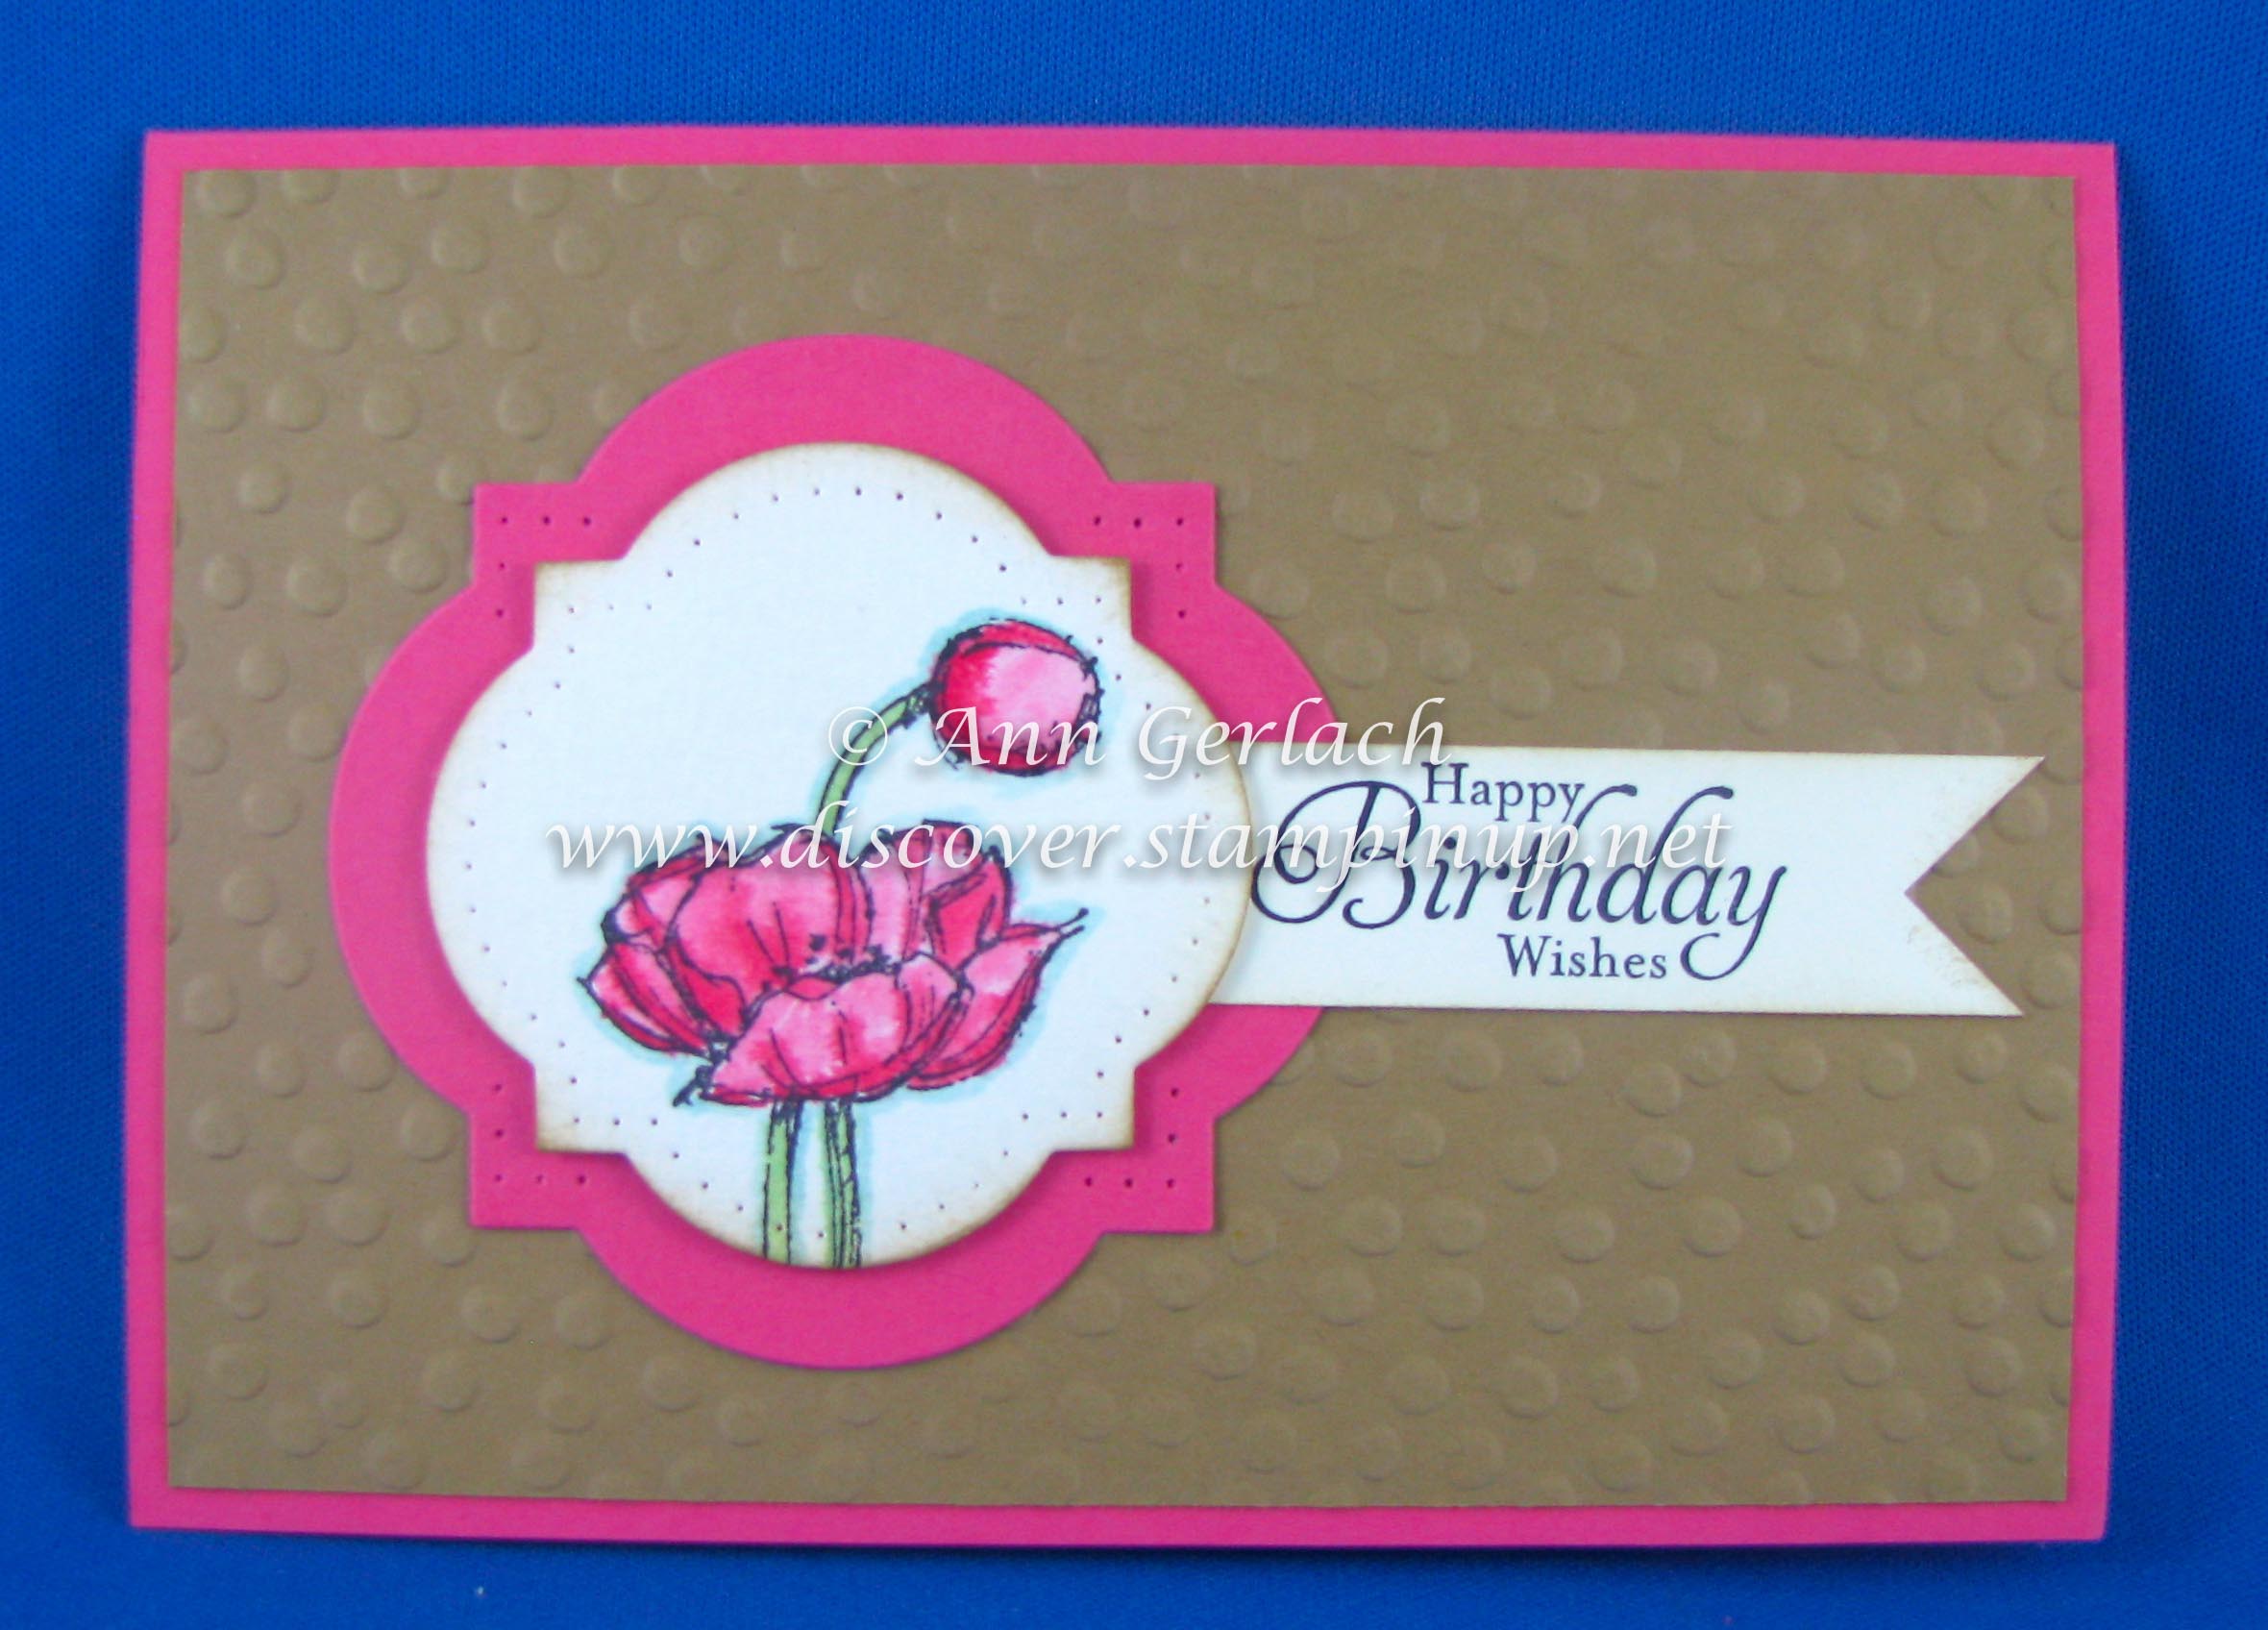
I had a lovely friends 40th birthday this weekend, now I’ve known him since we went through university 23 years ago and to be honest – apart from his family which he absolutely adores, his two big loves in life have always been fishing and beer….so the choice of card was sort of easy really as I made him a fish card last year! It’s a really simple card, but it was made with love!
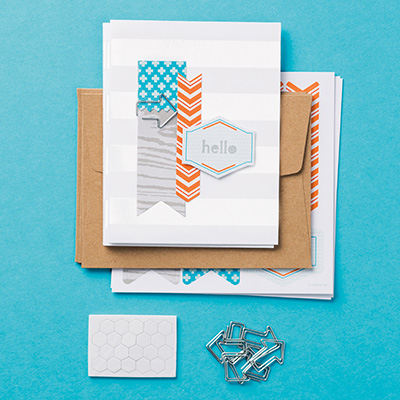
The background embossing folder is from Sale-a-bration – decorative dots, which will be available in the next annual catalogue, but for the next 24 hours you can get it for FREE with a qualifying Sale-a-bration order. The gold numbers were cut using the Typeset Alphabet on gold foil card stock – loving the silver and gold foil, a little bit really adds that special something to a card. The corners of the mug and the stripes of So Saffron card stock were rounded using my Envelope Punch Board as that was on my desk and the corner rounder was in the other room (yep I’m a lazy crafter).
I had a simply lovely hostess at a Sale-a-bration party recently and she wanted to base the party around water colouring, mainly to answer the question she had, which was “which was the best colouring tool to get a Blender Pen or an Aqua Painter?” Sadly I can never definitively answer this question as it really depends upon a lot of variables e.g. what size image are you colouring, what card stock are you colouring on, what effect do you wish to achieve, how much time do you want to spend colouring……….the list of variables is fairly long. So like with most things the best way to make a decision is via personal experience, or in this case to let people play with both and make up their own minds.
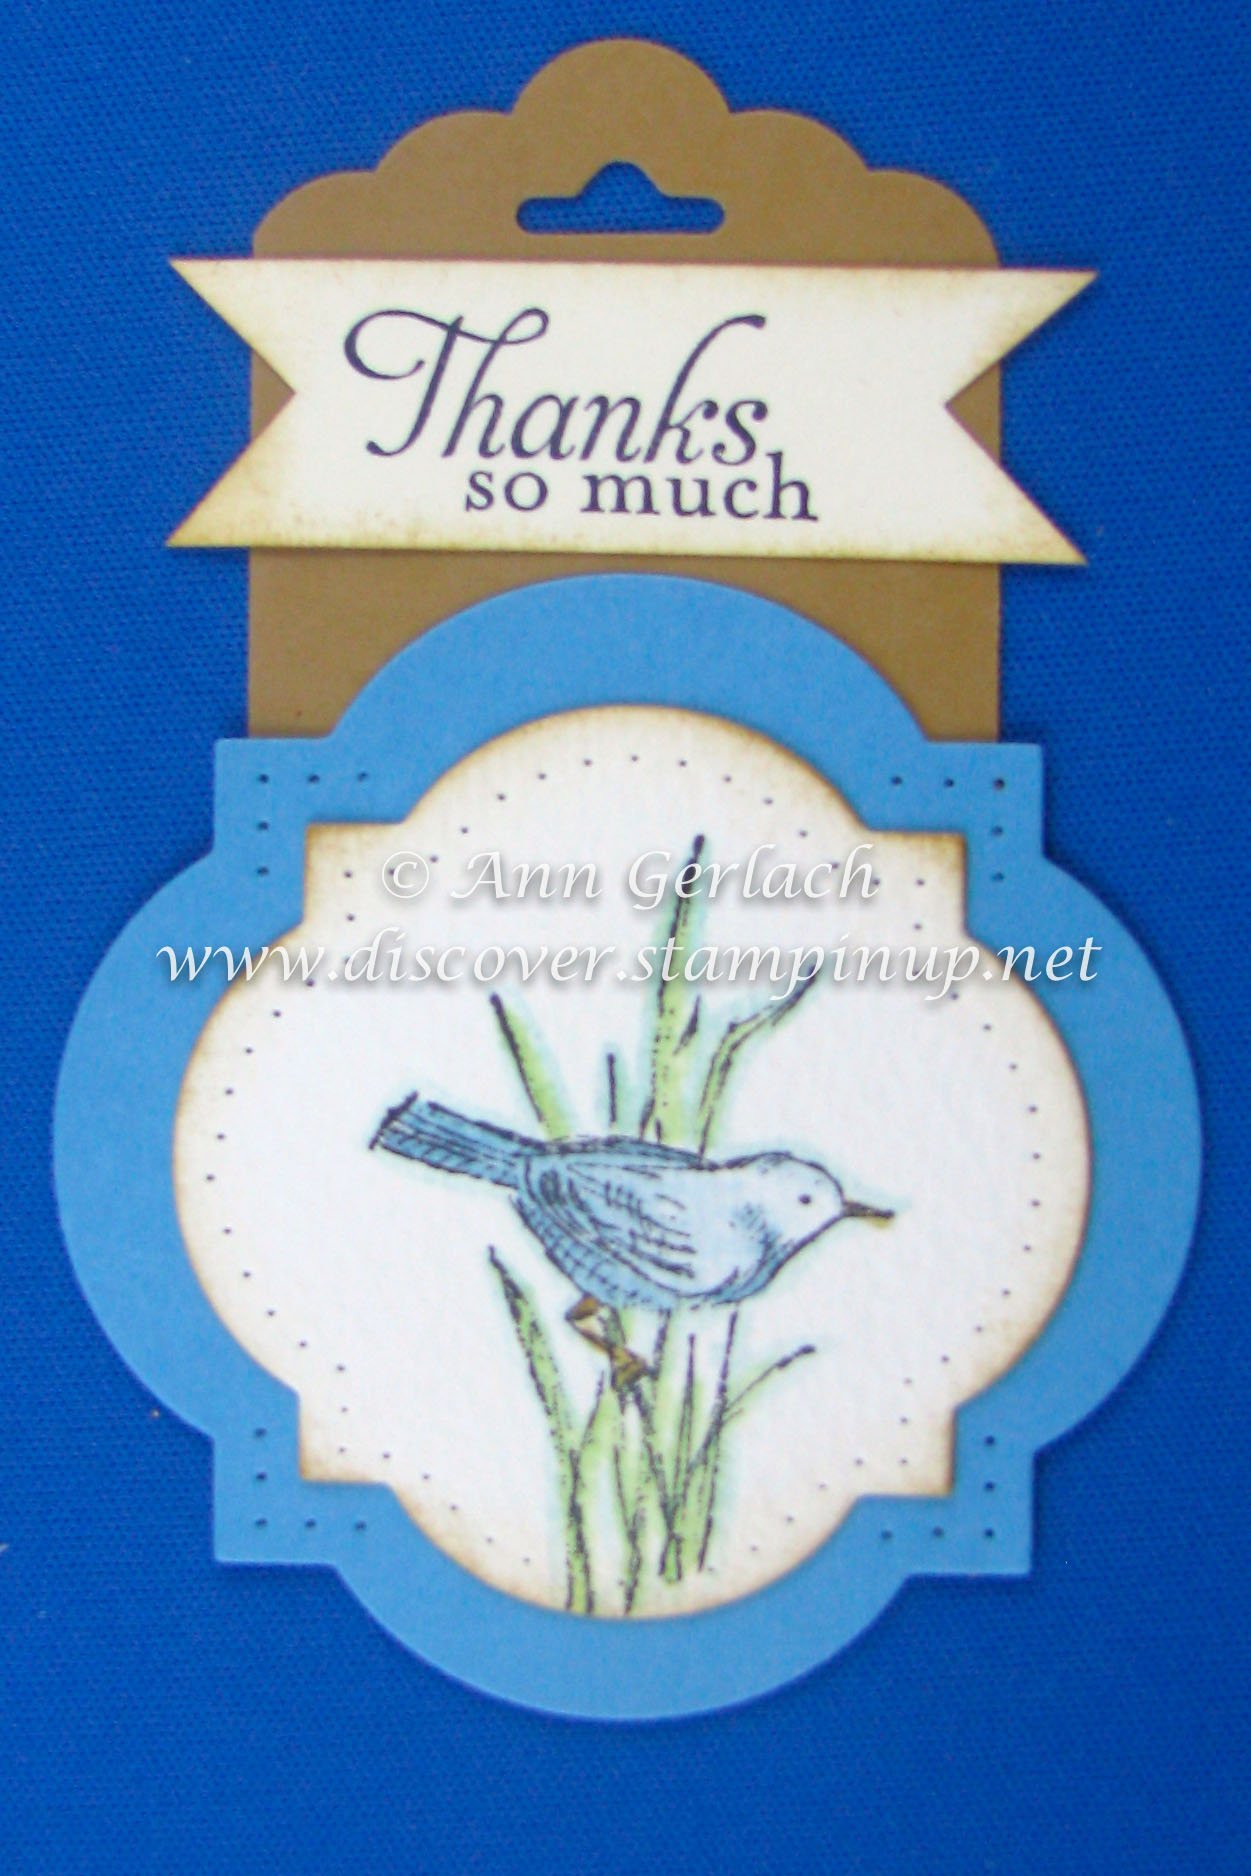
We made two items for the make and take – a tag using the new Scallop Tag Topper punch which I coloured with a Blender pen.
Don’t you love the paper piercing detail on this tag and card? Such a simple, flat, low cost way of adding something special to a card or tag. The second item they did was using the same stamp set, Simply Sketched, and coloured it with the Aqua Painter. It was up to the participants as to which image(s) from the set they preferred and which way around they coloured so some had pink tags, some had blue cards and some co-ordinated them so that they both matched. The whole idea of the workshop was to let people play with the products and make up their own minds about which colouring method they preferred.
Of course since it was subjective, there was no definitive answer that I can give you as to which is best, but if you would like to test drive both methods let me know, or if you have a different technique or question you want me to address please don’t hesitate to contact me or get some friends together and host a party.
Stamps: Simply Sketched (hostess)
Ink: Black StazOn, Strawberry Slush, Marina Mist, Pistachio Pudding, Soft Sky, Baked Brown Sugar.
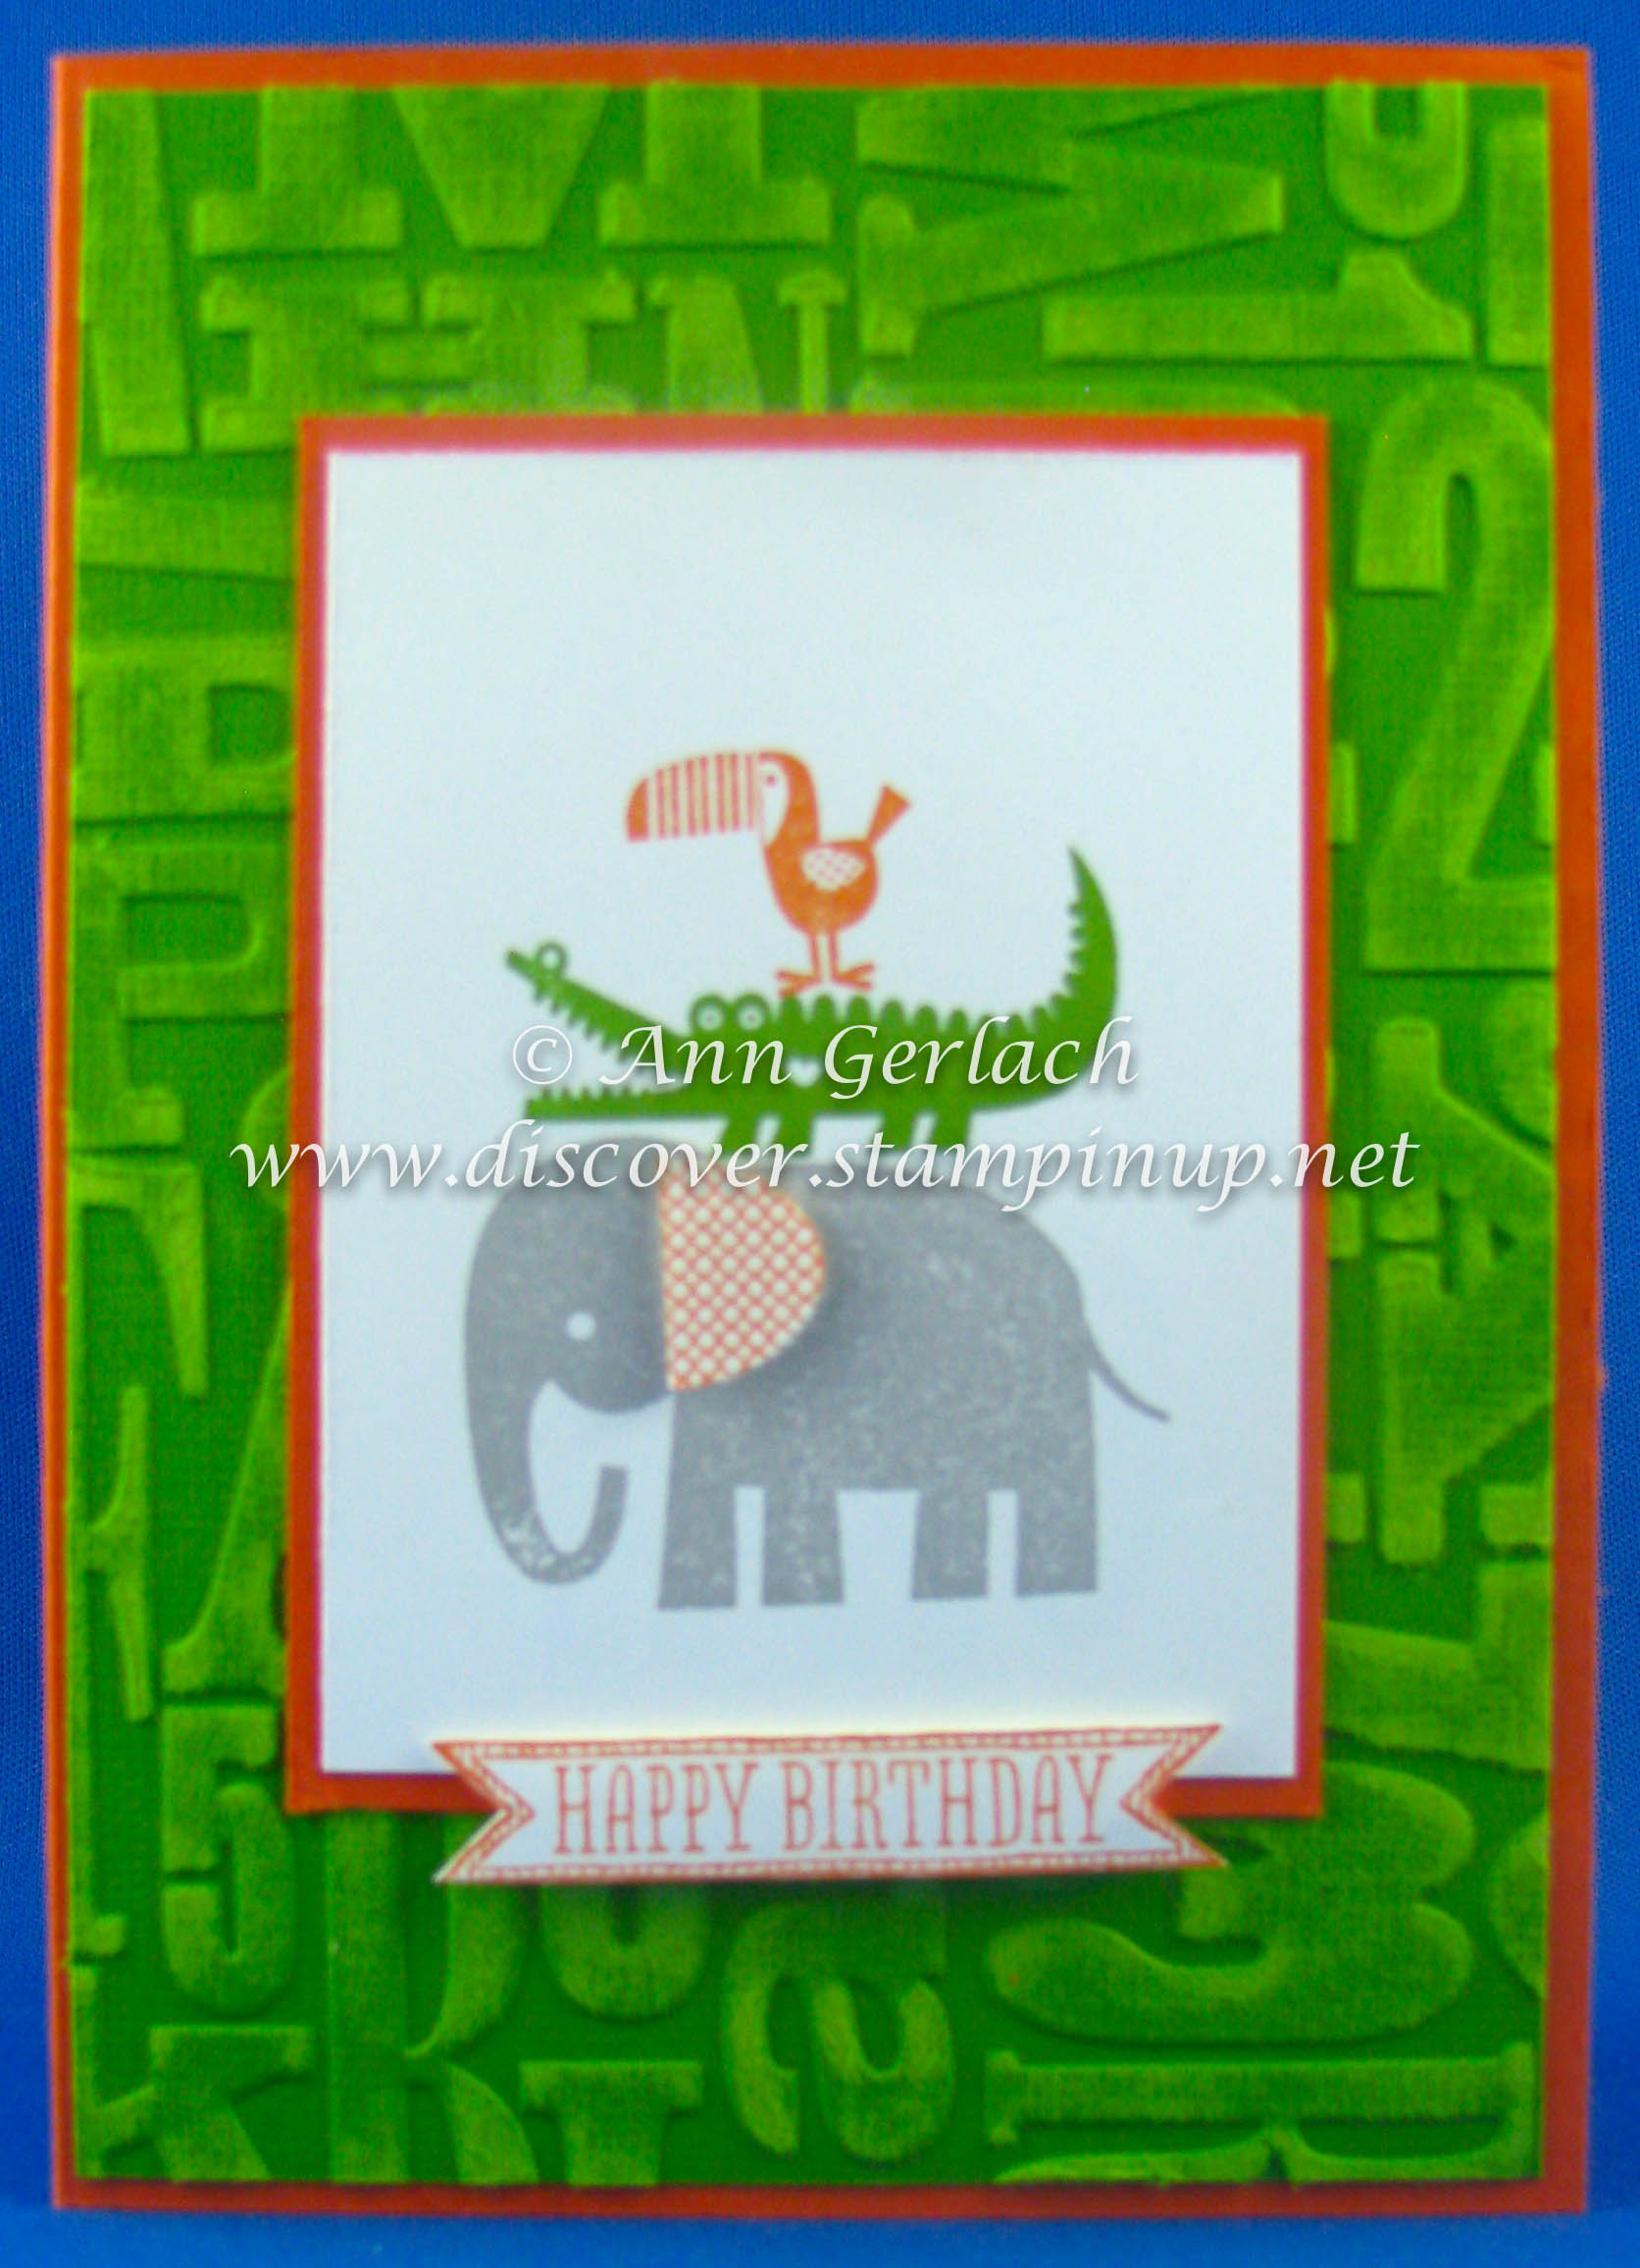
When I got the new annual catalogue last year I marked a couple of stamp sets that I loved for me, not just for classes and Zoo Babies was one of them. I love animal stamps and this one was really cute, but I had to wait a while before I could justify getting it. I don’t have a heap of baby cards to make, so I made this into a fun birthday card instead. The animals look really cute in a stack (you can use a stamp-a-ma-jig for perfect placement), and the elephant was stamped twice so I could cut the ear and pop it up with a Dimensional. The background is the new embossing folder Alphabet Press on Gumball Green Core’dinations card stock and lightly sanded to add texture.
Ever wanted to get to a Stampin’ Up! party, but just don’t have the time? On March 26th there will be a new style SU! party that everyone is invited to attend. The staff at Stampin’ Up!’s home office have invited you to stamp with them!
This is a live, streaming event where we will stamp with the All Wrapped Up Bundle on page 6 of the Sale-A-Bration brochure. The projects will be perfect for Easter, Mothers Day or just general gift giving.
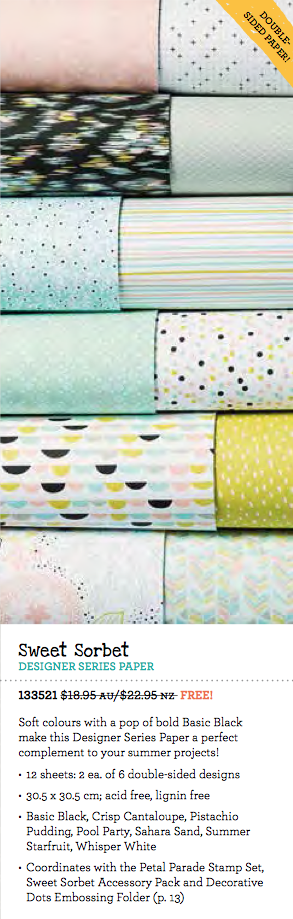
If you want to order the bundle in time to have it at the event so you can stamp along and create with the team, click here to order and select either the clear or wood mount version. The projects will also feature the Sweet Sorbet Designer Series Paper, so you may want to select that as your free Sale-A-Bration product.
Then on 26 March 2014, at 5:00 PM, 7:00 PM and 10:00 PM (all times listed are AEDT). The Stampin’ Up! staff will demonstrate the same projects at each of the same time slots, so you just choose which time slot is best for you and join in the fun via the Stampin’ Up! You Tube channel.
As well as having its of fun and seeing new projects, door prizes are also being given to random participants!
We had a Christmas Stamp-a-stack last week, I know it’s only the beginning of March, but that also means we’re a quarter of the way through the year! I send out over 80 Christmas Cards a year, so really that means I should be making about 7 cards a month at a minimum to stop the last minute panic, so far this year I’ve made 23 so I’m on track (sort of) plus I have a few left over from last year that didn’t get sent, so my tally for the year might be closer to 30………watch this space I might be getting organised which is seriously scary in itself!
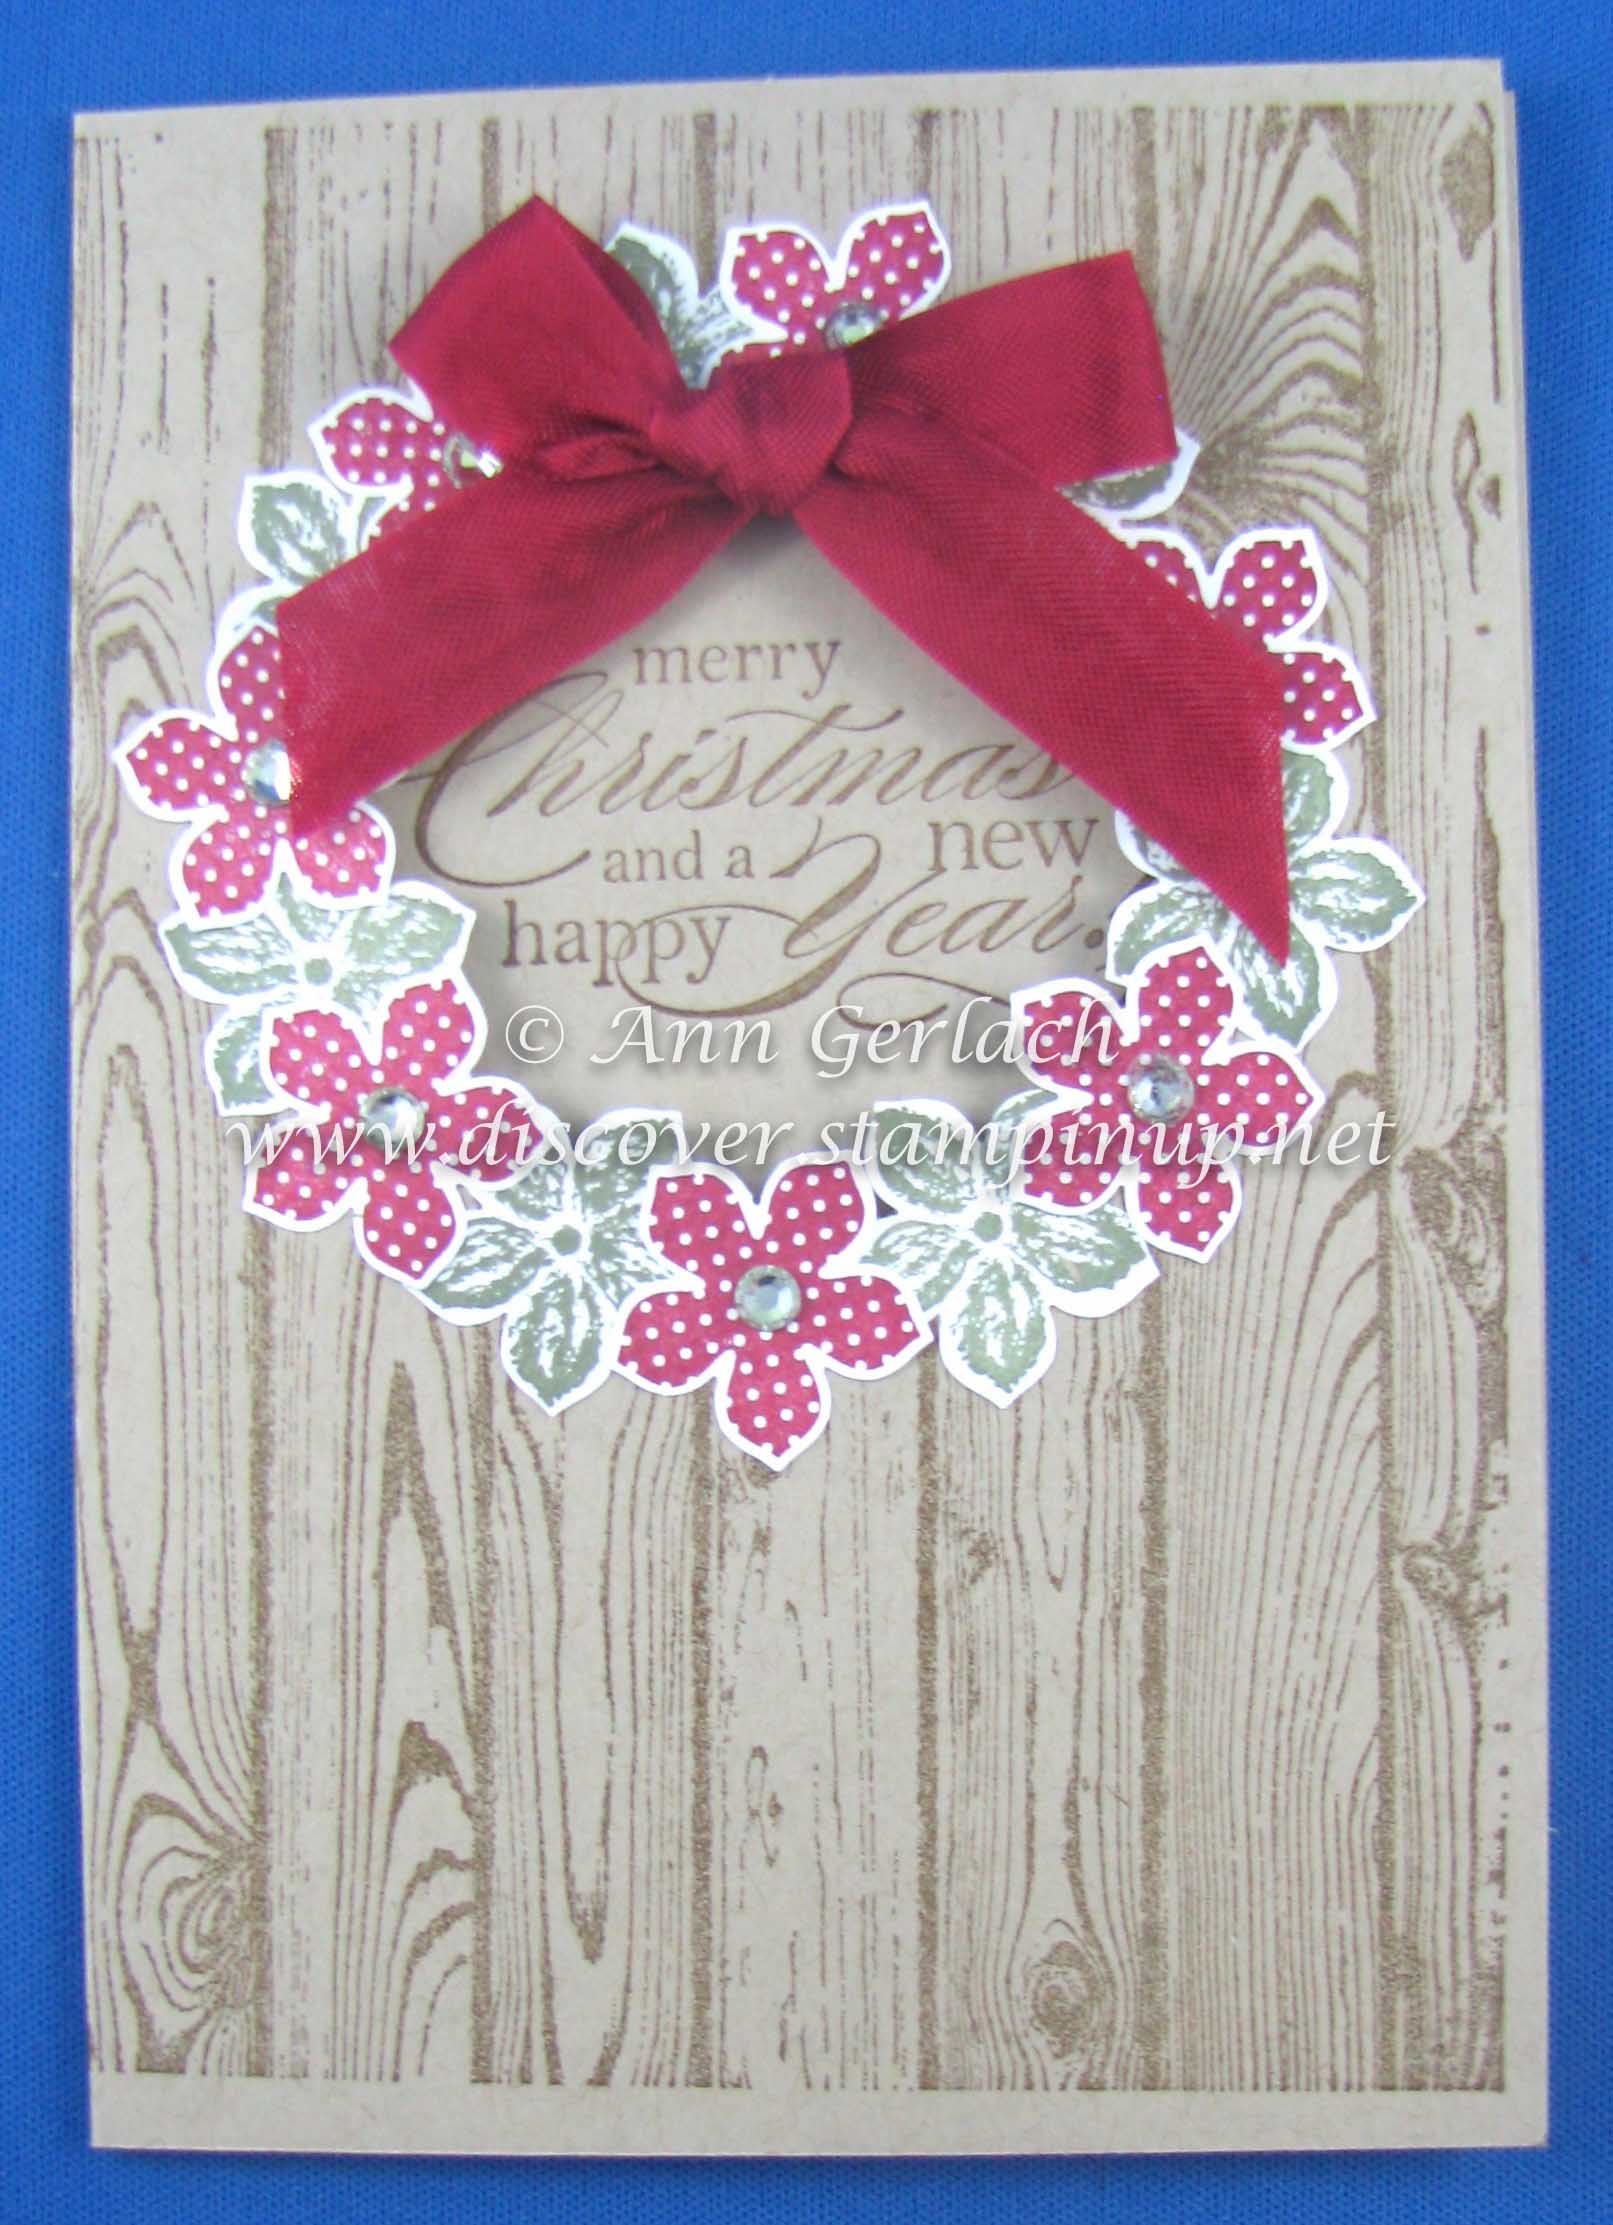
I love using non Christmas stamps for Christmas cards, the flowers from Petite Petals work wonderful to create a wreath topped with some Cherry Cobbler seam binding and basic rhinestones. The background is stamped with the new Hardwood stamp in Soft Suede ink from the Occasions Catalogue, which is the most beautiful woodgrain. The circle is cut with one of the circle framelits and the sentiment is from Delightful Dozen.
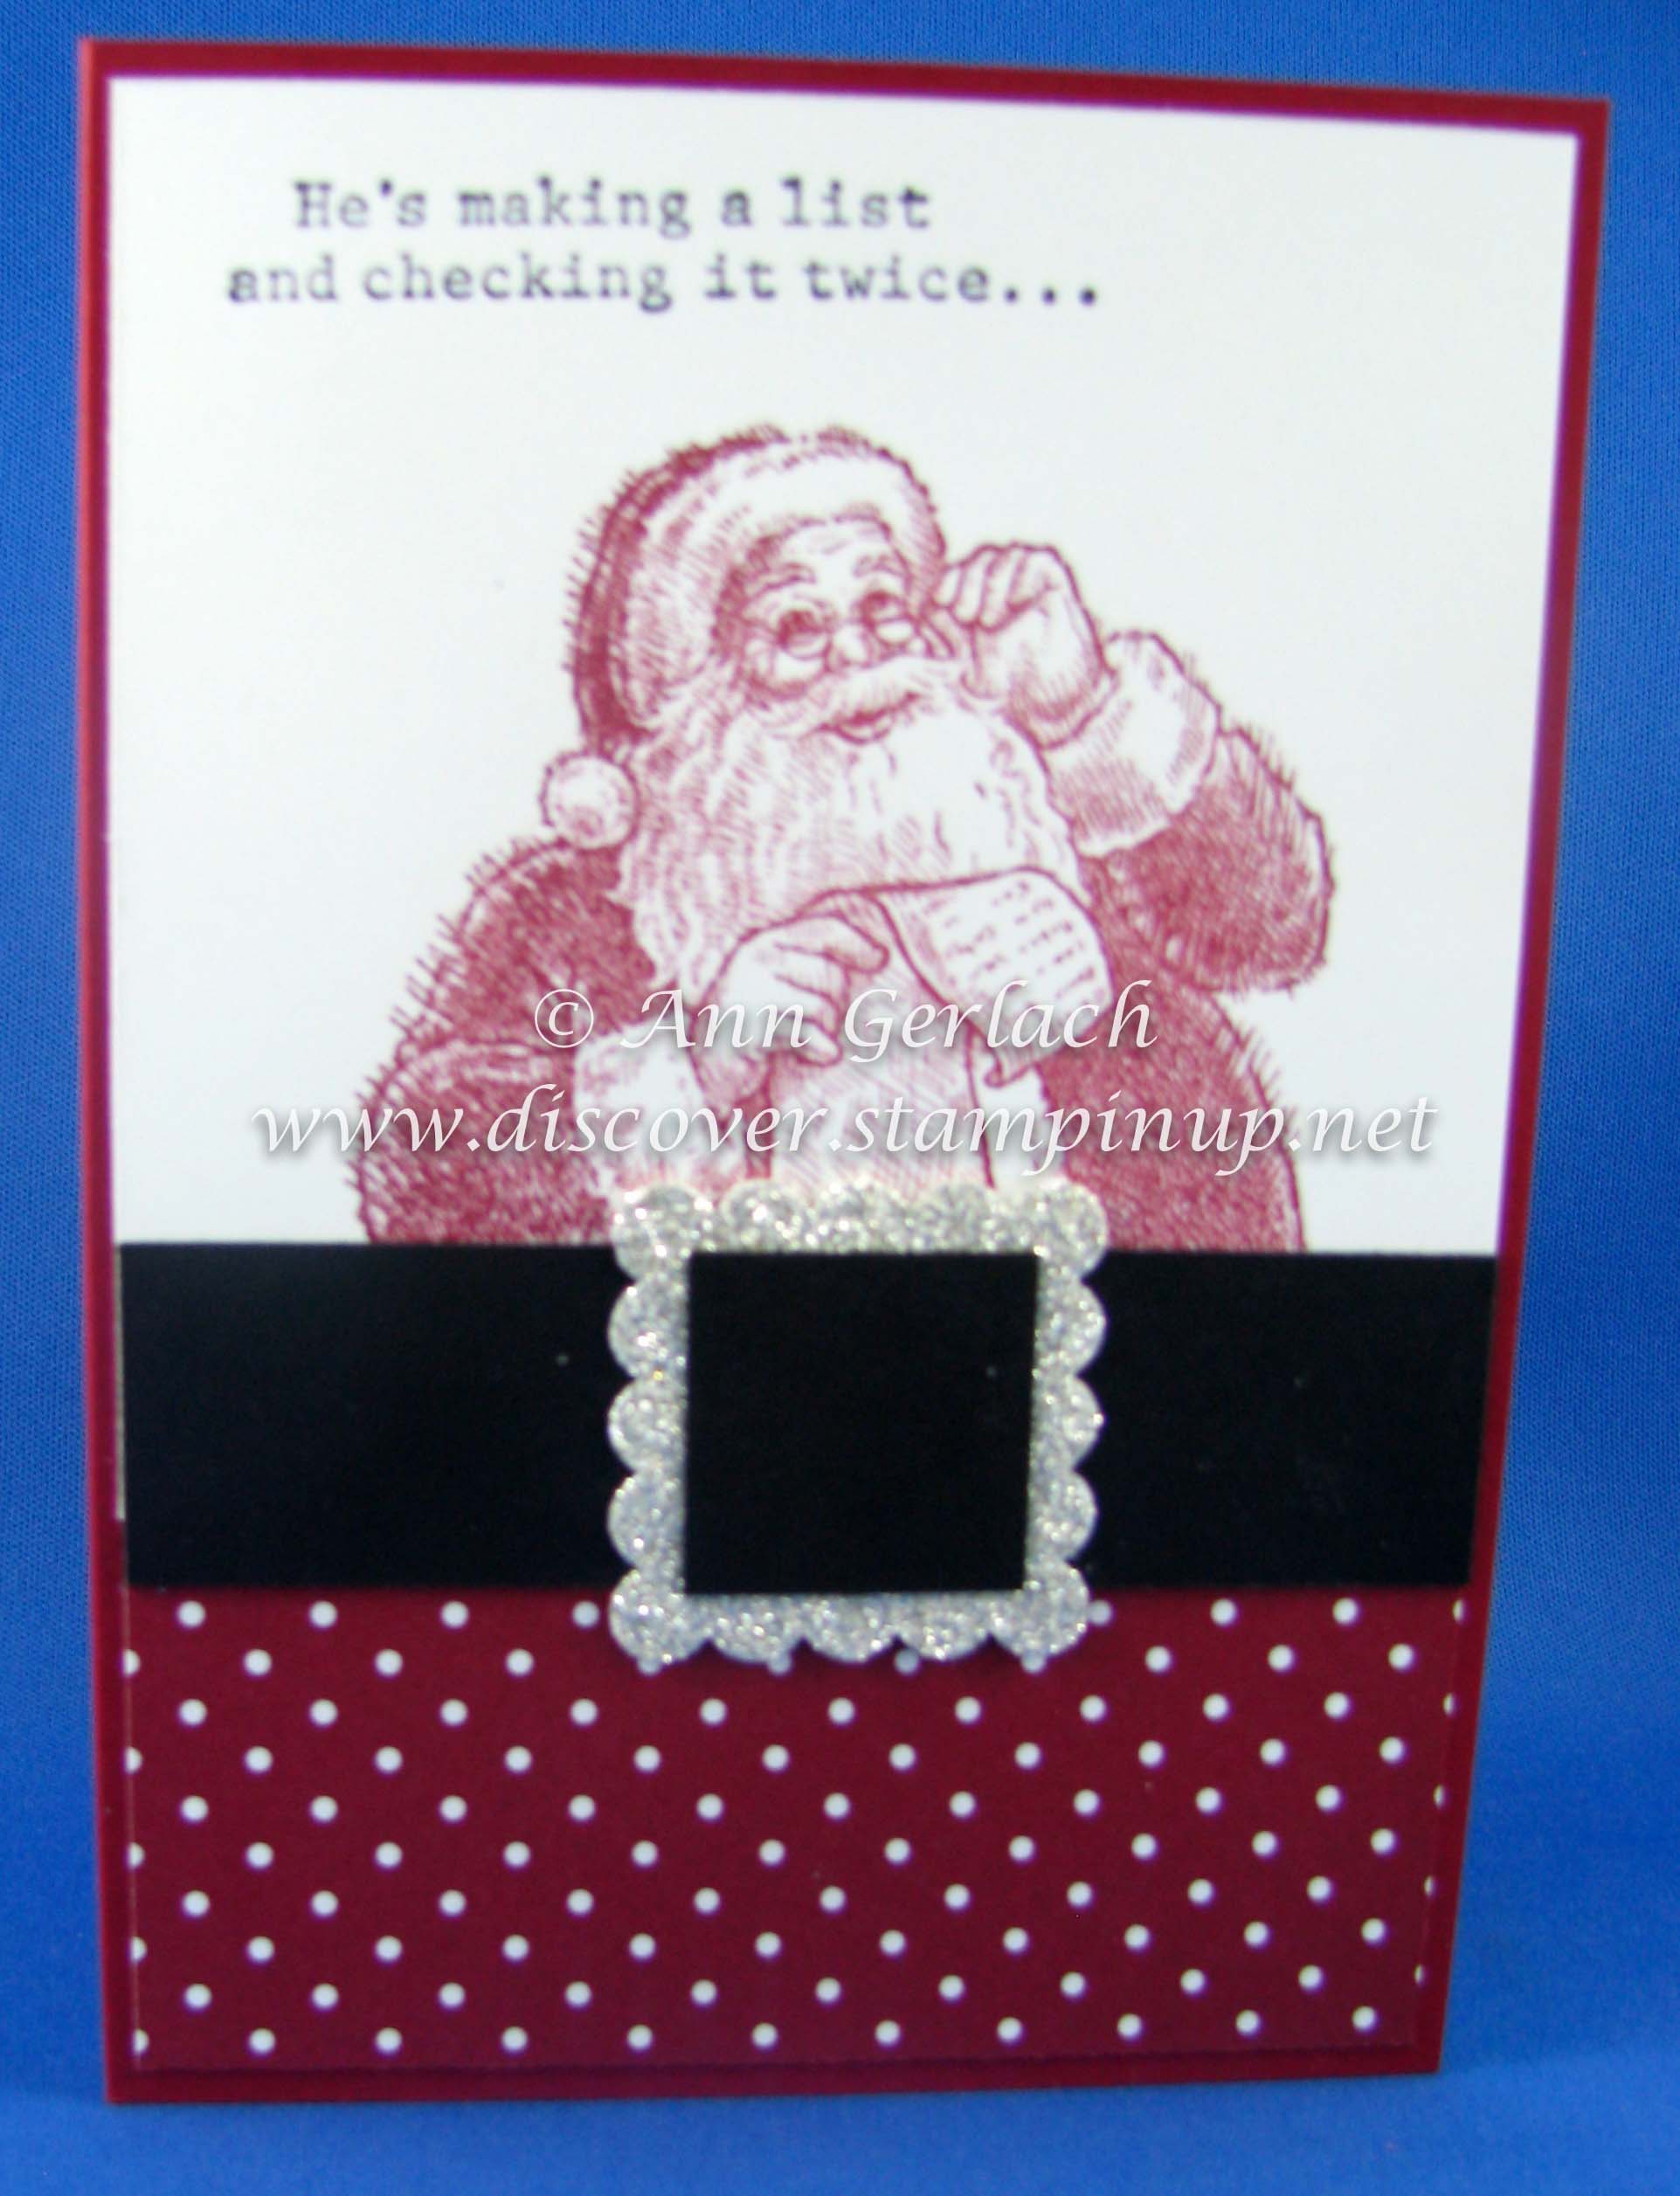
The next card was my favourite of the morning, I was naughty as I used a retired stamp to make it, I so loved this set and felt I didn’t get time amidst the Christmas melee to do it justice. There aren’t many sets I keep after they retire, but this is one, Santa’s List, is definitely one of them. The belt buckle is made using a strip of inch wide black card stock, layered with a piece of silver glimmer paper cut with another retired punch (my bad I totally hadn’t realised that this one had retired!) and then a one inch punch of black card stock as the final layer.
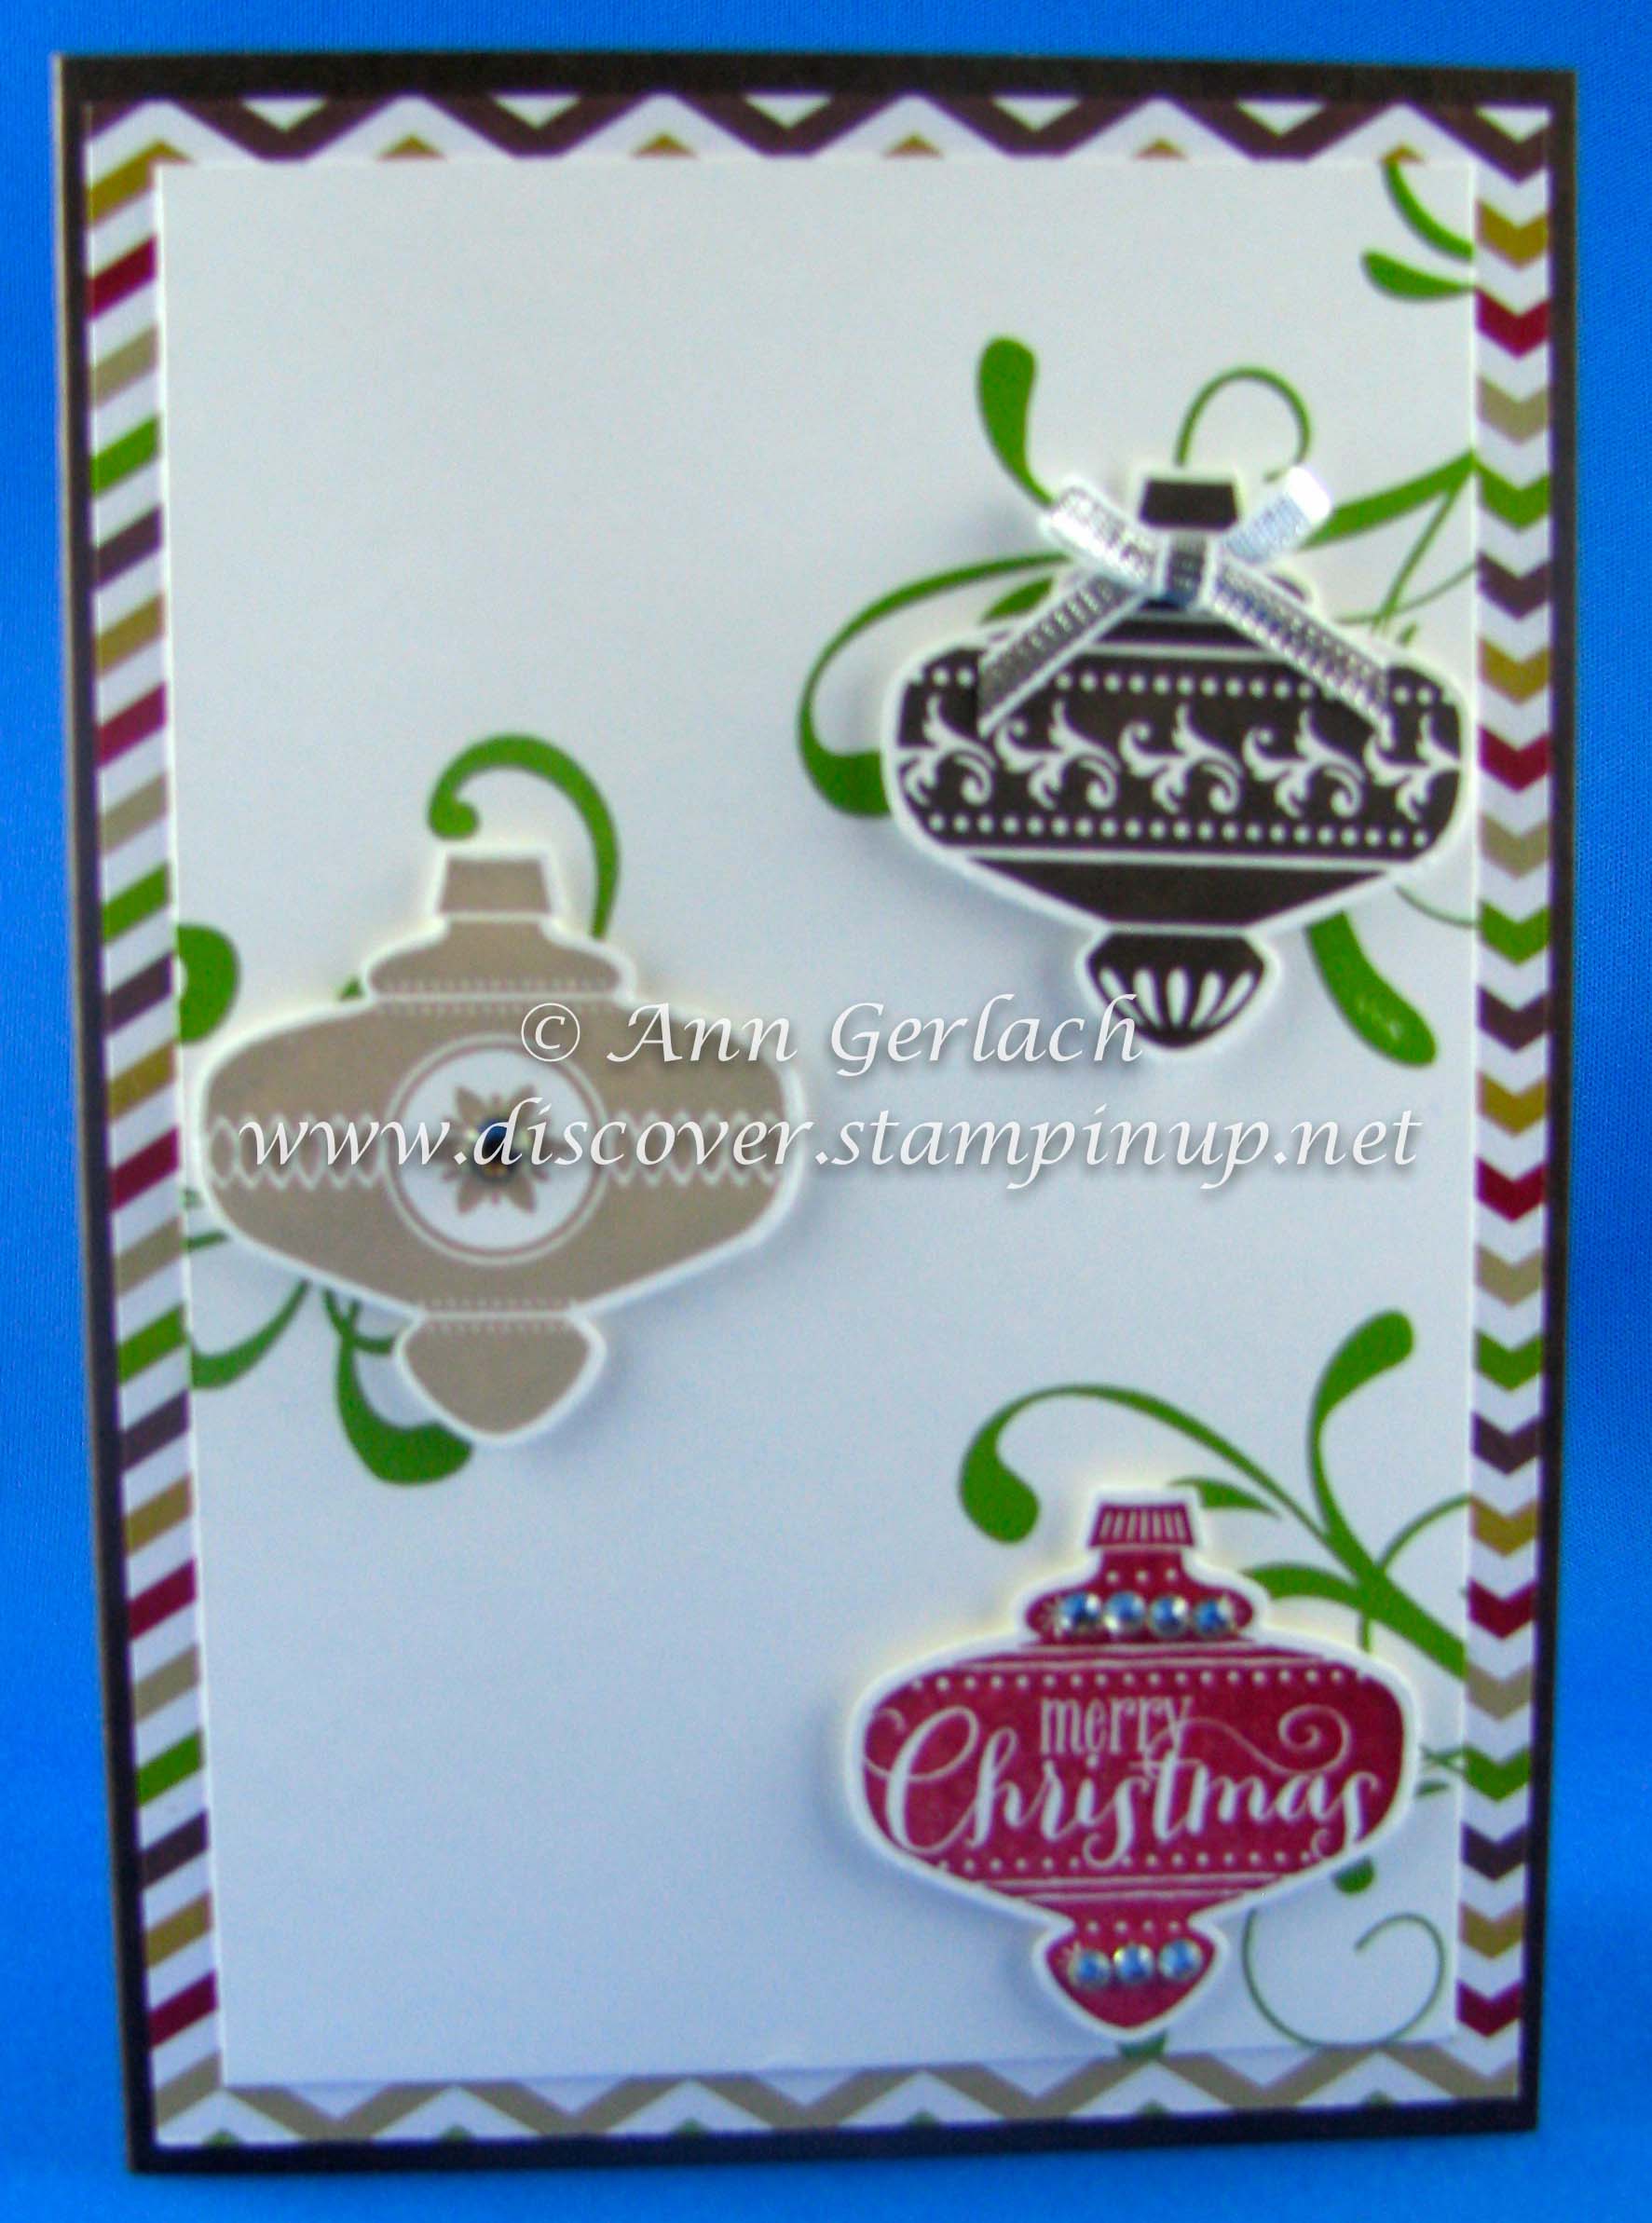
The final card we made was using Everything Eleanor and the Christmas Collectibles stamp set and co-ordinating punch. The ornaments were popped up on Dimensionals and adorned with either basic rhinestones or a box from the silver ribbon that was so popular in the Holiday Catalogue, it is now also in the Occasions Catalogue as well. The colours for the ornaments and ‘tree’ was taken straight from the designer series paper matting the front panel, I love how Stampin’ Up! products all co-ordinate so well!
Which is your favourite card from the class? If you want to join us for our next Christmas Stamp-a-stack keep an eye on my events list.
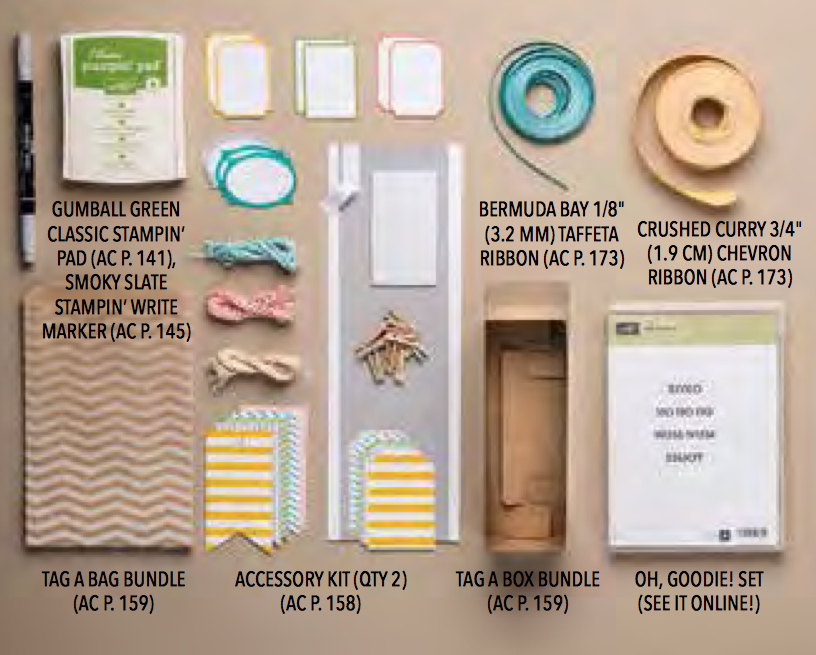
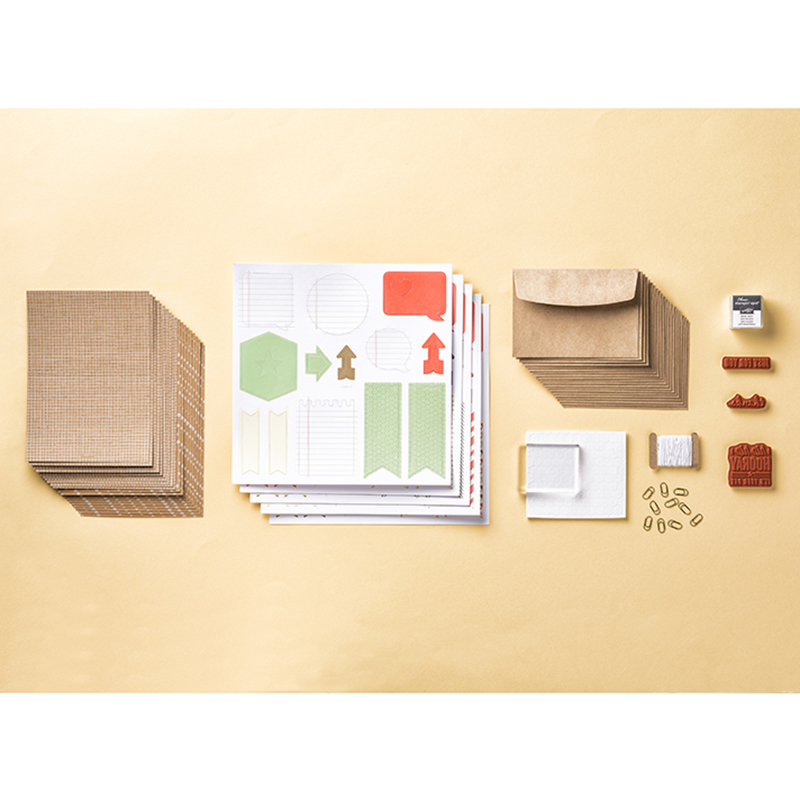
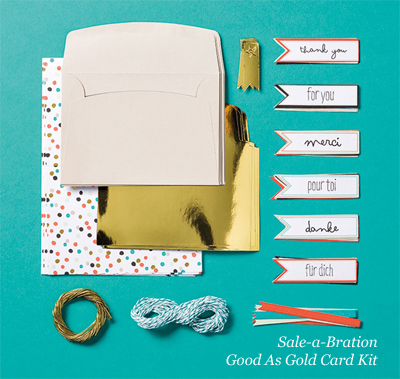
I saw this on the US Stampin’ Up! blog and thought it was too wonderful an offer not to share – during Sale-A-Bration, for each $90 you spend you earn a free, exclusive product. Here’s a bundle of products that work well together and will help you create everything you need for making 44 cards except some adhesive and scissors for just $92.80. That’s just $2.11 per card with envelope, plus at the end you will still have an ink spot and 5 stamps and no doubt some embellishments left over for your next creative session!
Here’s the bundle to purchase to make your next 44 cards:
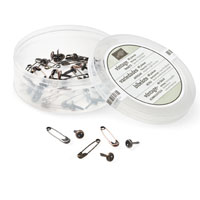
This will get you 36 card bases with envelopes, five stamps, an assortment of clips and Baker’s Twine, a Classic Stampin’ Spot, stickers, Stampin’ Dimensionals, etc.
As your free item for spending $90 during Sale-a-bration I recommend selecting the Good as Gold Kit (133512) as your free Sale-A-Bration item. You’ll add eight more cards and envelopes to your stash! That’s 44 cards and envelopes in total — I am sure that you will really enjoy mixing and matching all of the pieces on the cards to make them unique.
If you do need scissors and adhesive you can find those in my online store along with the kits mentioned, hurry though as Sale-a-bration is only for another 3 weeks!
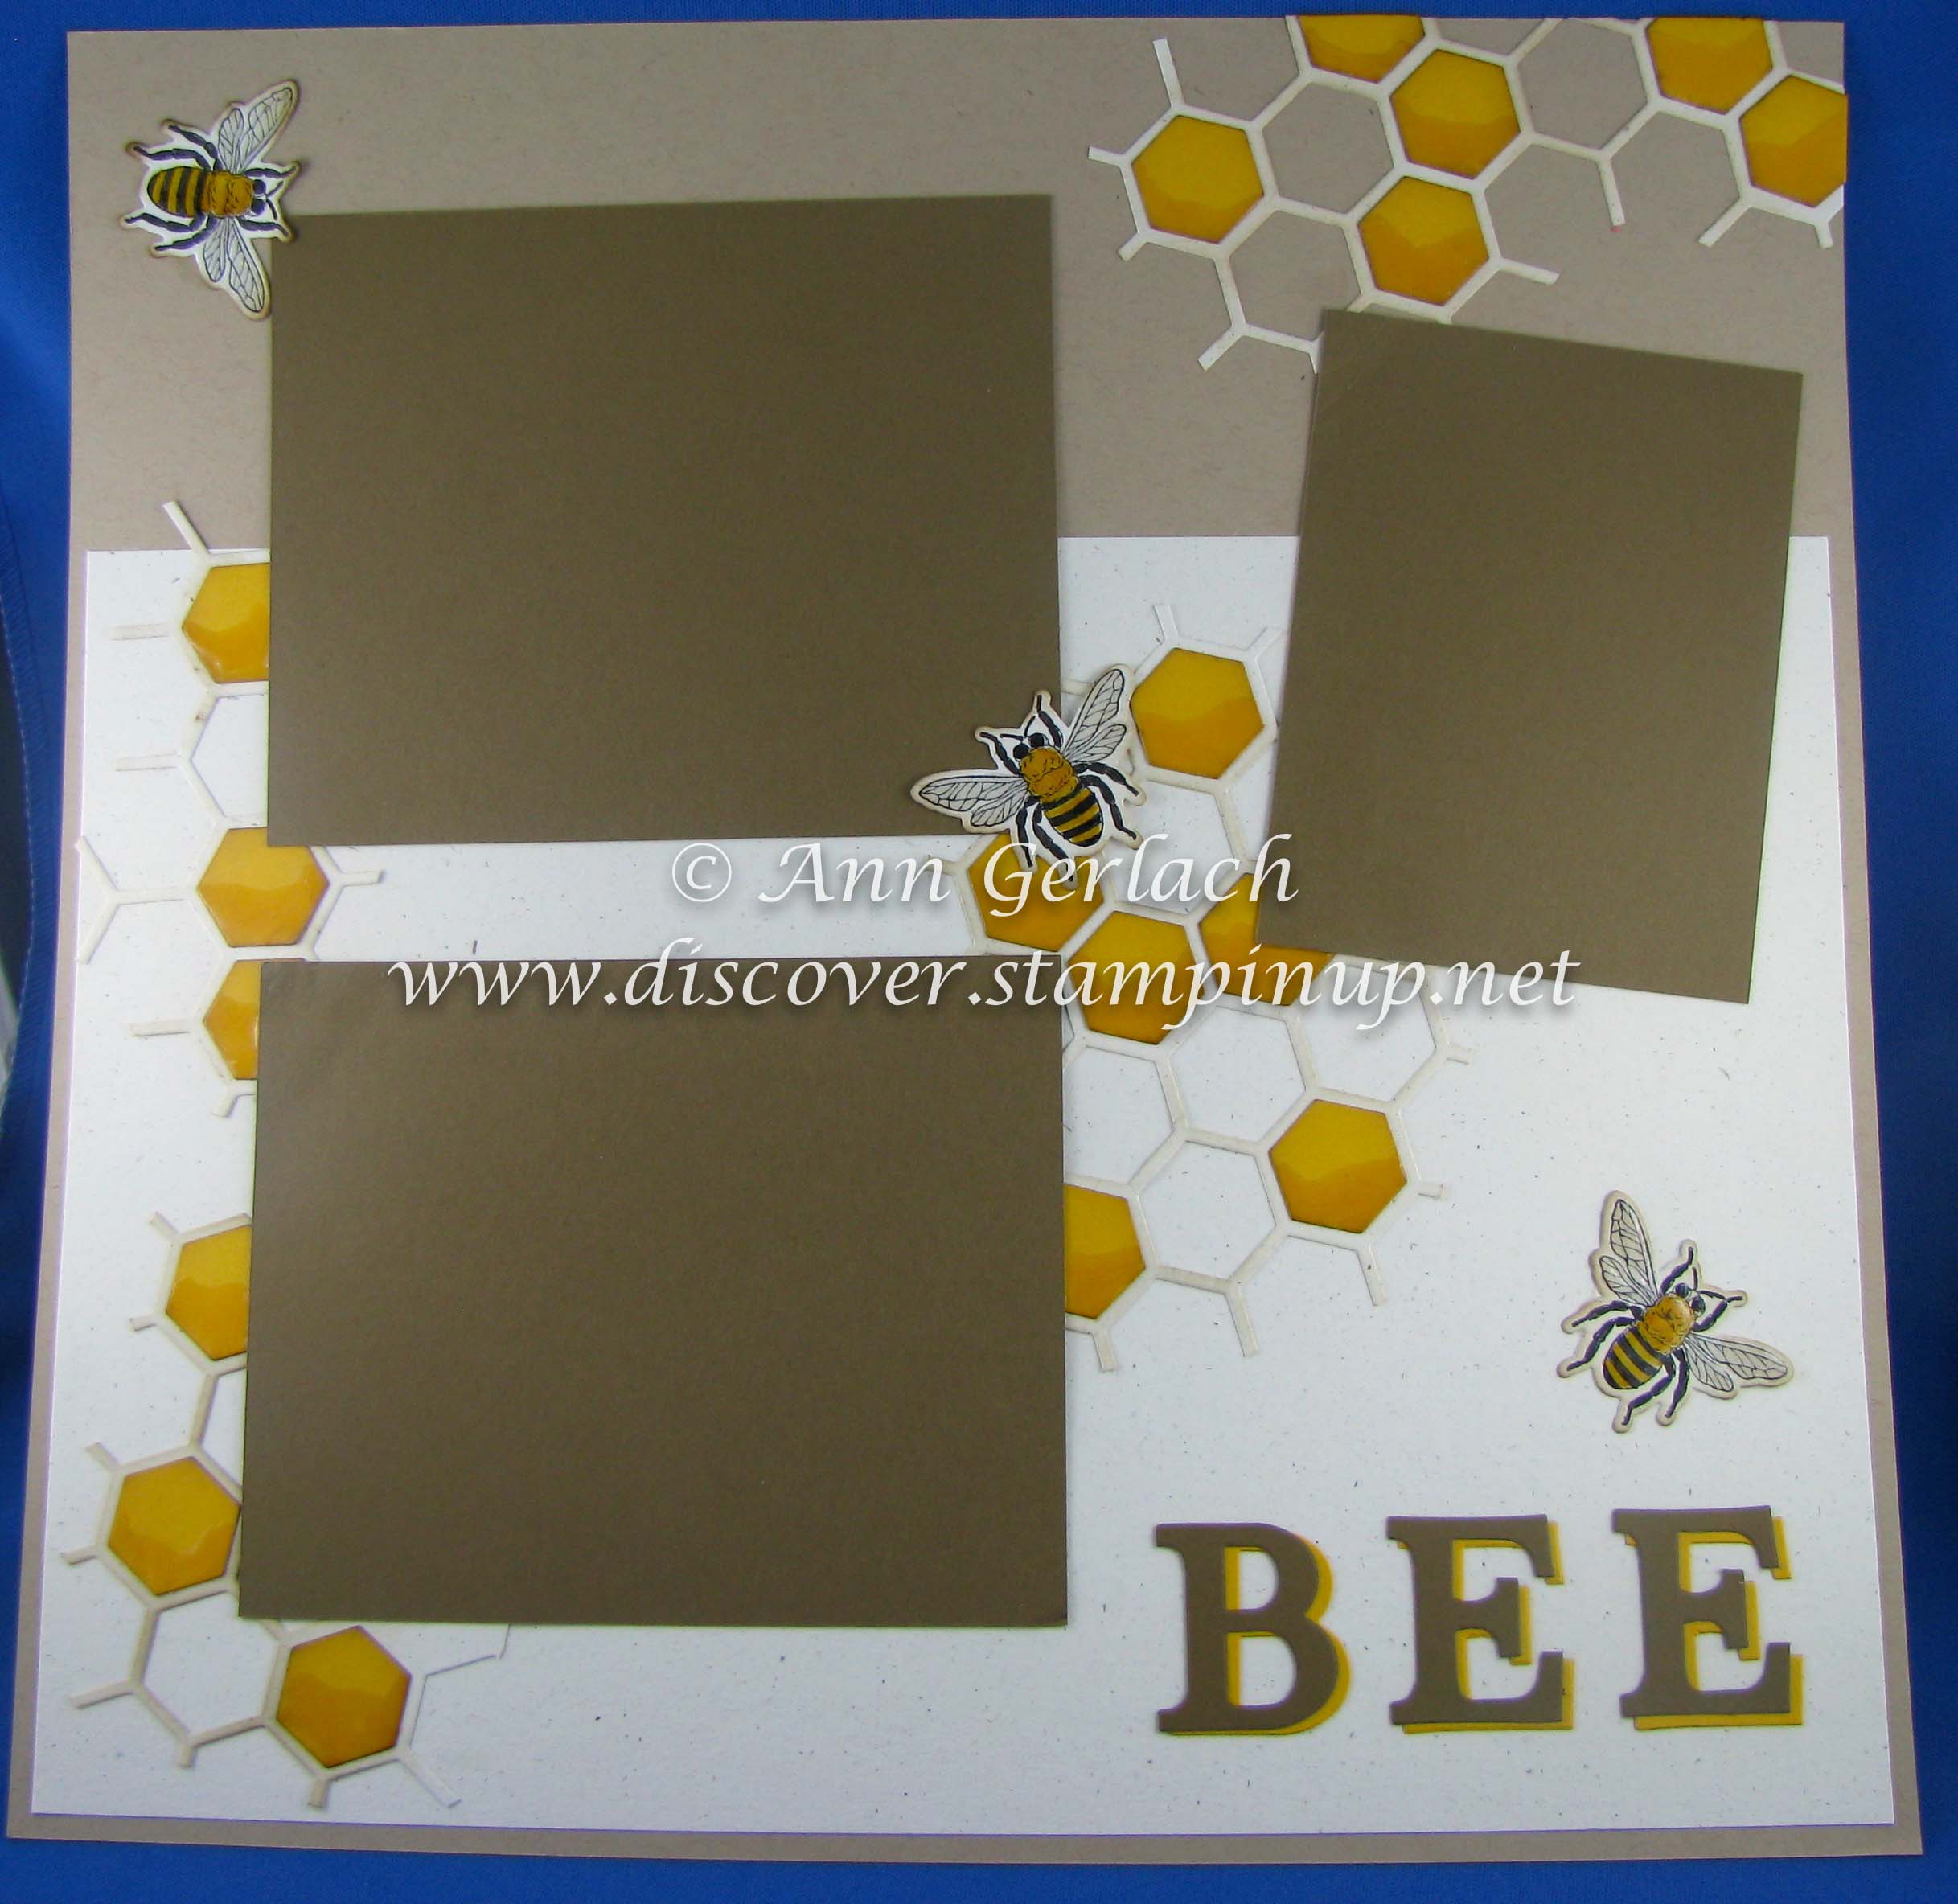
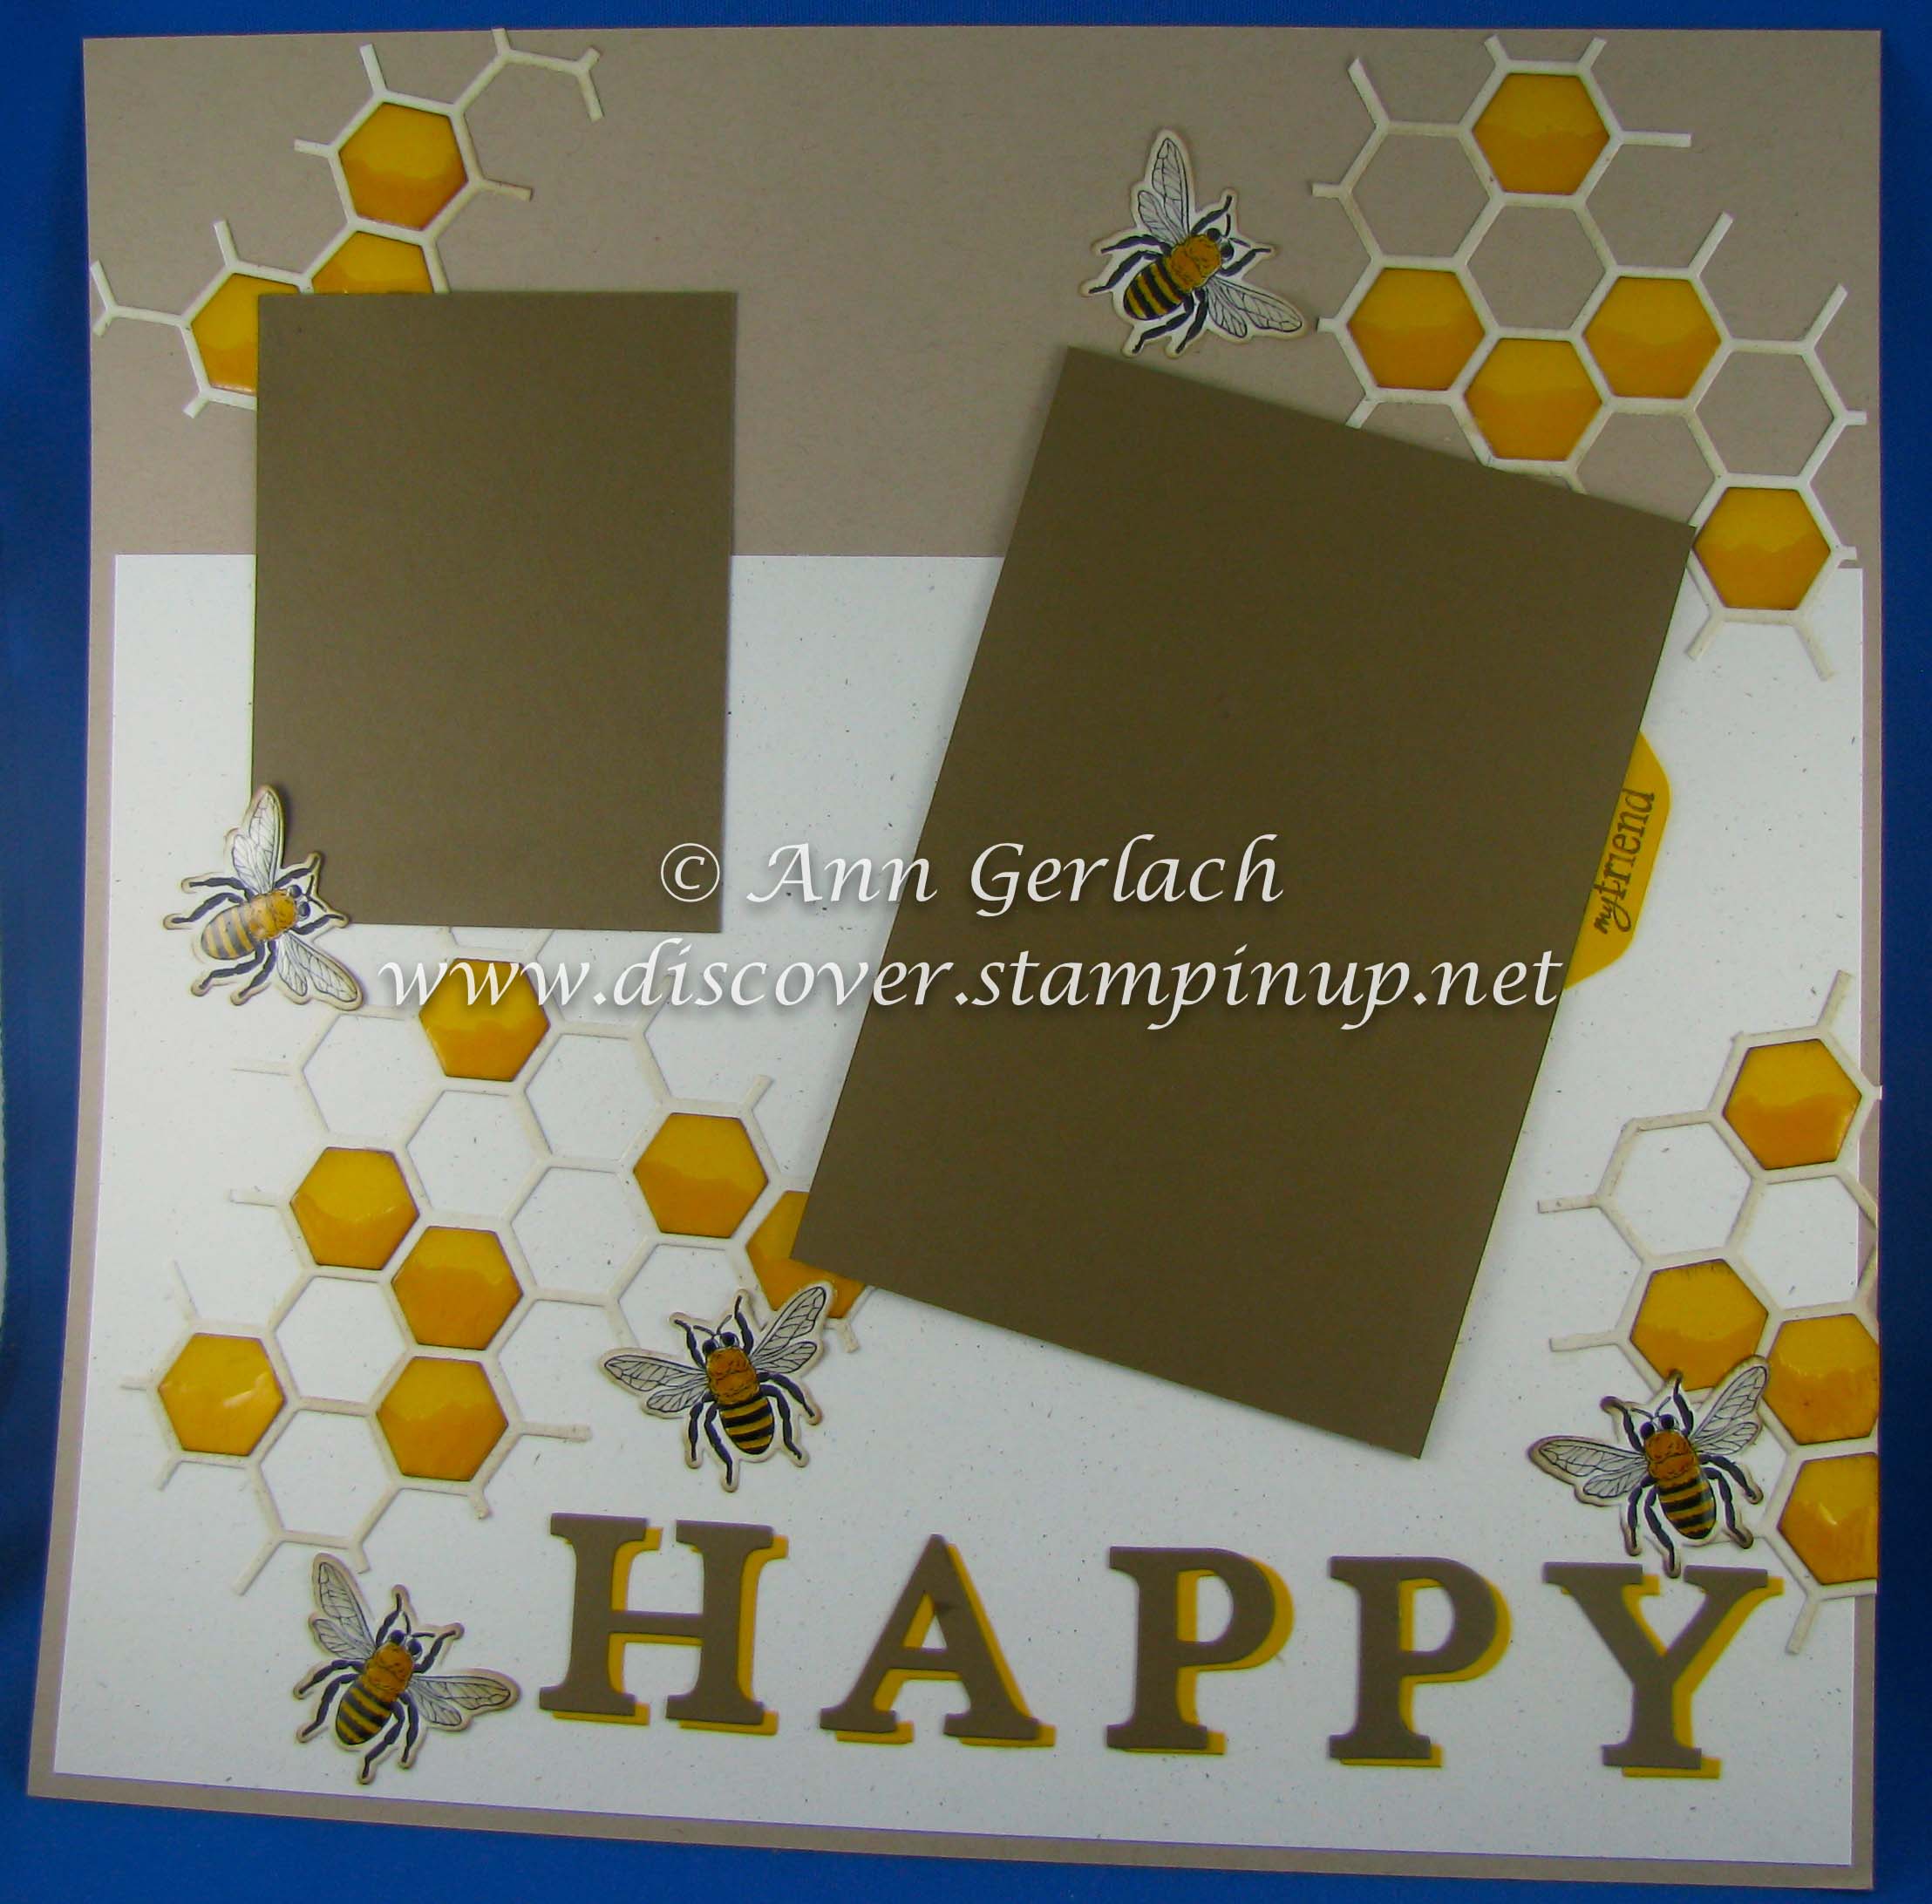
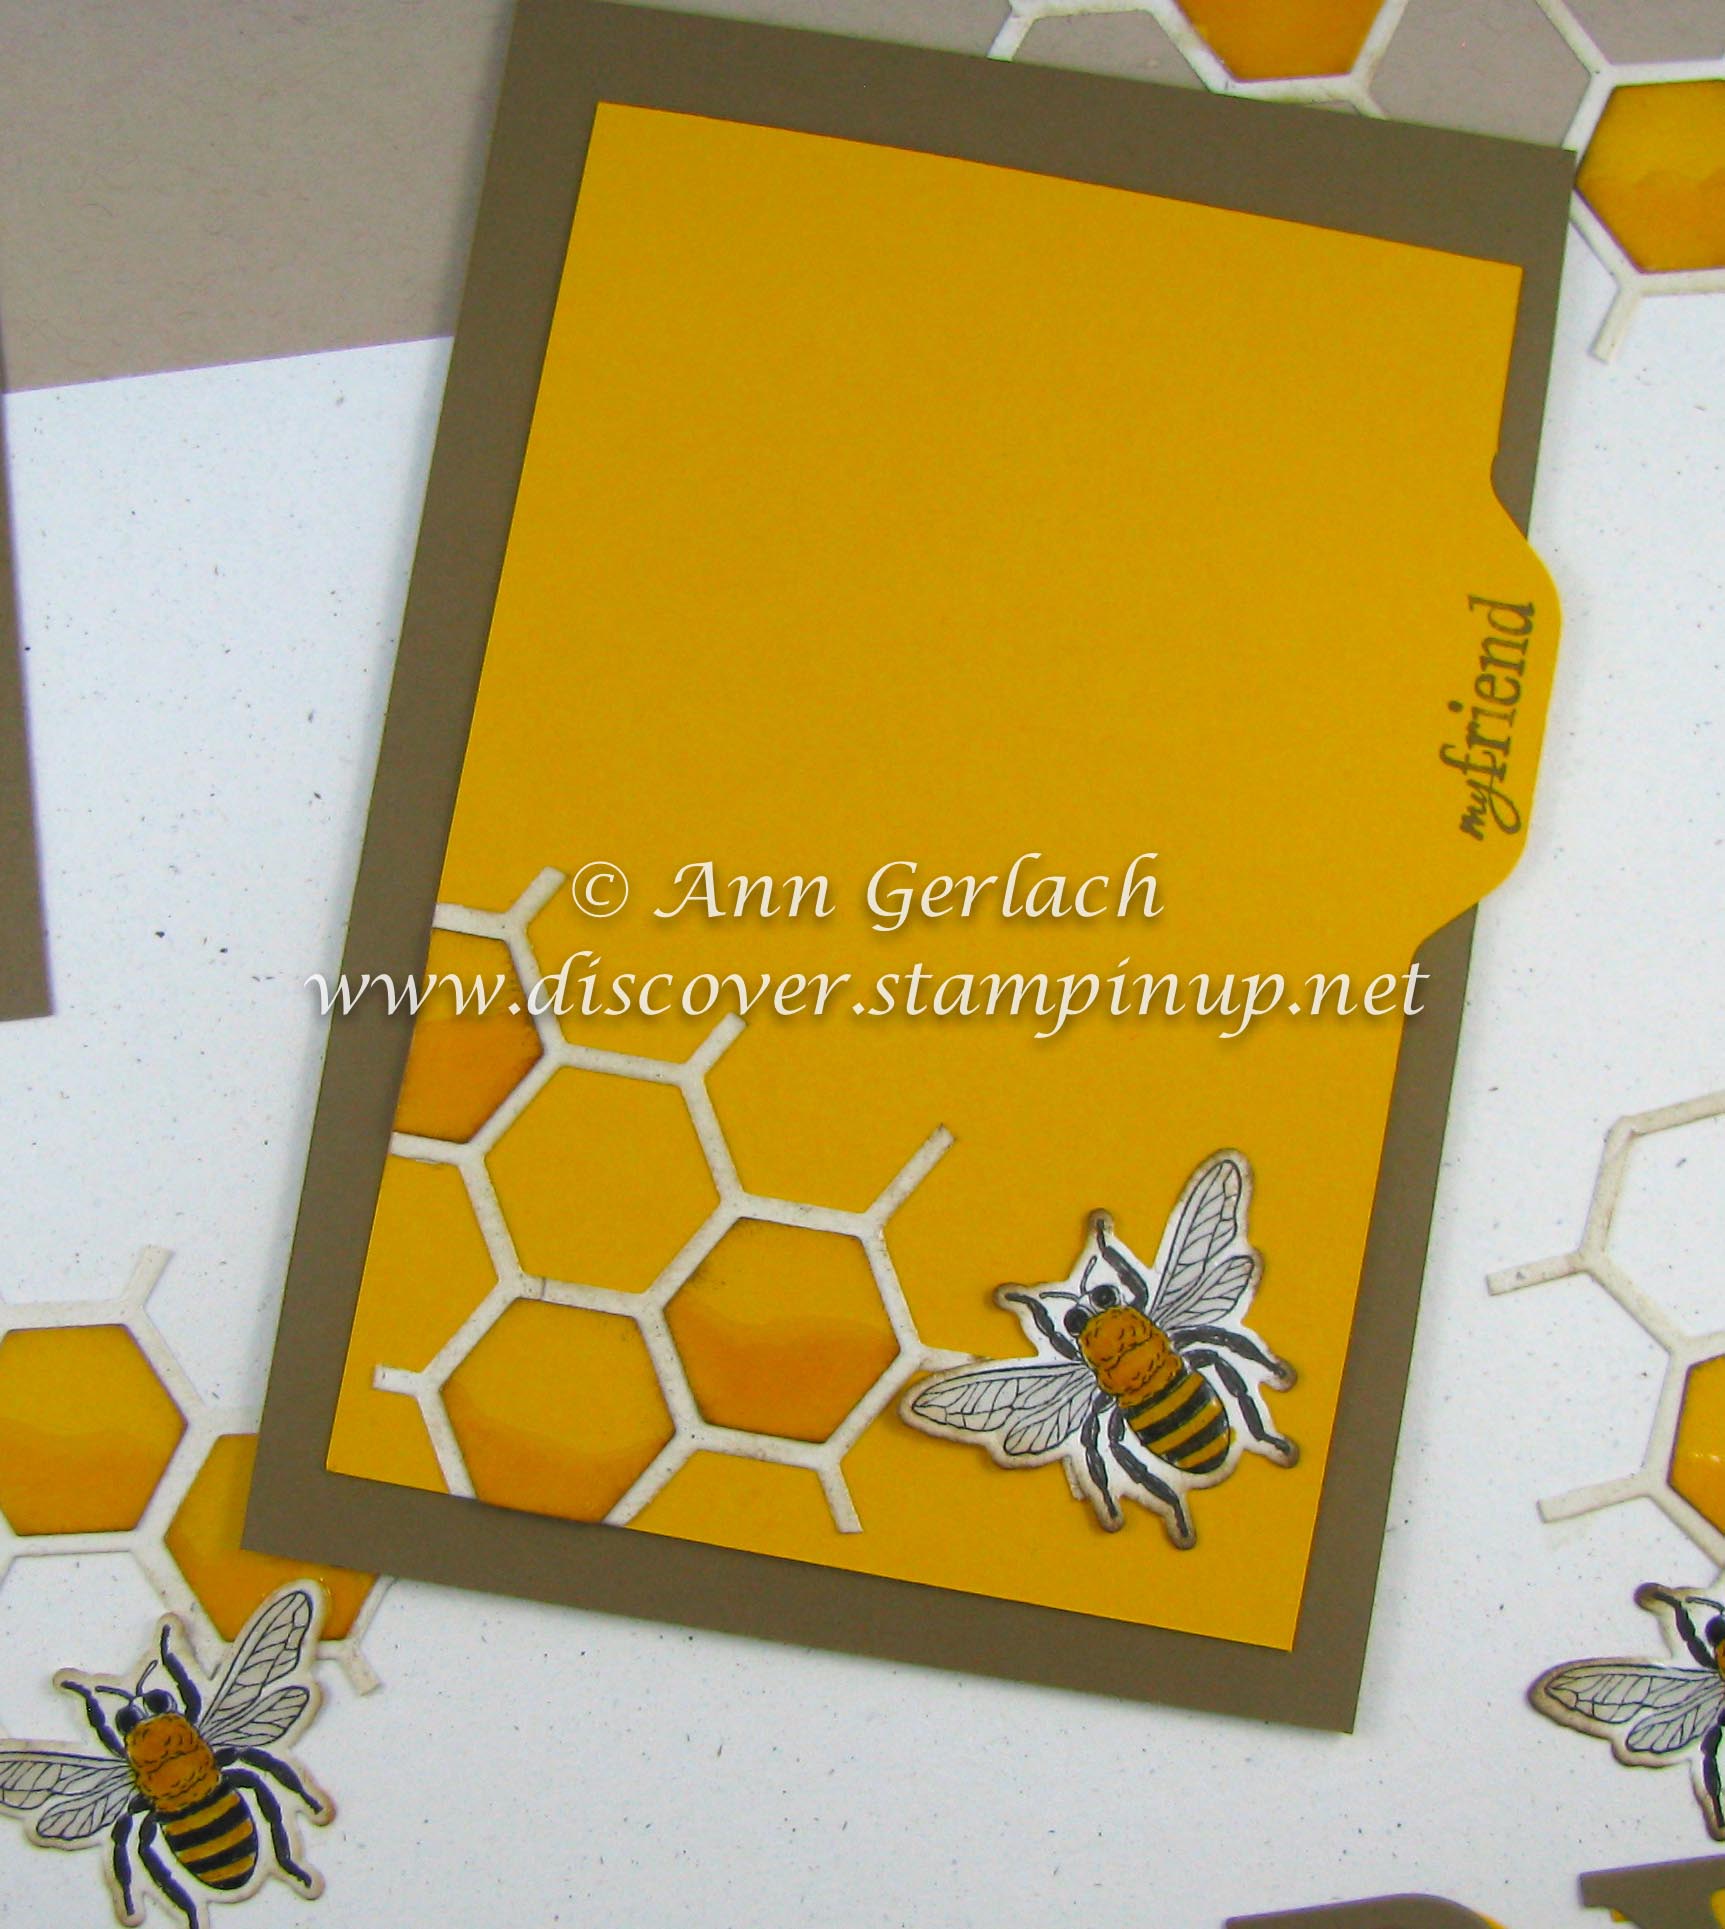
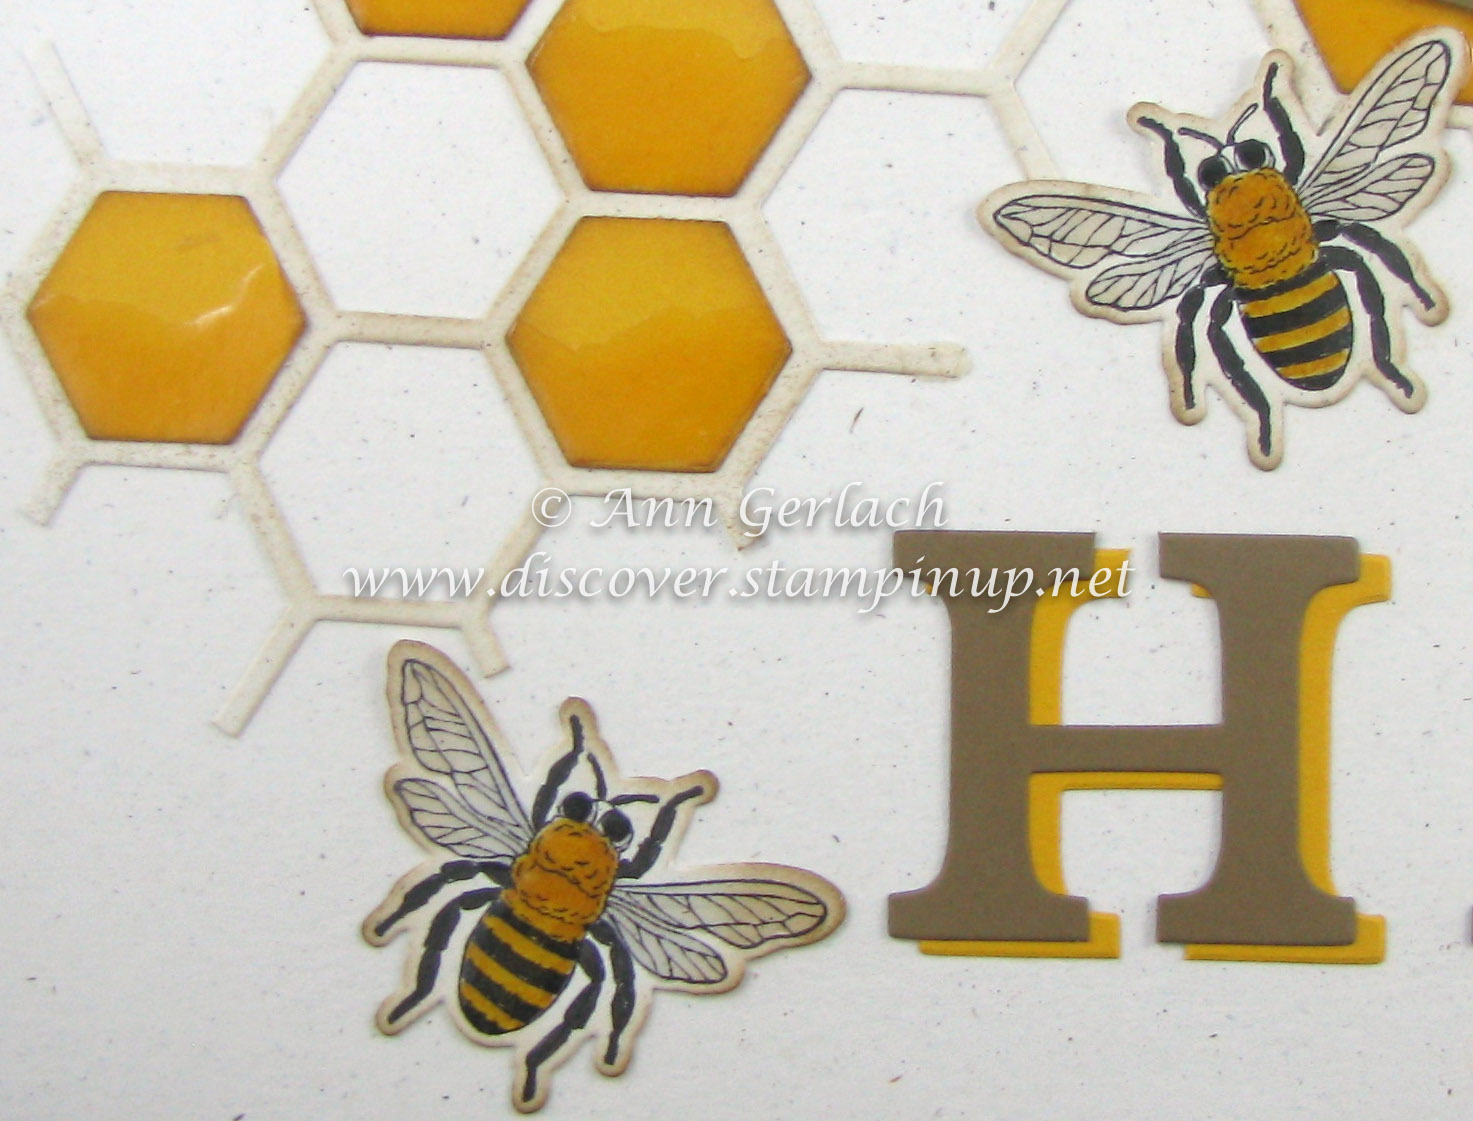
We had a lovely time at Crafternoon last week with the new hexagon hive thinlit die to make either a double scrapbook layout or 4 cards. Here is the double layout that we made. I found that cutting the hexagon hive with wax paper between the die and the card stock allowed me to remove the pieces without any problem. The surround of the hexagons was snipped off to leave a more random honeycomb effect.
The lettering as made using the Typeset Alphabet dies cut in Soft Suede and Crushed Curry and glued together with Tombow.
The second page had a pull out journaling page, the tab was really easy to make using the envelope punch board.
Each of the honeycomb pieces were sponged with soft suede, the solid pieces were overlaid with crushed curry hexagons that had also been sponged with soft suede. The Bees came from the stamp set Backyard Basics that had been stamped in Black Stazon. Each of the bees wings, body and the honeycomb pieces were highlighted with Crystal Effects.
I’ll take photos of the cards we made in the hexagon class and share them here very soon. If you want to join us for some crafty time – check out my latest list of events here I have daytime classes with cheap creche, crop nights and more, of course if you can’t make any of those time slots let me know, get 4 friends together and I’ll bring the class to you.