I first made this tea caddy/ tea bag holder in Crafternoon class a couple of years ago, but we remade it this week as part of a 3D gift class and it’s always popular. The tutorial is from Splitcoaststampers and I have modified the decoration pieces (listed below) to make is simpler.
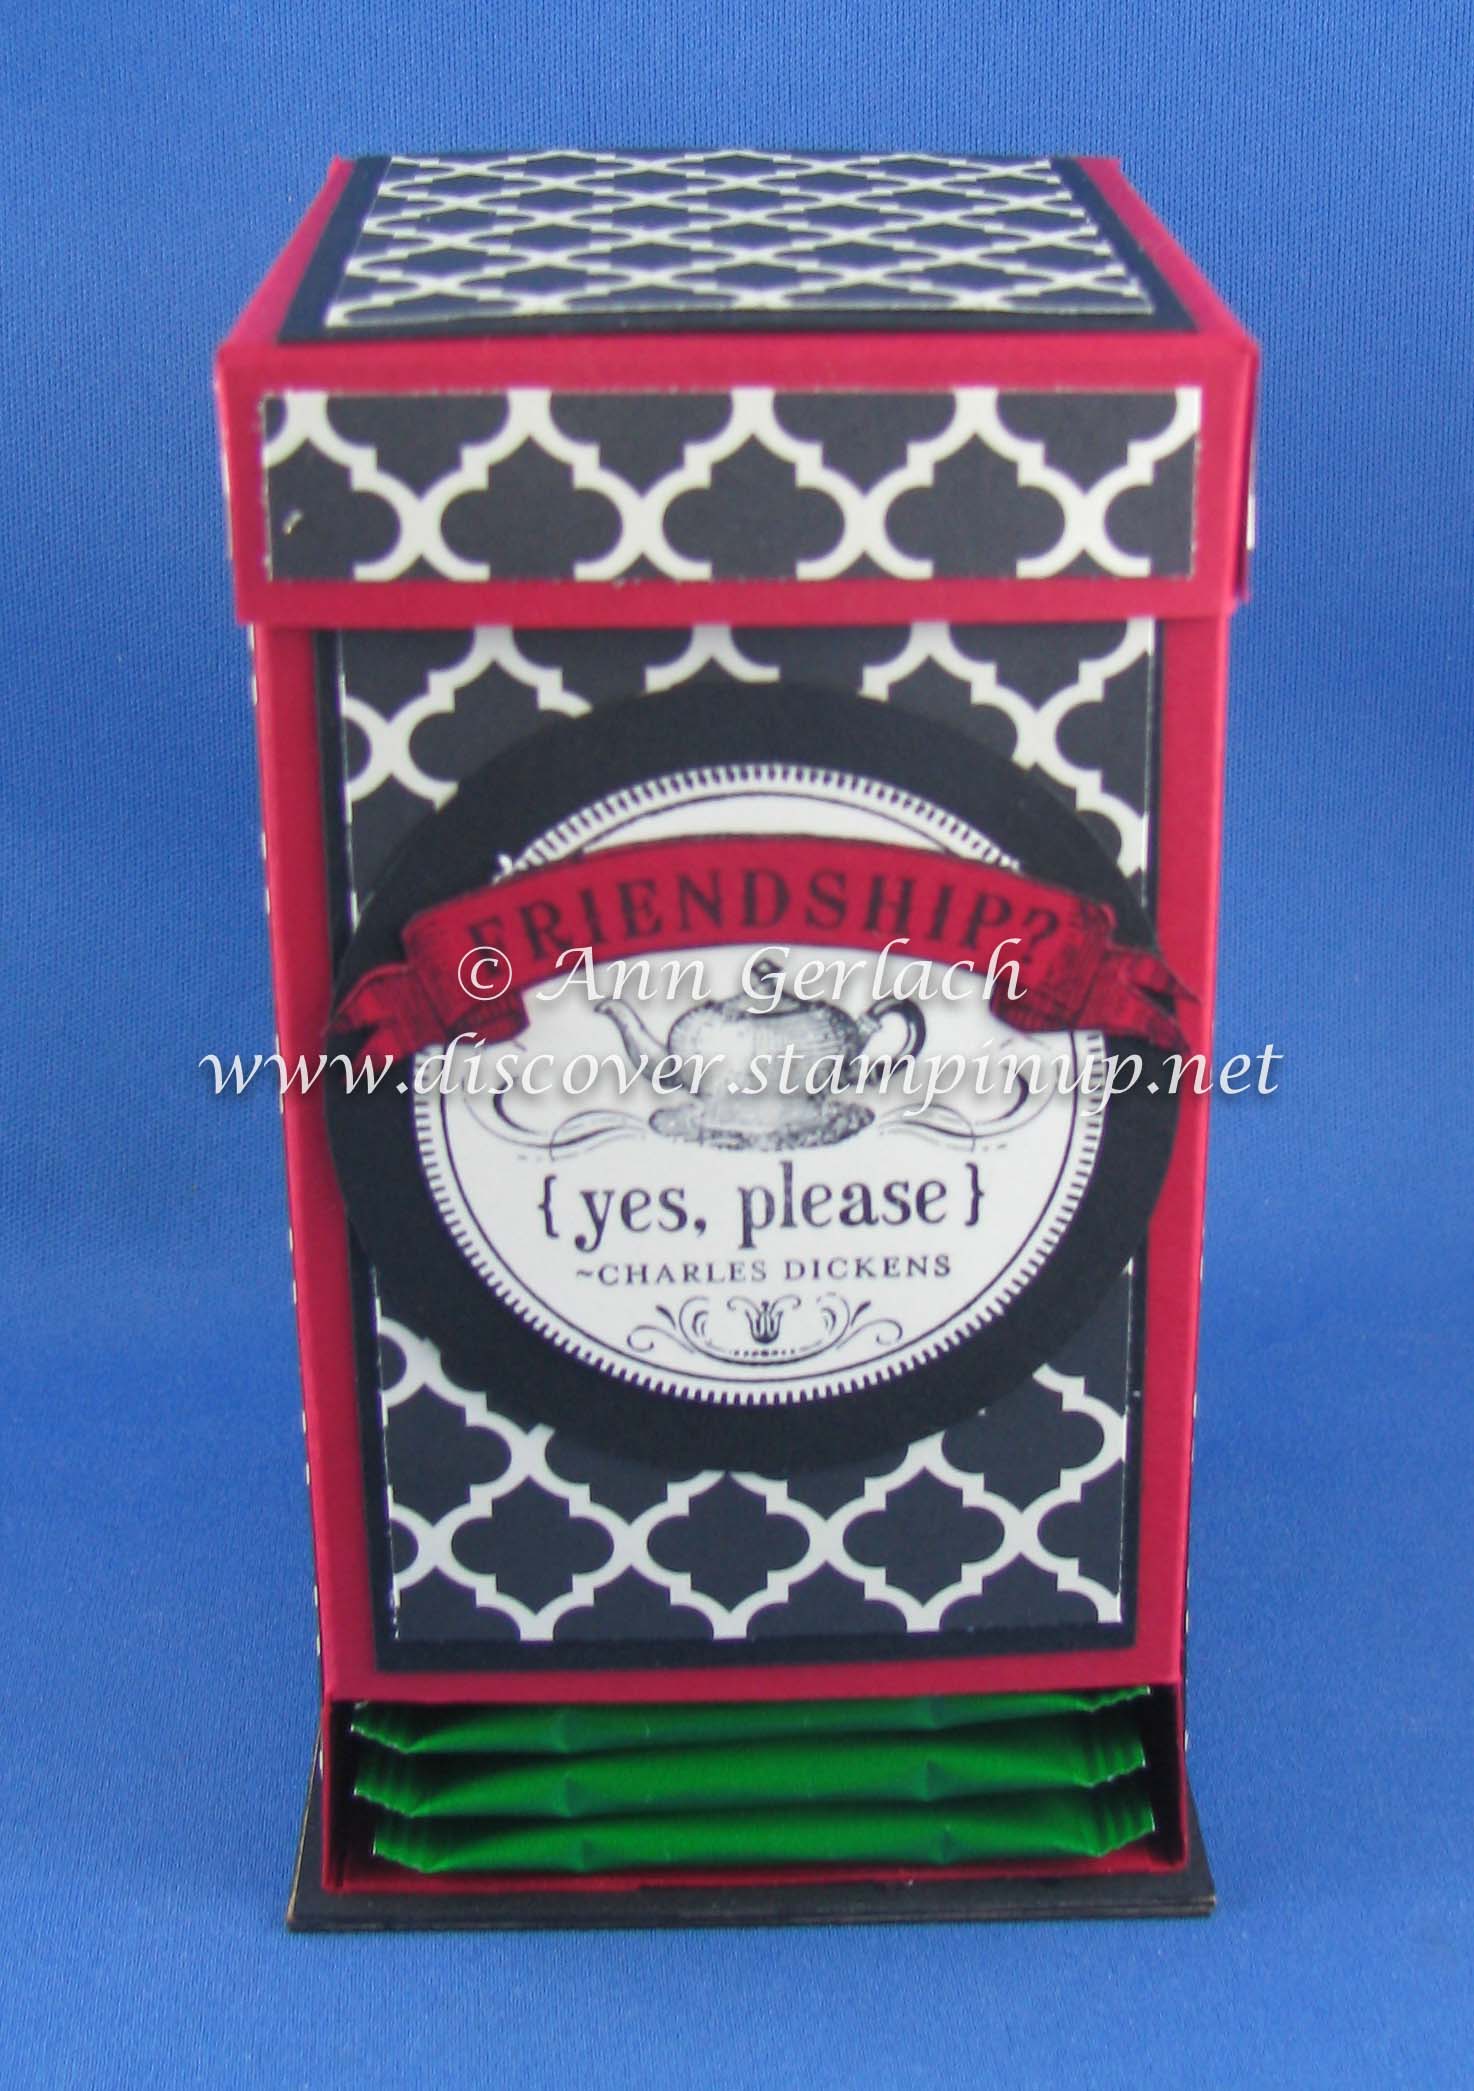 This one is made up with retired designer series paper (DSP), but class ones were made with Back to Black DSP, the stamp is From My Heart and is also retiring (it has sold out in clear mount version, but is still available in wood mount at 25% off), you can see all the retiring items here.
Base card stock (e.g. red)
- 6” x 12” piece for central part of the tea caddy
- 4 ¼” x 4 5/8” piece for the lid, scored at ¾” all around
- 2 ¼” x 2 5/8” piece for the insert at the base to cover the folded tabs (gets added last)
Contrast card stock (e.g. black)
- two pieces 3” x 8.5cm for base & another this size in chip board
- two pieces 2 ¾” x 4 ¾”
- 4 ¾” x 2 3/8”
- 4” x 2 3/8”
- 2 7/8” x 2 ½”
Designer series paper
- 3 ¾” x 2 ¼”
- two pieces 4 ½” x 2 ½”
- 4 ½” x 2 1/8”
- 2 ¼” x 2 5/8”
- two pieces 2 7/8” x ½”
- two pieces 2 ½” x ½”
I get my chip board from the backing piece that comes with glimmer or specialty paper, got to love upcycling! I also love our paper trimmer for having the cutting and scoring blades as well as metric and imperial measurements as it makes my life SO much easier, although I confess as I was preparing multiple kits for this I did use the score board rather than the trimmer for a lot of the scoring as it is quicker!