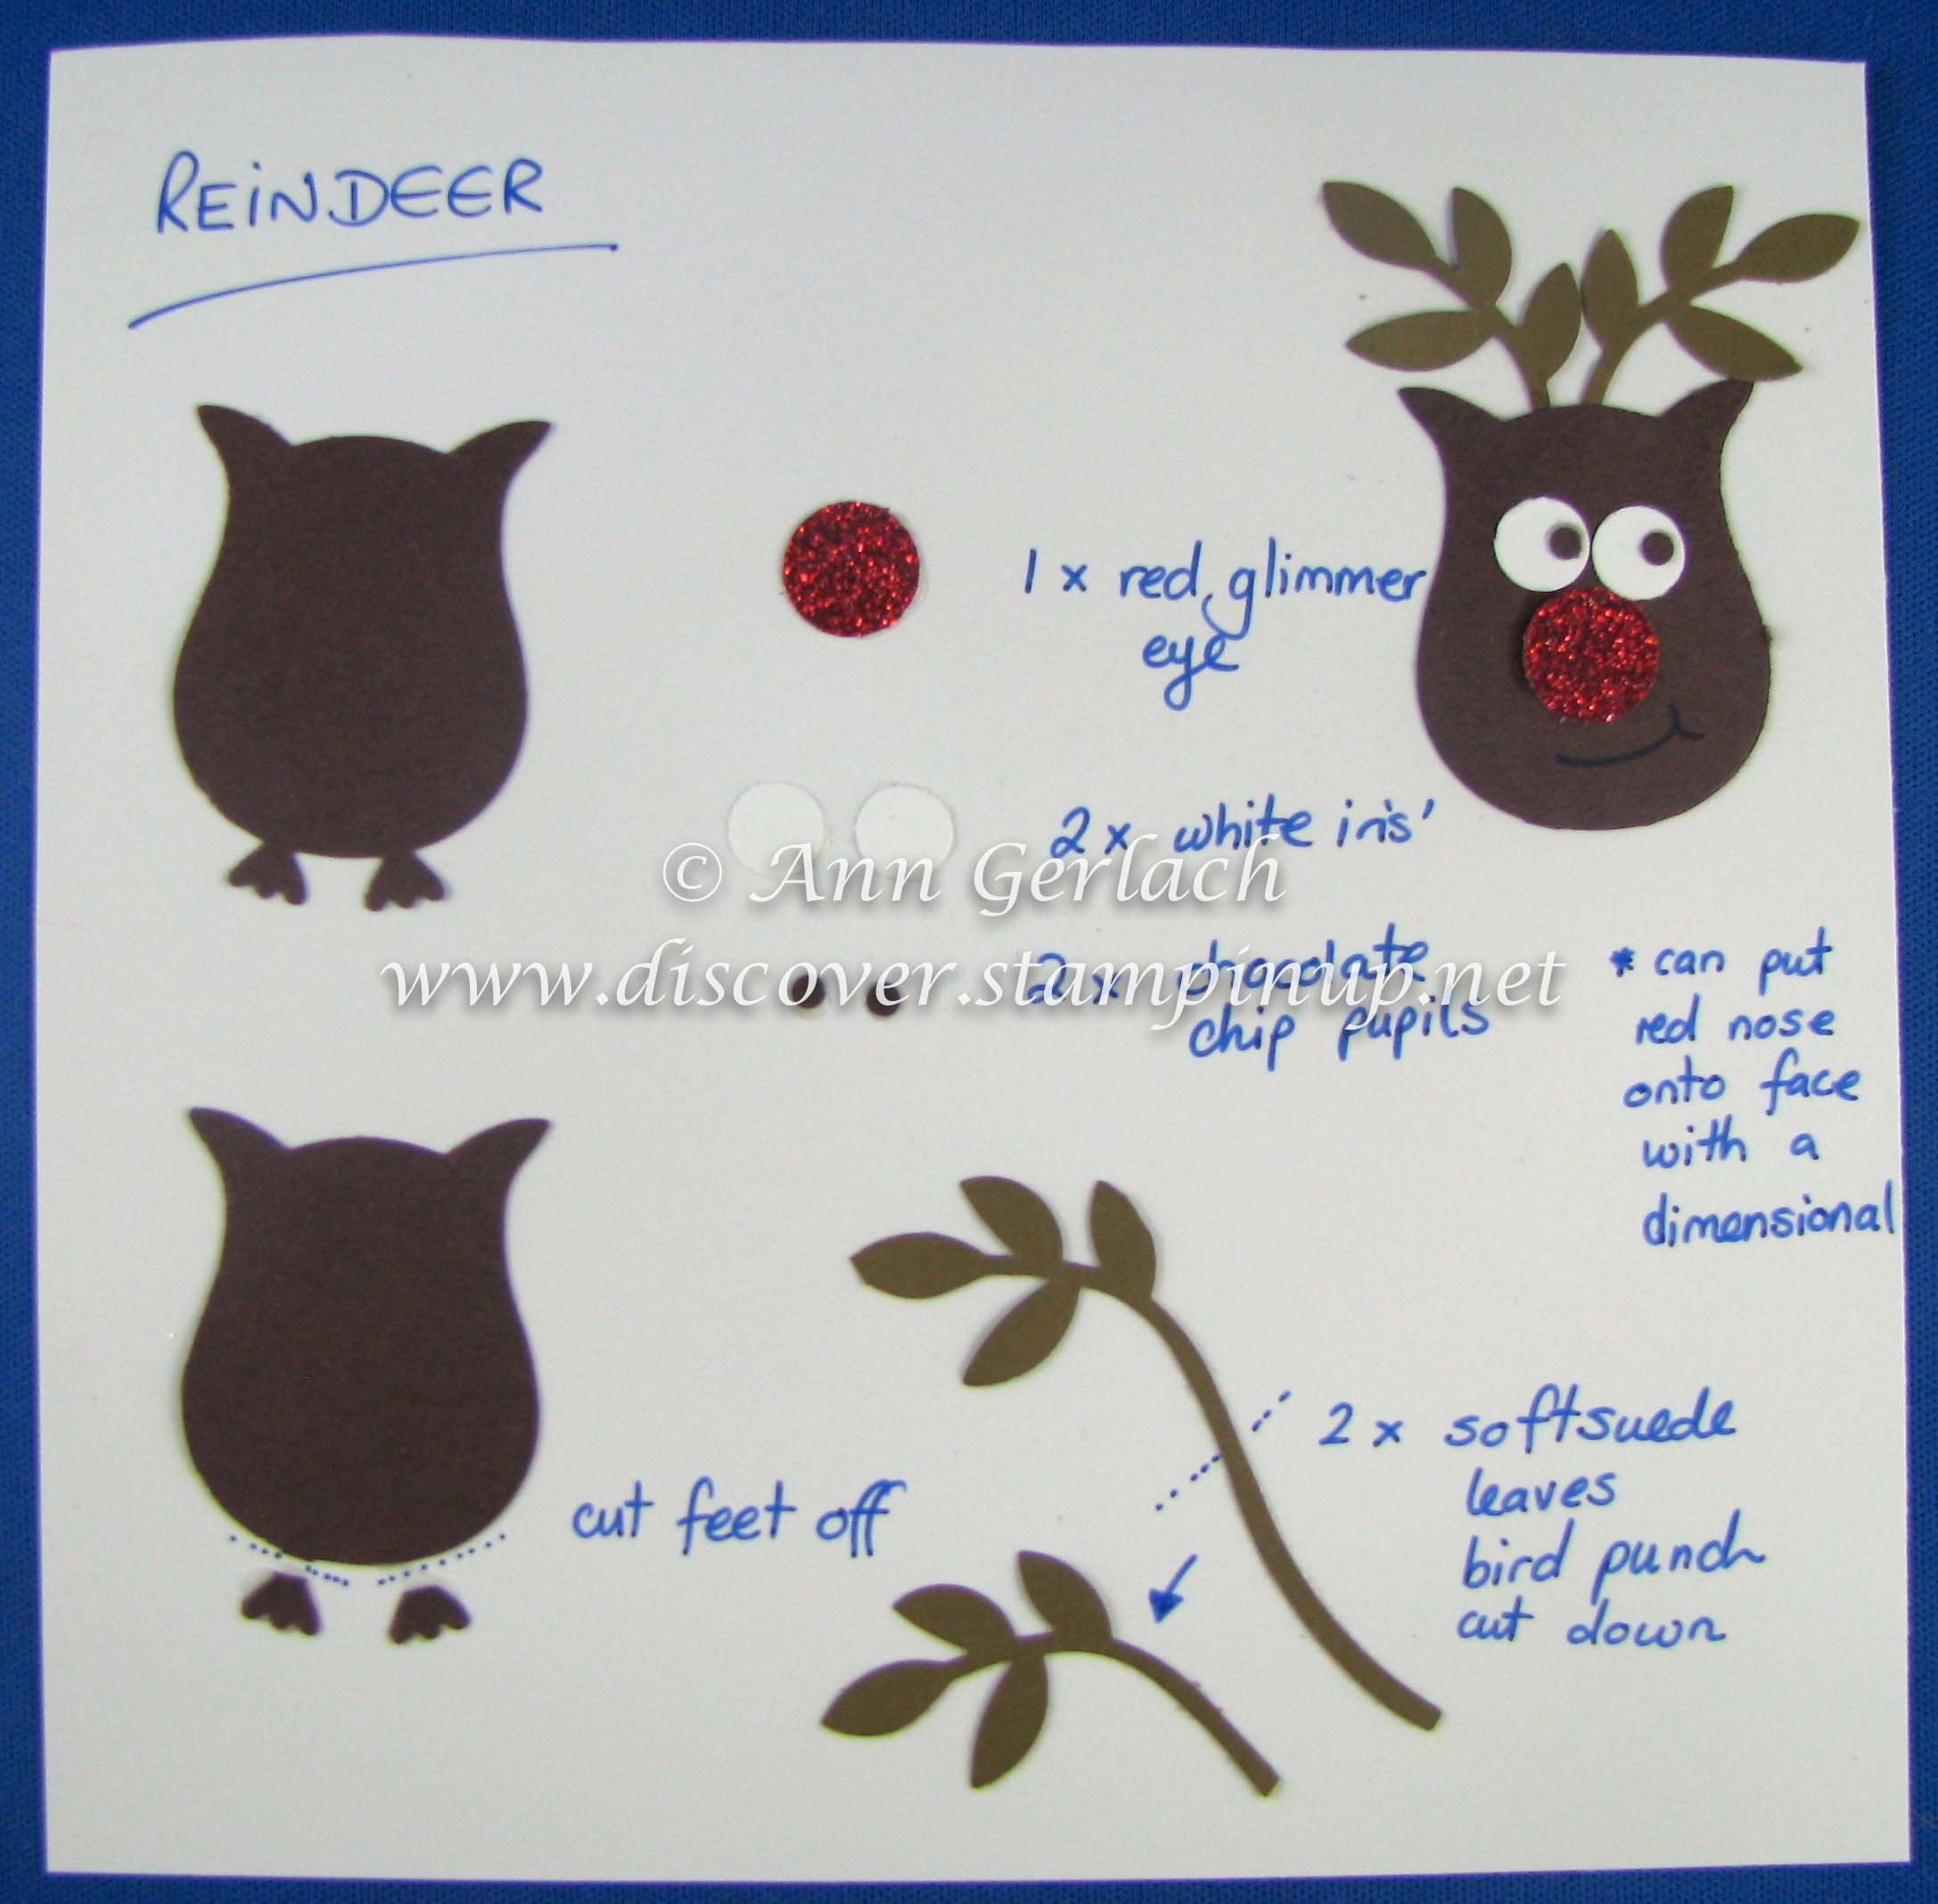
This is the fourth Owl Punch tutorial card I made for my class attendees, you can see the first here, second here and third here as I said in my other posts many ideas have been CASEd and modified from years ago and I apologise to their original creators as I have not kept track of who created what first, some I have modified and / or created myself, but my objective here is to share them for your easy reference and I have not intended to infringe any copyright by doing this.
I popped the red glimmer nose up on a Dimensional. If you don’t have the red glimmer paper, you could use Real Red card stock and cover it in Crystal Effects to give a nice shiny red nose instead. I prefer using Tombow glue for sticking all the pieces together, but please use whatever adhesive that you prefer to do this. The 01 journalling pen from the Project Life range I am finding excellent for adding fine detail onto the punch art characters.
These look adorable on cards, gift tags and on the top of cello treats as you can see here I’ve been using them for years. I hope these directions help someone – if you have questions please as me and I will endeavour to assist or if I have time make a video for you to follow.

