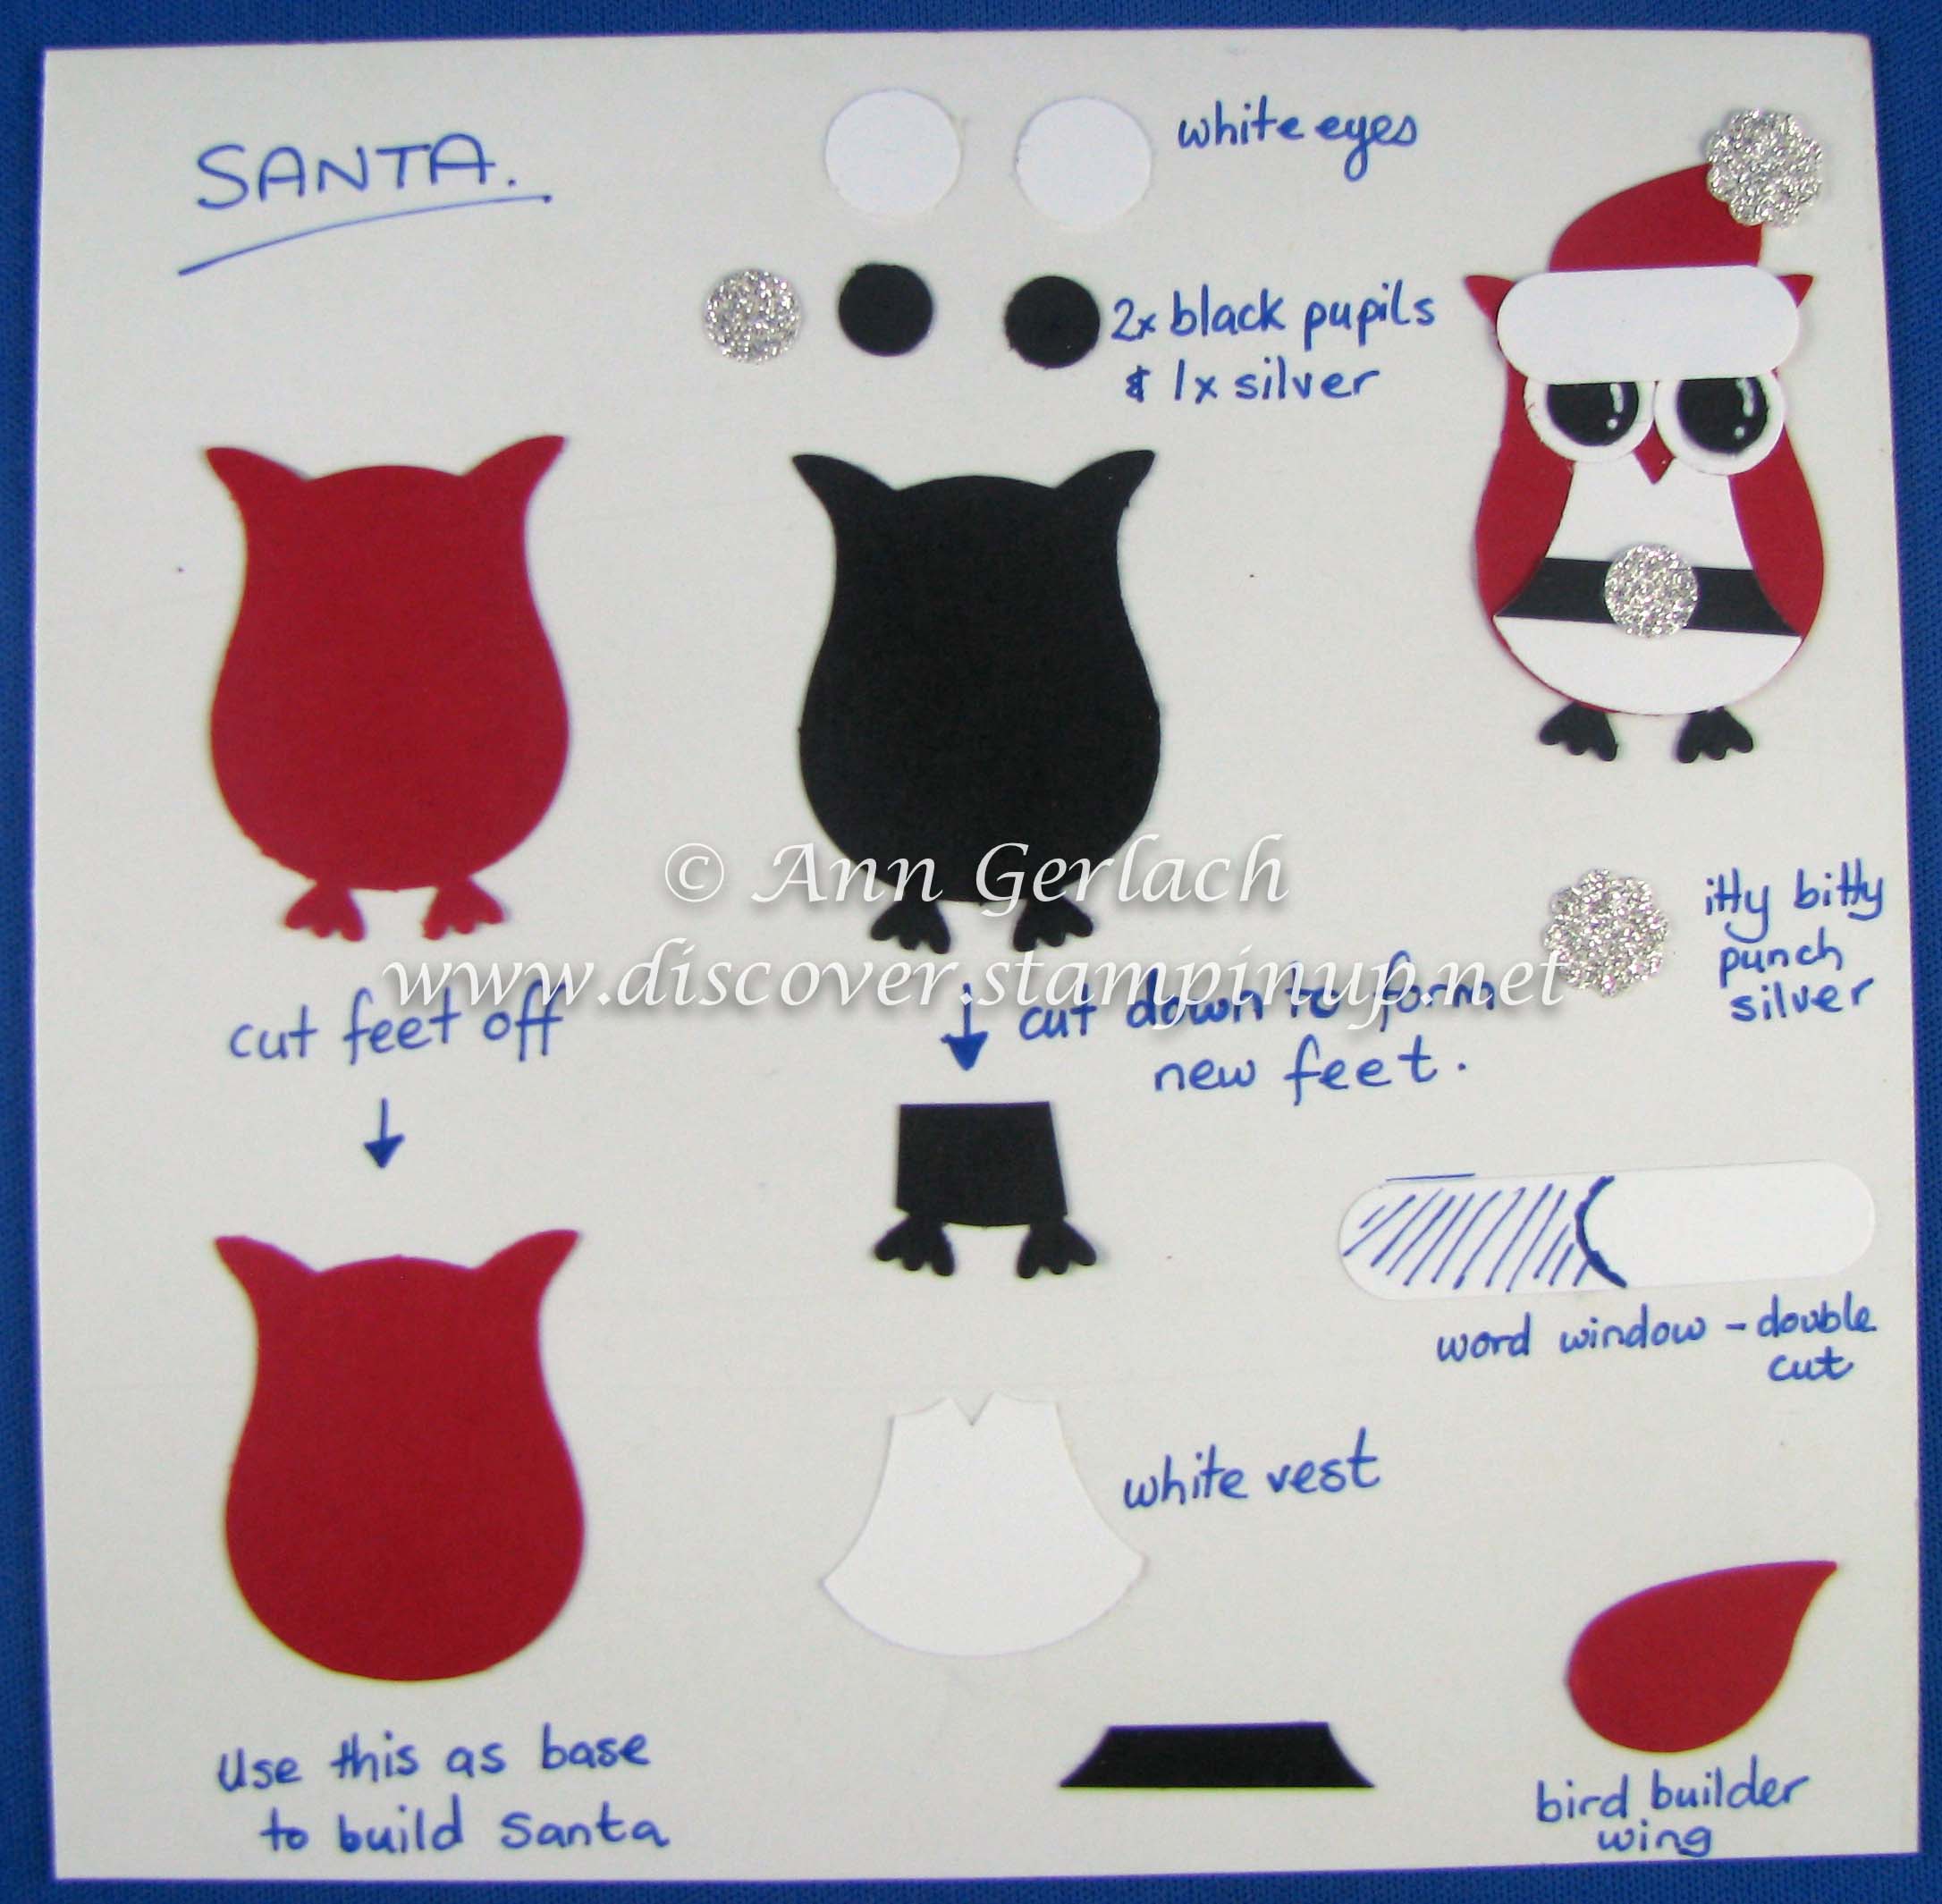
I was asked by my regular Crafternoon class attendees to do an Owl Builder Punch class recently, it was so popular I had another 5 people do it at the last Pizza & Papercraft night! When Stampin’ Up! first released this punch I did several classes and workshops on it to give people ideas, but with the advent of Pintrest, Google etc. I haven’t focused on it of late. I thought I would share the templates I made up for the class – I did the directions for each creation and there were several on a 6″x6″ piece of cardboard cut from the backing pieces of designer series paper, eventually when my craft room renovations are complete (read wall is rebuilt and rendered, but it is awaiting plaster and sanding before I can paint it) I will find my empty 6″ x 6″ album and store them all in there! Although for now I will share them semi regularly here on my blog. Many have been CASEd and modified from years ago and I apologise to their original creators as I have not kept track of who created what first, some I have modified and / or created myself, but my objective here is to share them for your easy reference and I have not intended to infringe any copyright by doing this.
I prefer using Tombow glue for sticking all the pieces together, but please use whatever adhesive that you prefer to do this. I also did this last month and the Itty Bitty Punch was still current – as this item is no longer available I would now use another owl eye punched from the silver glimmer paper (the larger of the two eye circles). The belt is cut from a strip of long thin black card stock and just put into the punch across the vest part to get the exact curve of the vest edges.
You can see an example of how I used it here. I hope these directions help someone – if you have questions please as me and I will endeavour to assist or if I have time make a video for you to follow.


