For inspiration, ideas, tutorials, techniques and classes on paper crafting, card making, scrapbooking and more using quality Stampin' Up!® products. gerlach@iinet.net.au 0421 482 578
Yes the most awaited time of the year is here – there is no better time than now to order, host a party or join my team!
Customers: For every $100 you spend as a customer you can chose one of 19 products for FREE, including 6 from the current main catalogue, see here for details. Everyone who places a $100 order with me (or more) during Sale-a-bration will go into the draw to win a beautiful Spice Cake fabric bag (order $200 and get 2 entries etc.)
Hostesses: In addition to your normal hostess rewards for a $300 party you get a pack of 12″x12″ silver glimmer paper for FREE & for a $600 party you get the silver glimmer paper and 3 of the Sale-a-bration items for FREE (Sycmore Street designer series paper, Sycamore Street ribbon and button pack and the Madison Avenue stamp set). Plus as a special thank you from me you will get an exclusive Stampin’ Up! collapsible bin. So get your diaries out and contact me now to book in a party with friends!
Joining: If you join my team during Sale-a-bration you get an extra 25% in your starter kit- that’s right for just $169 you get to chose $294 of products from the current catalogue!
Plus on February 2nd I have a FREE launch party to help celebrate the start of Sale-a-bration and the new mini catalogue.
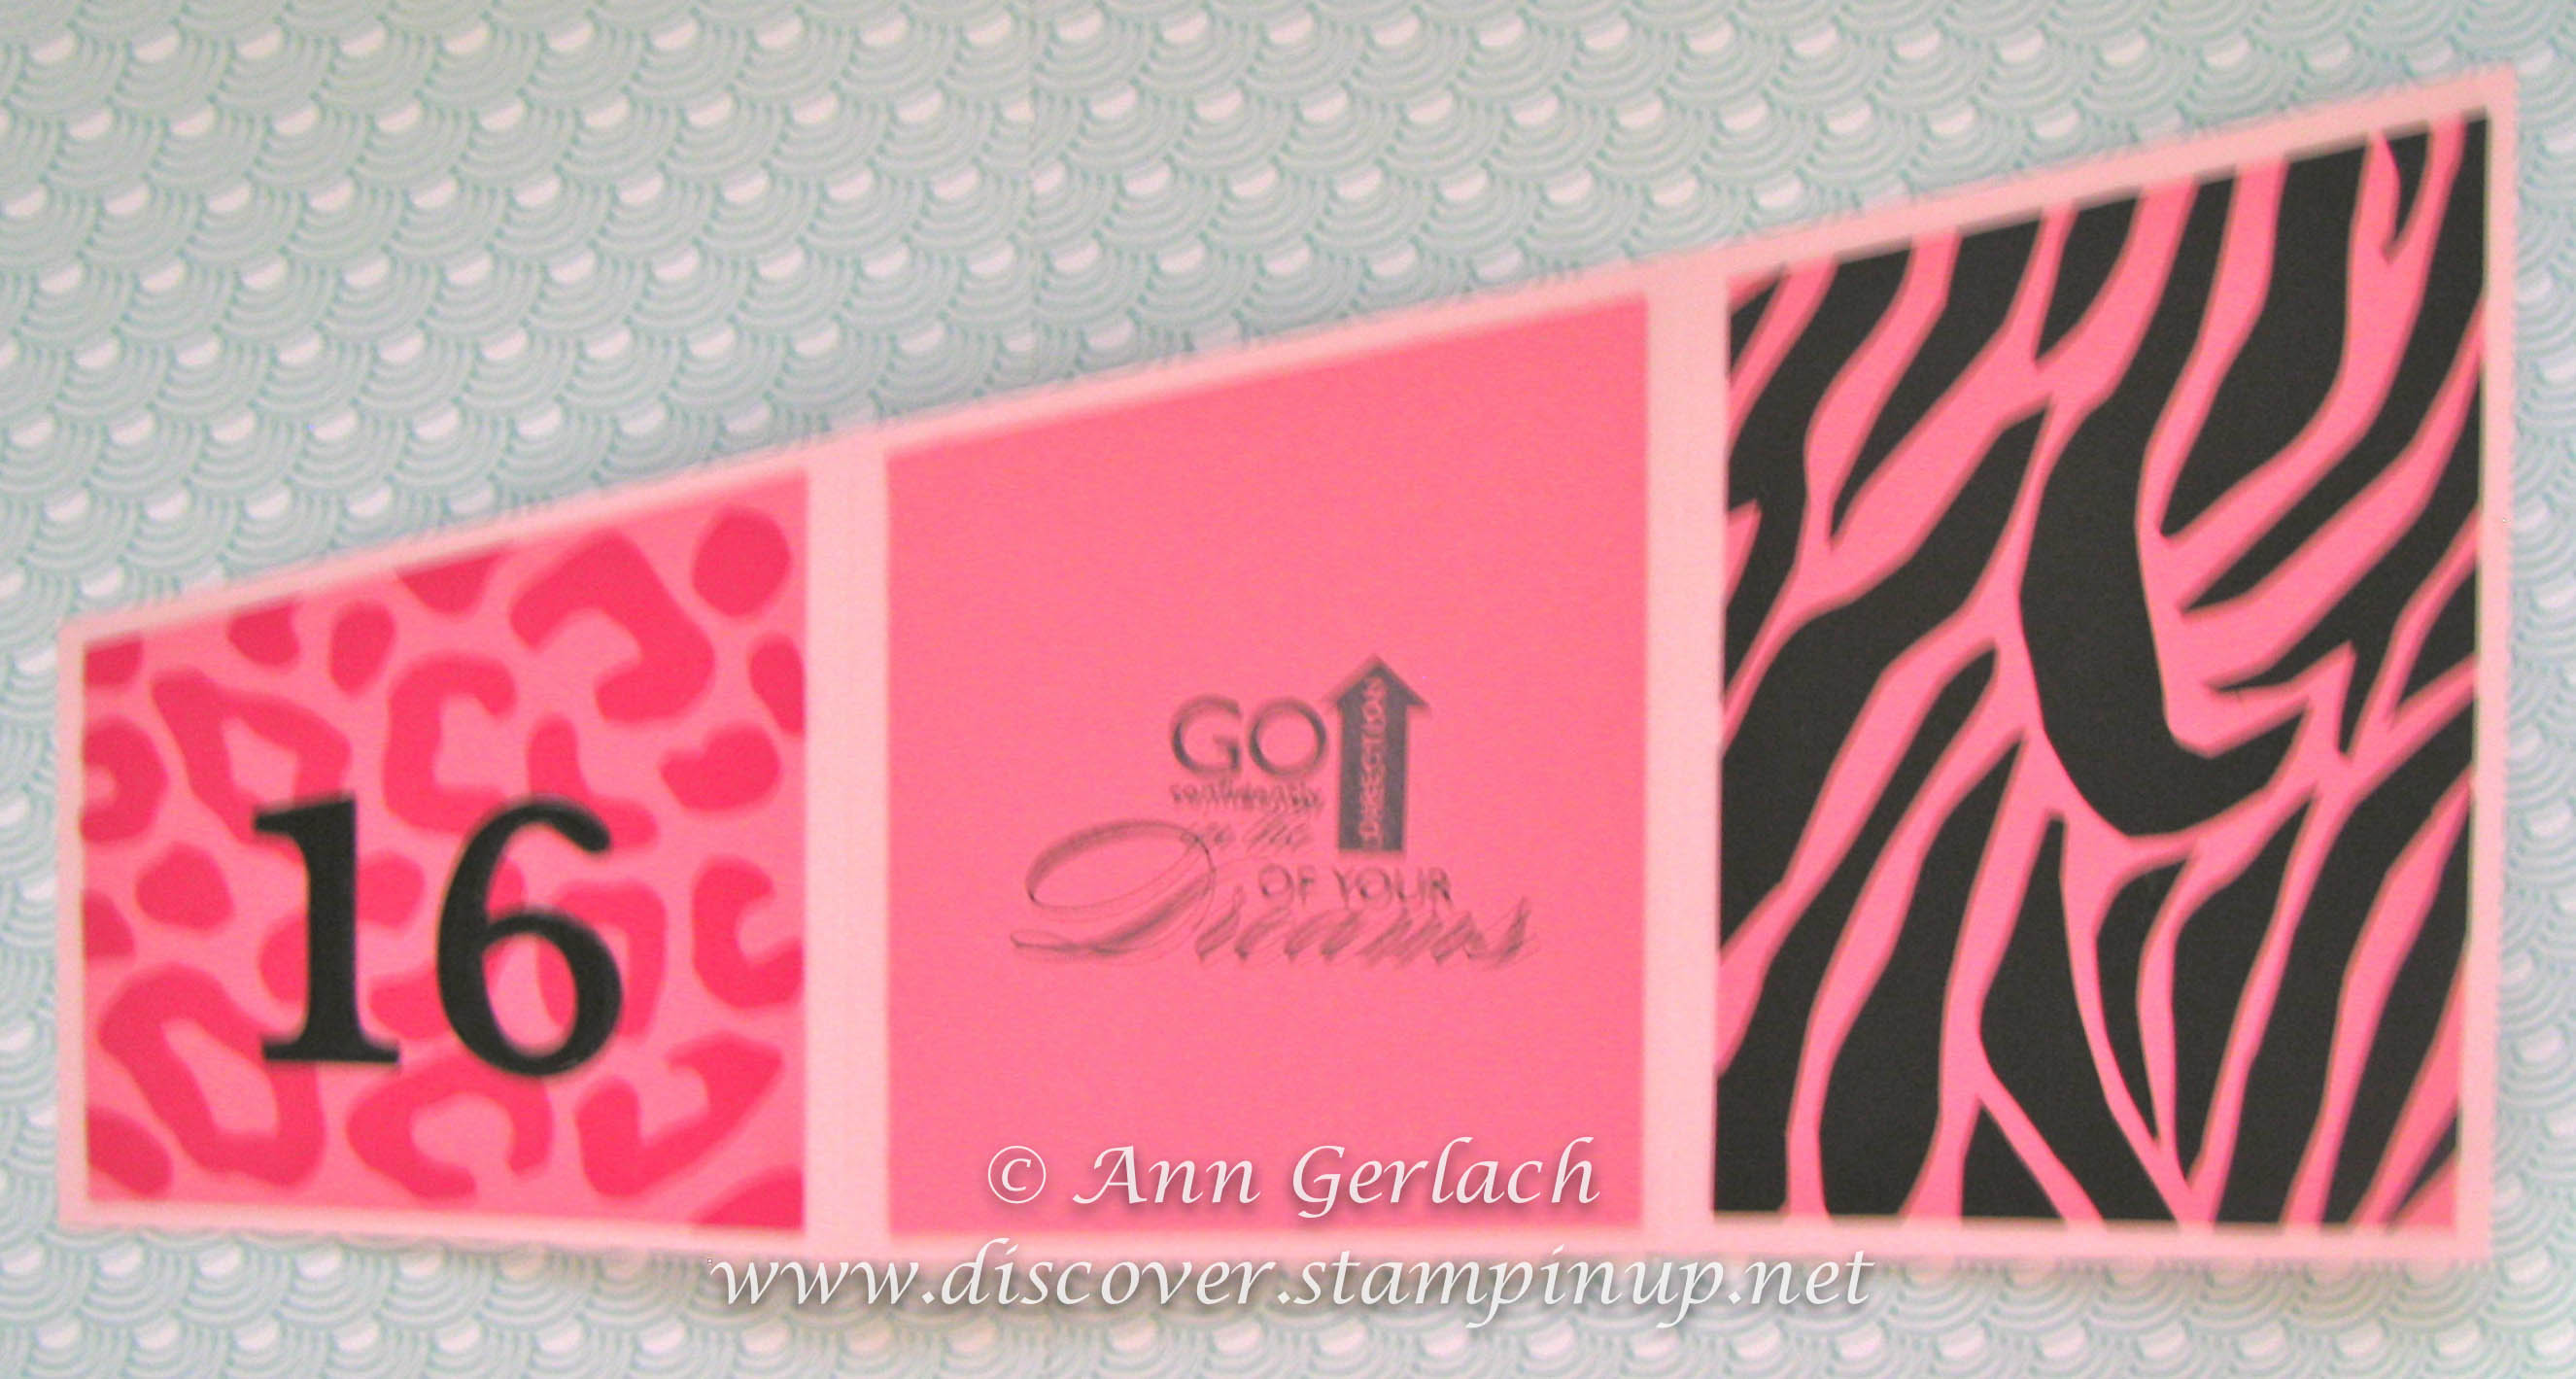
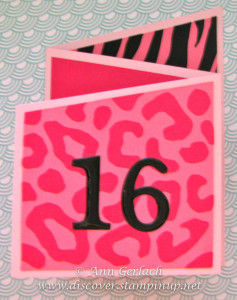
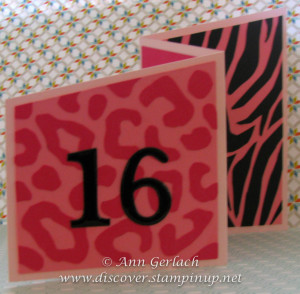
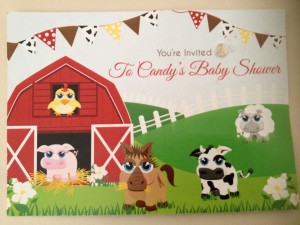
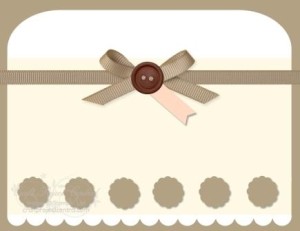
I got asked to make a sweet 16 card themed to this invitation:
So the criteria was pink and animal print………definitely not my colour theme of choice, but hey I’m also not 16yo so I’ll go with it. I decided to do a folded card and modified a Z fold, I cut it 12″ x 14.8cm (yes I do both imperial and metric measurements in one card just like the new SU! trimmer *grin*), then I cut it on the long diagonal from full height one side to 3″ on the other side. I scored it at 4″ across to end up with a flat card base that looked like this:
If the cutting directions made no sense let me know and I’ll draw out a sketch for you. The sentiment isn’t actually blurry – that’s my photography! It then folds up to look like this, the colours and layers of patterns I took straight form the invitation:
The 16 was die cut and I used Crystal Effects to go over it to make it shiny, the zebra stripes and leopard splodges were all hand cut and thus unique like every wild animal skin! Hope she likes it.
Stamps: Word Play
Ink: Basic Black
Card Stock: Pink Pirouette, Basic Black, Regal Rose & Melon Mambo
Stampin’ Up! has released so many exciting new products and there are more to come in the next few weeks with Sale-a-bration starting on January 22nd and the next mini catalogue starting on February 1st.
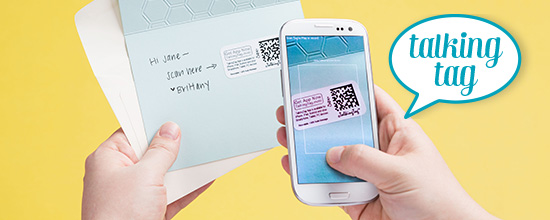
Do you have a smartphone? Then you will love todays new product, it is called Talking Tags. With a Talking Tag, you can send a gift that is uniquely you. Talking Tag is a message label you can attach to cards, invitations, gifts . . . anything! Personalize birthday cards, gifts or even record quick instructions for a project. Now your pictures really can say a thousand words!
Check out this cool video on how to use them:
How awesome is that? You can order them by the sheet from today and you get 10 tags for just $12.95 AUD (item 129723).
How to send a voice message:
Download the FREE TalkingTagT App on your smartphone from talkingtag.mobi, iTunes® or Google PlayT.
Adhere the message tag to your card or gift.
Open TalkingTagT App and scan the code.
Record your message (recording starts immediately, so make sure you’re ready!).
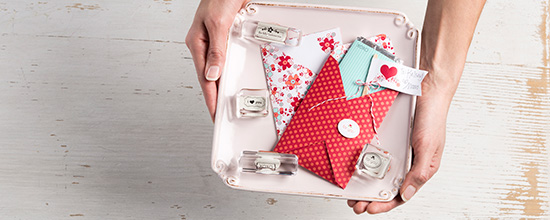
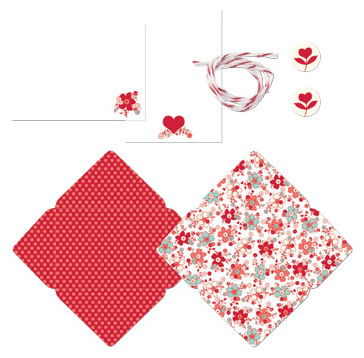
Who doesn’t LOVE freebies? Well from now until the 21st of January when you purchase the My Little Valentine stamp set (only comes in clear mount) for $17.95 #132242:
You will get a Sealed with Love Simply Sent Kit FREE RRP$15.95 from the Holiday catalogue page 35 #126923.
Here’s what is inside the kit:
• 10 notecards, 5 each of 2 designs 8.6 x 11.6 cm
• 10 double-sided envelopes 12.1 x 8.7 cm
• 20 printed paper buttons
• 10 pieces Whisper White/Real Red bakers twine each 25.4 cm. (colour exclusive to this kit)
24 Stampin Dimensionals
You can see all the details on the flier here. There are no limits on this promotion so you can order as many as you like and really share the love!
Don’t forget that week 3 of the Clearance Rack also starts today, so check out the specials and contact me today to place your order.
I was asked recently if I would make a card to match an invitation……which is below……..so as Google is my friend, as is Splitcoast Stampers I set about using my punches to create some cute little farm animals, Alana Galagher, Dani Holland, Becky Robinson and a few more for inspiration made some super cute animals that I just had to CASE.
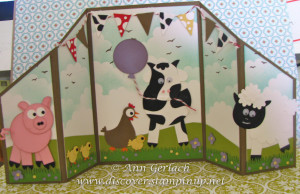
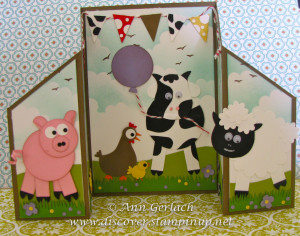
Anyway when I’d made an array of cute little critters I realised that a normal card front wouldn’t be big enough to display them without them being all squashed up or stacked on top of each other. To overcome this I used a 12″ folded card like this to give me more room.
Sorry for the wonky photography, the sides fold in for mailing, but all of the panels are decorated on the front.
Aren’t the chickens and chicks cute – that owl punch is very versatile! I didn’t get to add the red barn or a horse, but the rest pretty much matched the original invite, I think?
Of course you can’t write on the front of the card, so I decorated a back panel so the greeting can be added over the clouds! See what happens when we have a +40’C heatwave for a week – I spend hours playing with punch art! Anyways lets hope the lady likes it……I haven’t shown it to her yet, worse case scenario though is I’ll get to keep it if she doesn’t lie it.
I was a little alarmed to realise though that the googlie eyes that I used on the cow and sheep will vanish with the end of the Holiday catalogue on January 31st! So if like me you love using the self-adhesive eyes I’d advise you to stock up now!
Stamps: Up, Up & Away!
Ink: Chocolate Chip & Pool Party
Card stock: Soft Suede, Whisper White, Basic Black, So Saffron, Real Red, Pumpin Pie, Wisteria Wonder, Pretty in Pink, Lucky Limeade, Gumball Green.
Accessories: 1″ circle punch, word window punch, Owl punch, pennant punch, itty bitty punch, 1 3/4″ scallop circle punch, 1 3/4″ circle punch, 1 3/8″ circle punch, Boho Blossom punch, Tombow glue, mini glue dots, Cherry Cobbler Bakers Twine, 2 3/8″ scallop circle punch, stamping sponge.
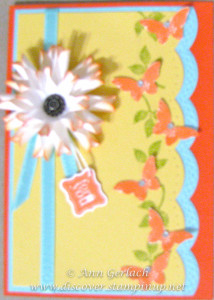
So I like entering sketch challenges, this month I saw one over on Craft Project Central that I thought I’d enter and 30 days later I still hadn’t made anything so with 56minutes to go I decided instead of making dinner I’d make my card entry instead! I got to use lots of lovely new products that are coming out soon as part of Sale-a-bration, where you can earn products for free!
This was the sketch:
so I flipped the orientation and this was what I made with it.
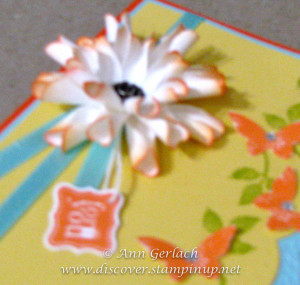
The flower was made using the large 2 3/8″ and 1 3/4″ scallop circle punches.
Stamps: Bloomin’ Marvelous, Pretty Petites
Ink: Lucky Limeade, Tangerine Tango
Card Stock: Pool Party, Whisper White, Tangerine Tango
Accessories: Petite curly label punch, 2 3/8″ and 1 3/4″ scallop circle punches, Pool Party satin ribbon, Antique brads, White Bakers Twine, Basic Rhinestones, stamping sponge, Delicate Designs Embossing folder, Large scallop edgelit, 1/16″ handheld punch, paper piercer.
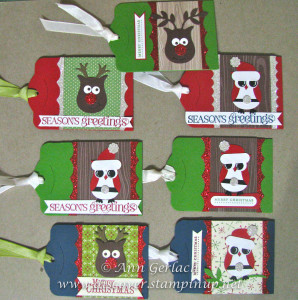
A lot of people are giving gift vouchers these days as presents, myself included. When you live a long way from family or are giving a gift to a younger person whose taste in music or clothes can change rapidly, it’s sometimes safer to let them buy their own present than to double up or get something they may not like or use.
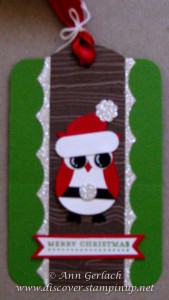
So I made up several of these this year – using the Two Tags die and cutting on the fold I can adhere a gift card inside for the recipient and still have it as an attractively packaged gift to hang on the tree. These were fairly simple to make, I had a load of owls and reindeers made up and then used up bits and pieces of designer paper, glimmer paper and ribbon to dress them all up.
Stamps: Chock-Full of Cheer, Curly Cute, Teeny Tiny Sentiments
Card stock: Soft Suede, Midnight Muse, Chocolate Chip, Be of Good Cheer DSP, Festival Prints, Whisper White, Real Red, red glimmer paper, Very Vanilla, Basic black, Woodland Walk DSP (retired), Gumball Green, silver glimmer paper.
Ink: Real Red & Midnight Muse, basic black marker
Accessories: Two Tags die, Old Olive taffeta ribbon, Whisper white taffeta ribbon, Owl punch, Snowflake die, Word window punch, Bird punch, real red satin ribbon, white gel pen, Tasteful trim die, Dimensionals, modern label punch.
I thought I would post a few more Christmas cards that I made and didn’t have time to blog to date, before I start posting some sneak peeks of some of the exciting things that are coming up in the new year!
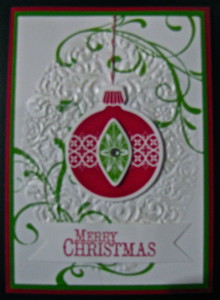
We made this at my downline meeting a few months back, it actually shimmers as it has platinum shimmer paint daubed onto the dry embossed frame. I’m just making up samples for my January team meeting now, if you’d like to know more about joining Stampin’ Up! you can read about it here.
I would like to wish everyone a very safe and happy Christmas. My year has been very full and I have been fortunate to continue to have so many lovely people in my stamping world some of whom I have known for decades and some who are new, who I am so fortunate to count as my friends, customers, downline, sounding boards and stamping inspiration. 2013 is shaping up to be just as fun filled. I saw this poem on another site and had to post it here as it is SO me – I started teaching Christmas card classes in June this year – seriously you would think I would make time to mail some of them – perhaps I need to schedule a class for that next year!
Christmas Rubber Stamping
‘Twas the week before Christmas
and the house was a hush.
Save the stamping of rubber
in a last minute rush.
The cardstock was cut
with precision and care,
In hopes that a greeting
would soon be stamped there.
The children were tucked in
their beds around eight,
but now it’s 10:30–
How’d it get so late?
And I in my PJs
with bleary red eyes,
had finally arranged
all the stamping supplies.
It started out simple
(it does every year)
just make a few cards
for friends who are dear.
Nothing too fancy–
just an elegant touch
A gold embossed image,
some ribbon and such.
I pressed ink to paper
(it looked crisp and clean)
a sprinkle of powder,
then heat for a sheen.
When what on my green Christmas
cards should appear?
Why a tiny gold Santa,
with sleigh and reindeer!
But with little stray flecks,
and some missing spots, too,
I knew in a moment
this one wouldn’t do.
Then I tried it again,
once more, and another.
“I will get this right!”
I said to no other.
On pigment! On powder!
On heat from a gun!
Now ribbon! And envie!
Can I make fifty-one?
“I can do it!” I said
with all of my might.
And looked at the clock–
’twas well past midnight.
I went straight to stamping
out card after card.
“This might take all night,
but at least it’s not hard.”
But after I finished,
they looked a bit lame.
I didn’t want fancy,
but these were too plain.
And then in a twinkling
a thought came to mind.
“I’ll just dress them up
and then they’ll be fine.”
So I went in my craftroom
and looked all around.
Then back to the table
with all that I’d found.
My new cutter I brandished
(I wasn’t a quitter).
And soon I was covered
in EP and glitter.
A bundle of papers
I spread on the table
to find the right background
(quite sure I was able).
With fibers that sparkled,
a mulberry sheet
was just the right choice,
my card to complete.
I started to smile
when the cuckoo came out.
“It’s now 3am!”
That bird left no doubt.
The cap of a marker
I held in my teeth.
I’d lay in some color,
or maybe gold leaf.
My broad little face
was all beaded with sweat.
But I wouldn’t give up!
Well, not at least yet.
There was glue on the table
and ink on the floor.
I laughed at the sight,
though my fingers were sore.
I did not complain,
just kept up my work.
When more things went wrong,
I did not go berserk.
When I finally finished,
one card, around six,
it looked pretty good
after all of my tricks.
“I’m keeping this one.
My work on it shows.”
So clutching my card,
up the staircase I rose.
I crawled into bed
at the first crack of dawn.
Creativity spent,
motivation all gone.
But make no mistake!
I promise one thing–
“You’ll all get your cards!
But you’ll get them next Spring!”
I got the holiday stocking die last month as I had seen some cute projects done with it and decided I wanted it to be a gift voucher holder that you could hang on the Christmas tree. I dry embossed each section with a different embossing folder to give it more dimension and loved the result.
Stamps: Delightful Decorations
Ink: Cherry Cobbler & Gumball Green
Card Stock: Very Vanilla, Cherry Cobbler & Gumball Green