Punched Reindeer boxed biscuits

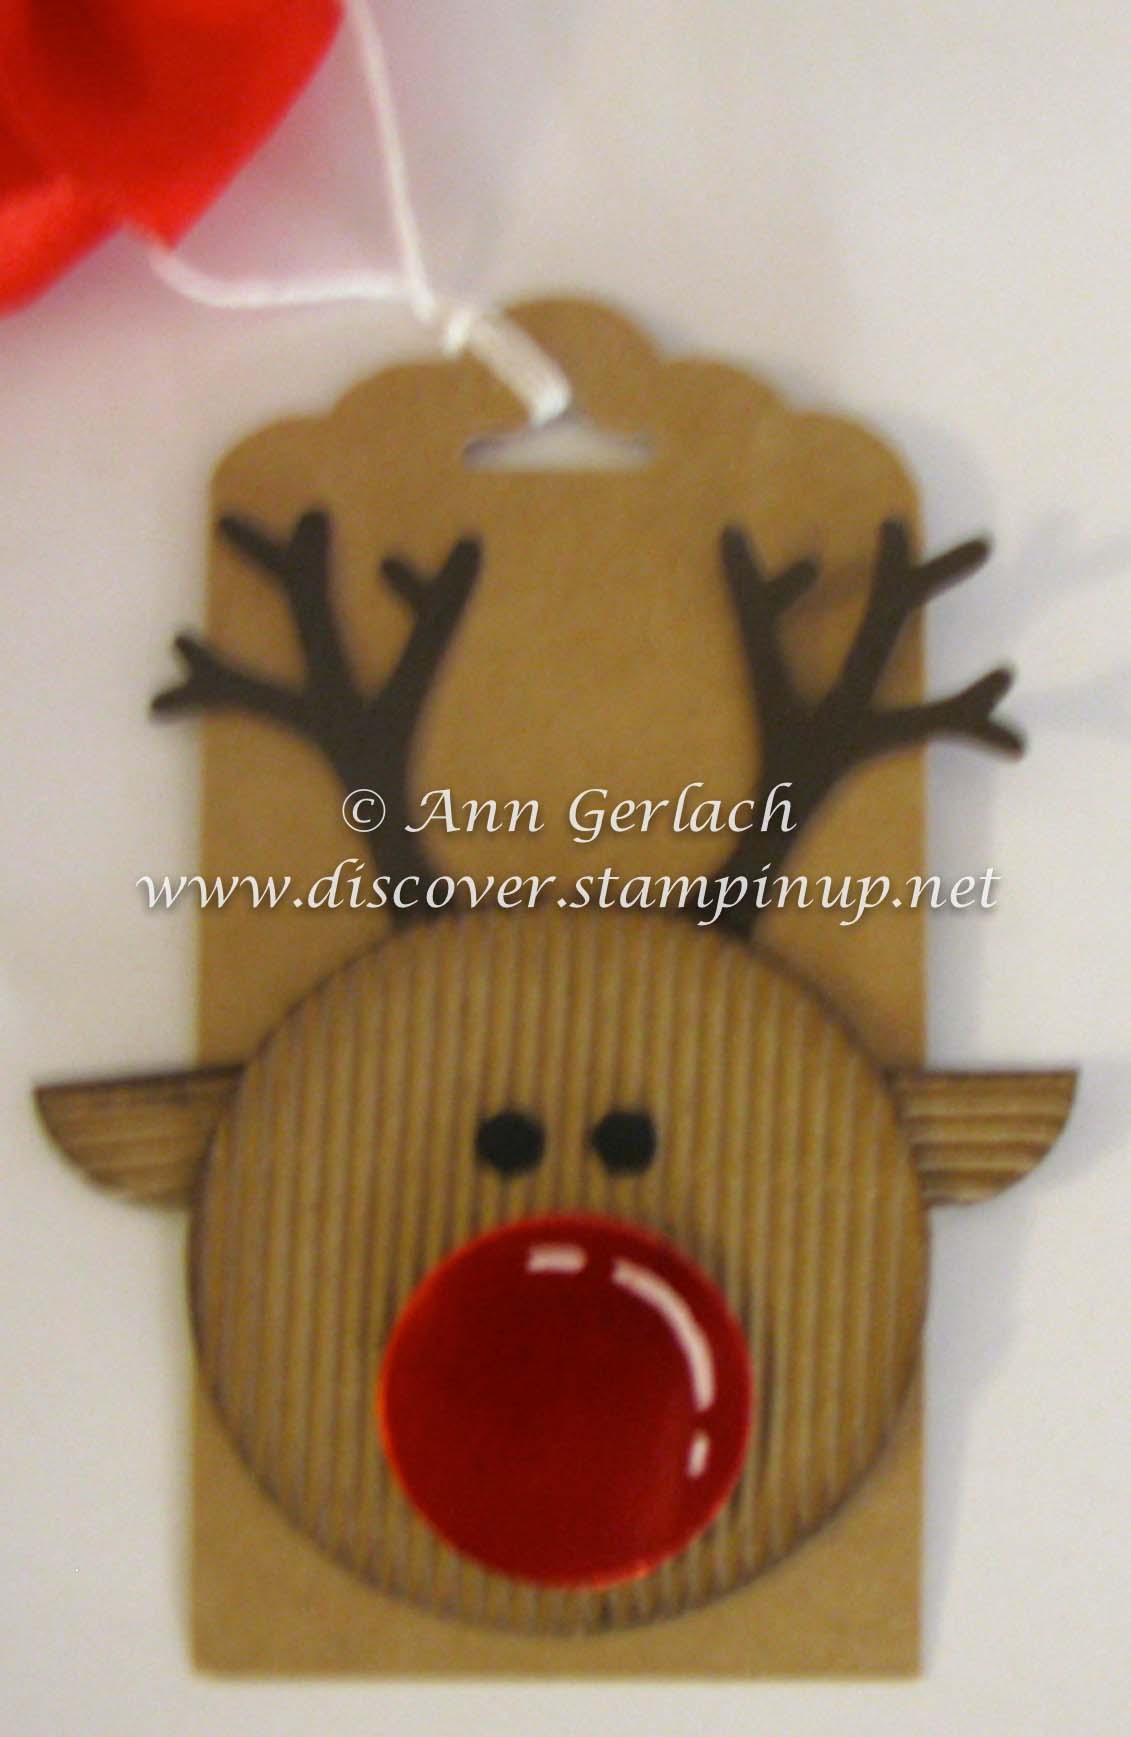
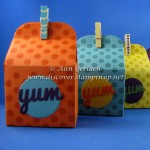
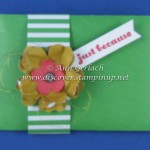
So I saw this super cute reindeer card on Carolyn’s blog recently and I knew I just HAD to make him, I also had to come up with a gift for hubby’s work colleagues……..now I’m not sure about you, but most of us have enough ‘stuff’ and Christmas can sometimes become a  complete clutter month, so I thought about making something cute, thoughtful & yummy instead for them. This was the result:

IMG_8089-2
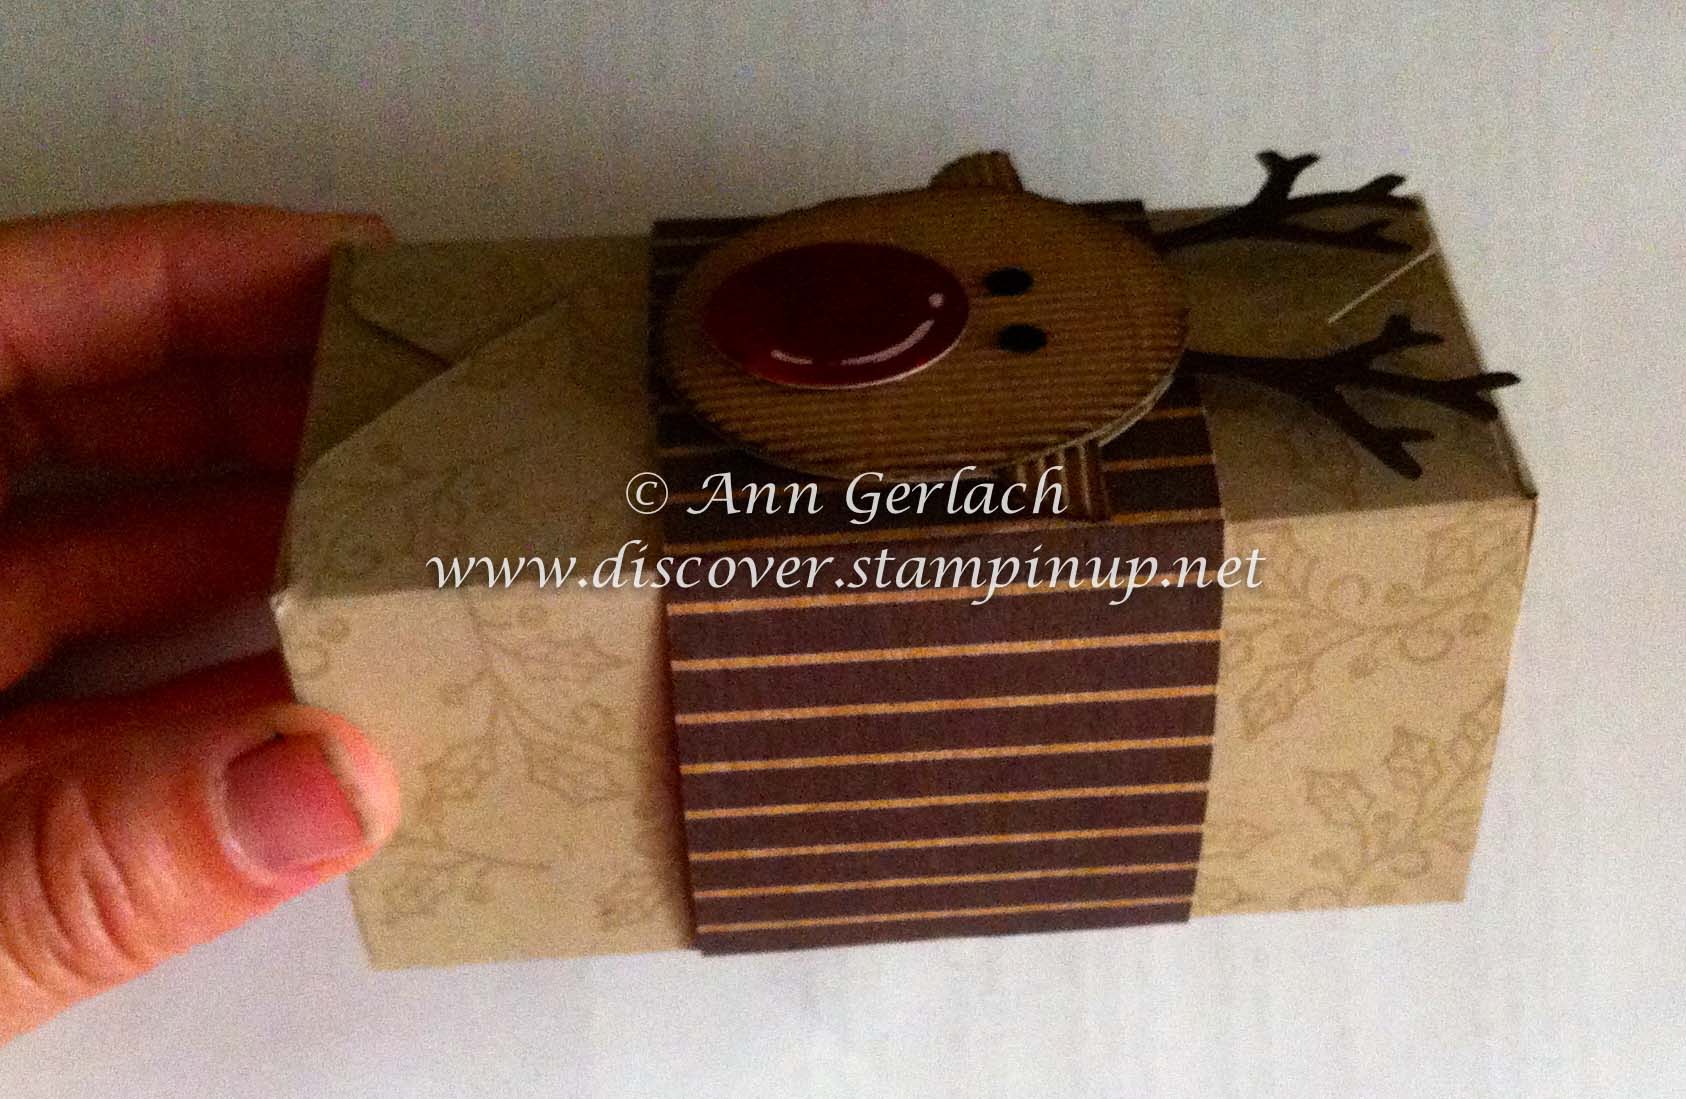
The box was made using the envelope punch board, filled with 4 homemade biscuits (which I have been told are very yummy & worthy of gourmet cafes, but I do have some very kind friends) and then wrapped in a belly band and adorned with the cutest reindeer this side of the black stump.

So lets start at the beginning………this is a post by the way so you might need a cuppa!

The box was made from a 21cm square of Crumb Cake card stock, stamped with an image from Embellished Ornaments in Versamark to give a subtle watermark effect so it looked like this:

IMG_8072-2

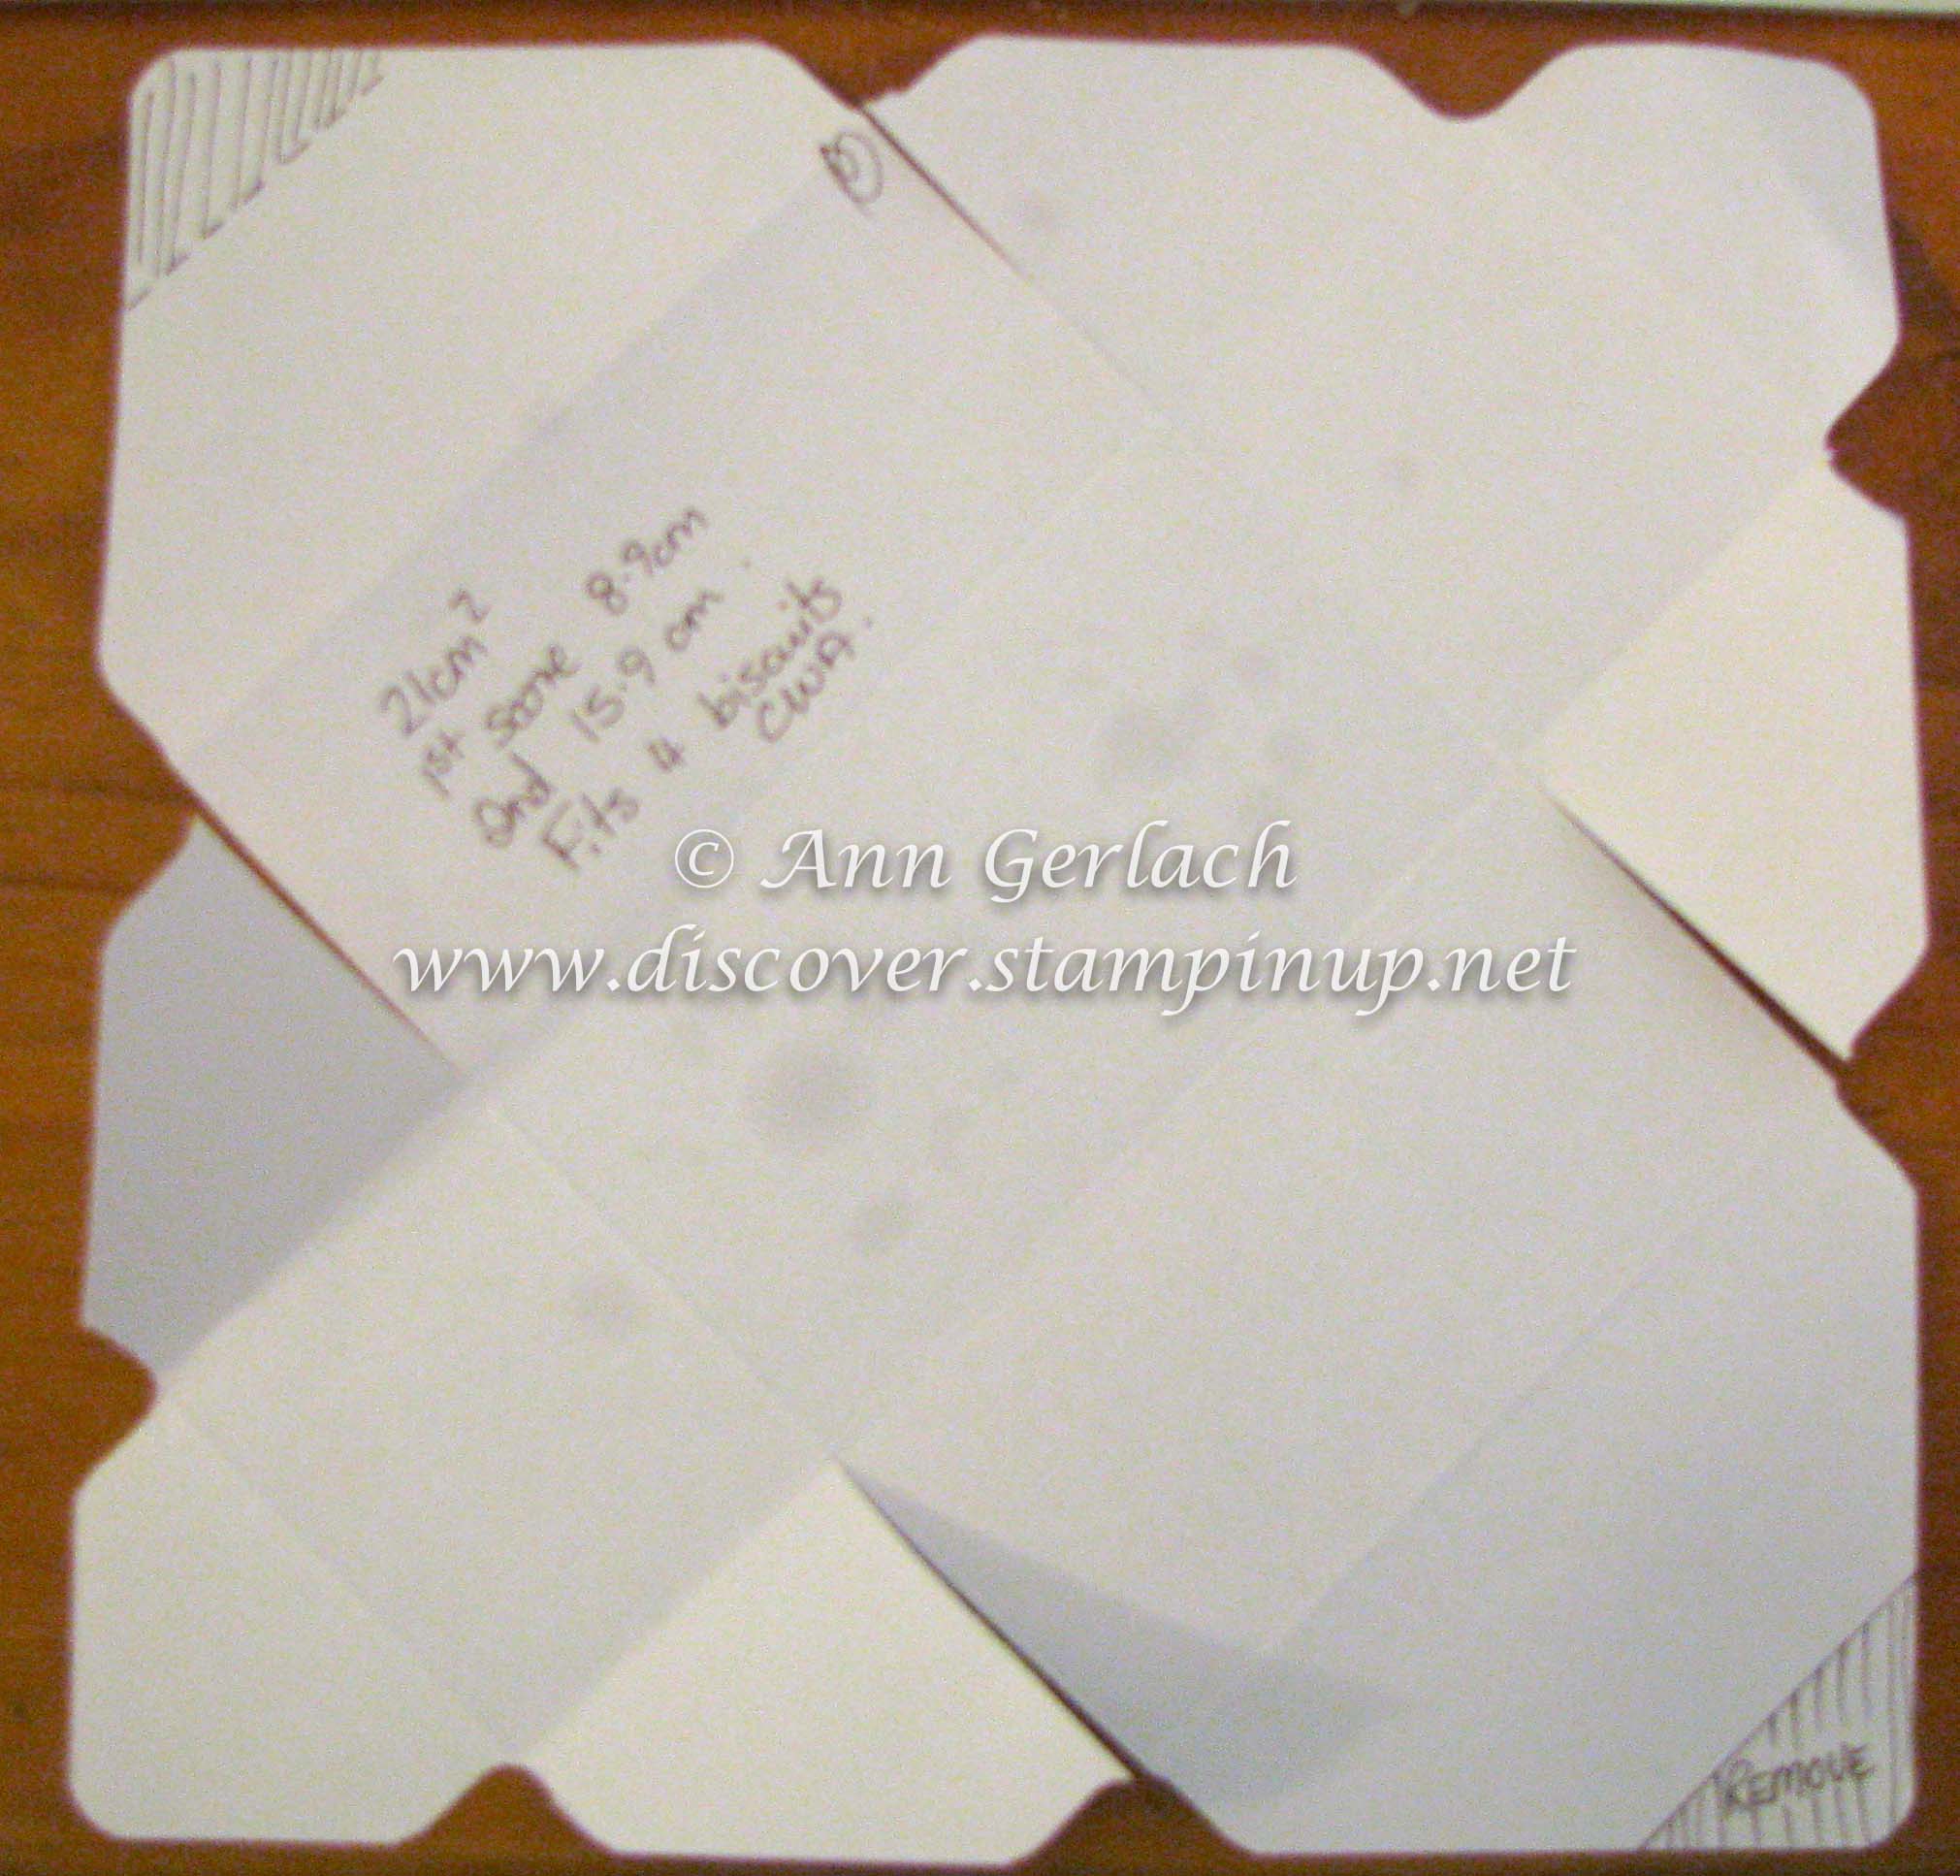
I then used the awesomely versatile Envelope Punch Board to turn it into a box, by double punching & scoring it at 8.9cm and then 15.9cm (the scrawled circle not he top edge is the first 8.9cm punch). I cut off the points of the flaps on the longest sides (see shaded in sections below), cut the flaps as you can see below and used tear tape to make it into a box (you could also use Tombow multipurpose glue, personally I wouldn’t use SNAIL as this is a box & the sides of it will pop open if you don’t use nice, strong adhesive).

IMG_8710-2

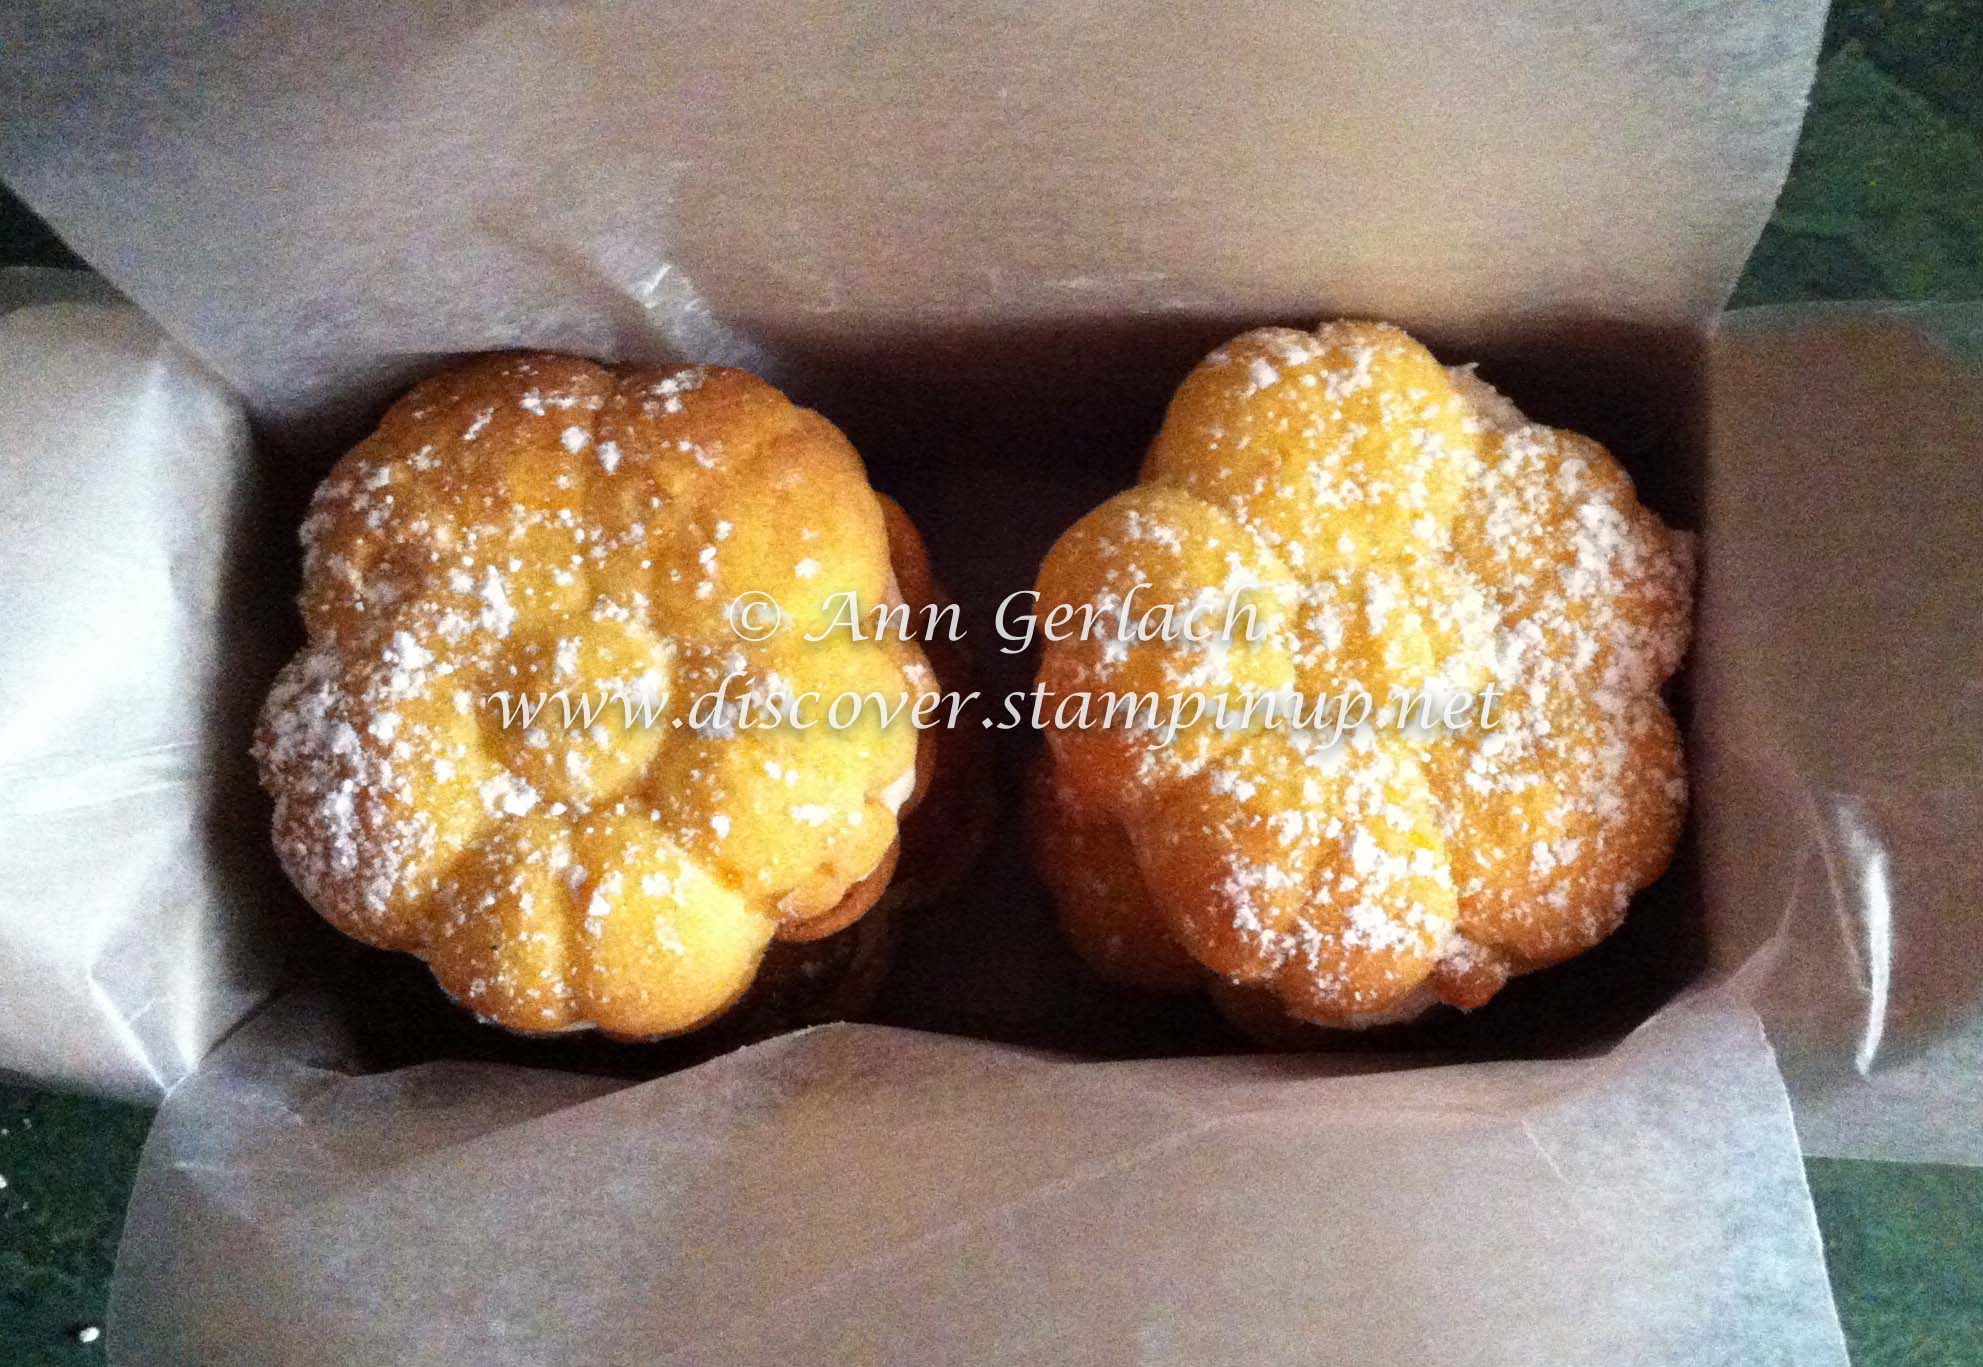
So it makes a nice box to fit four biscuits in, I did line the box with bake paper as otherwise the butter in the biscuits will oil stain the card stock (see above what it did to my template in the few minutes it was in contact whilst I got the fit right):

IMG_8082-2

So the box gets closed and wrapped with a 2″ x 10″ belly band (why imperial measurements – because if I cut the belly bands from a 12″x12″ piece of card stock I get 7 plus a small 2″ square left over, I did use retired card stock as these were just for gifts not in a class or being demonstrated).

IMG_8090-2

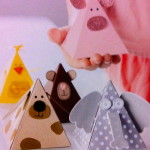
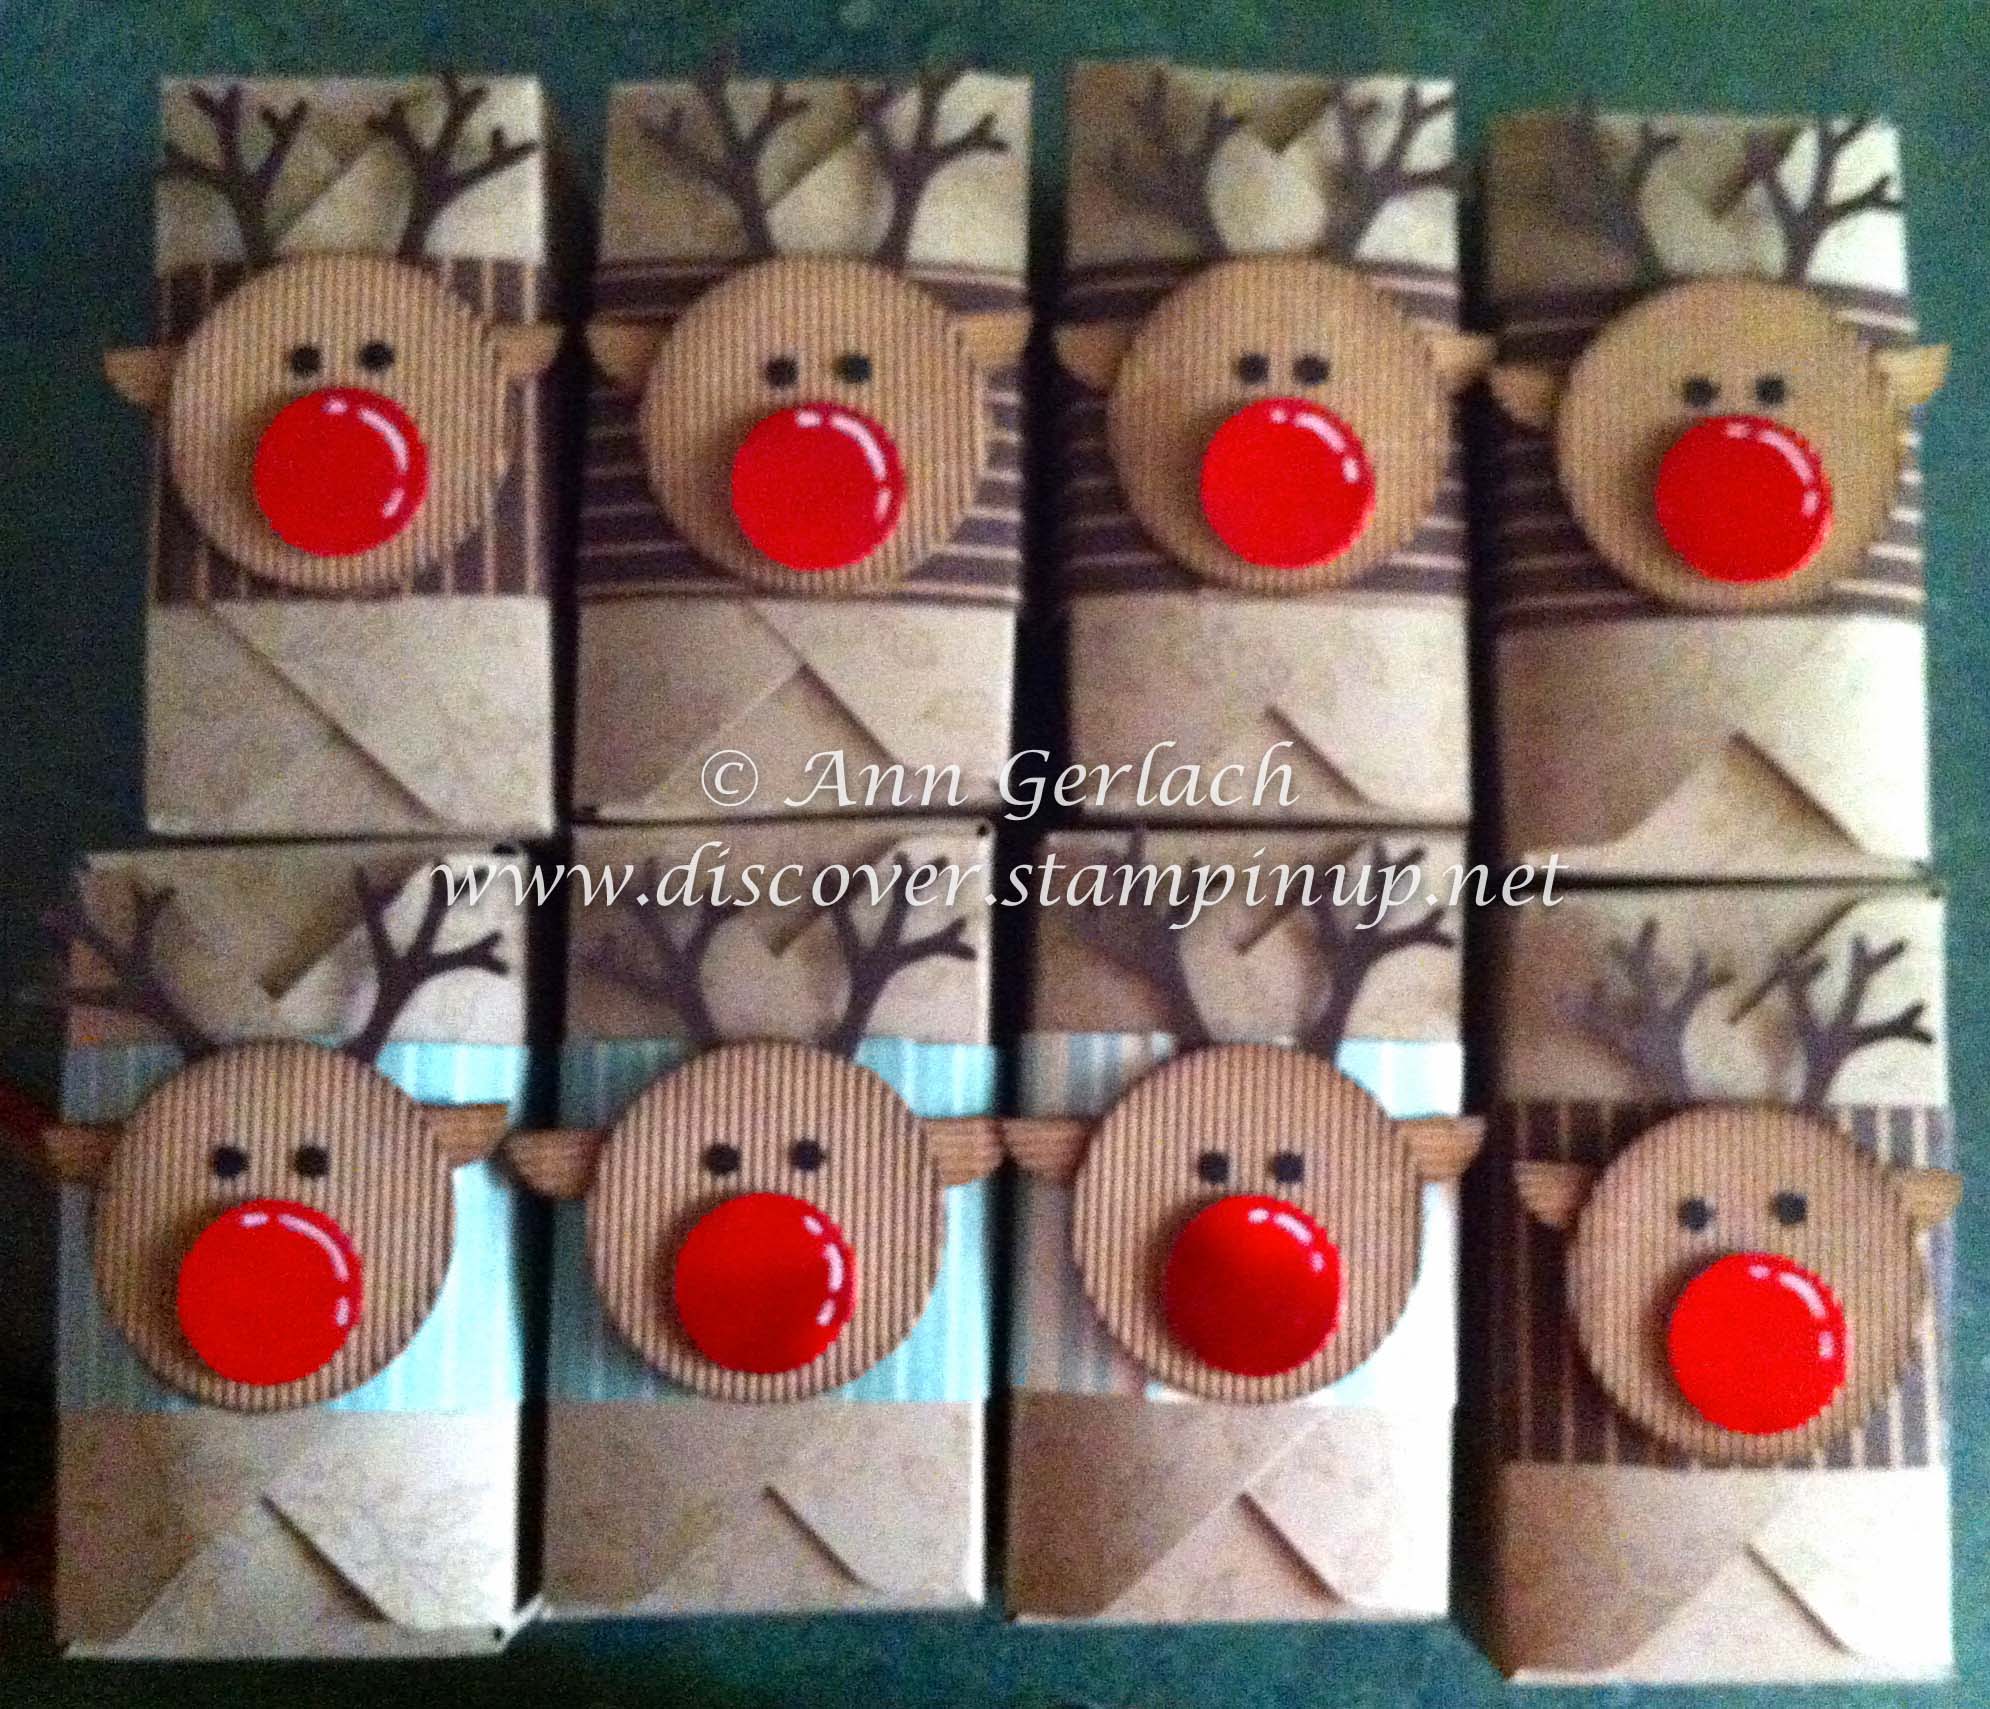
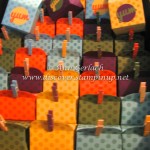
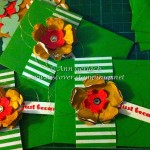
This is what a herd of them looks like:

IMG_8086-2

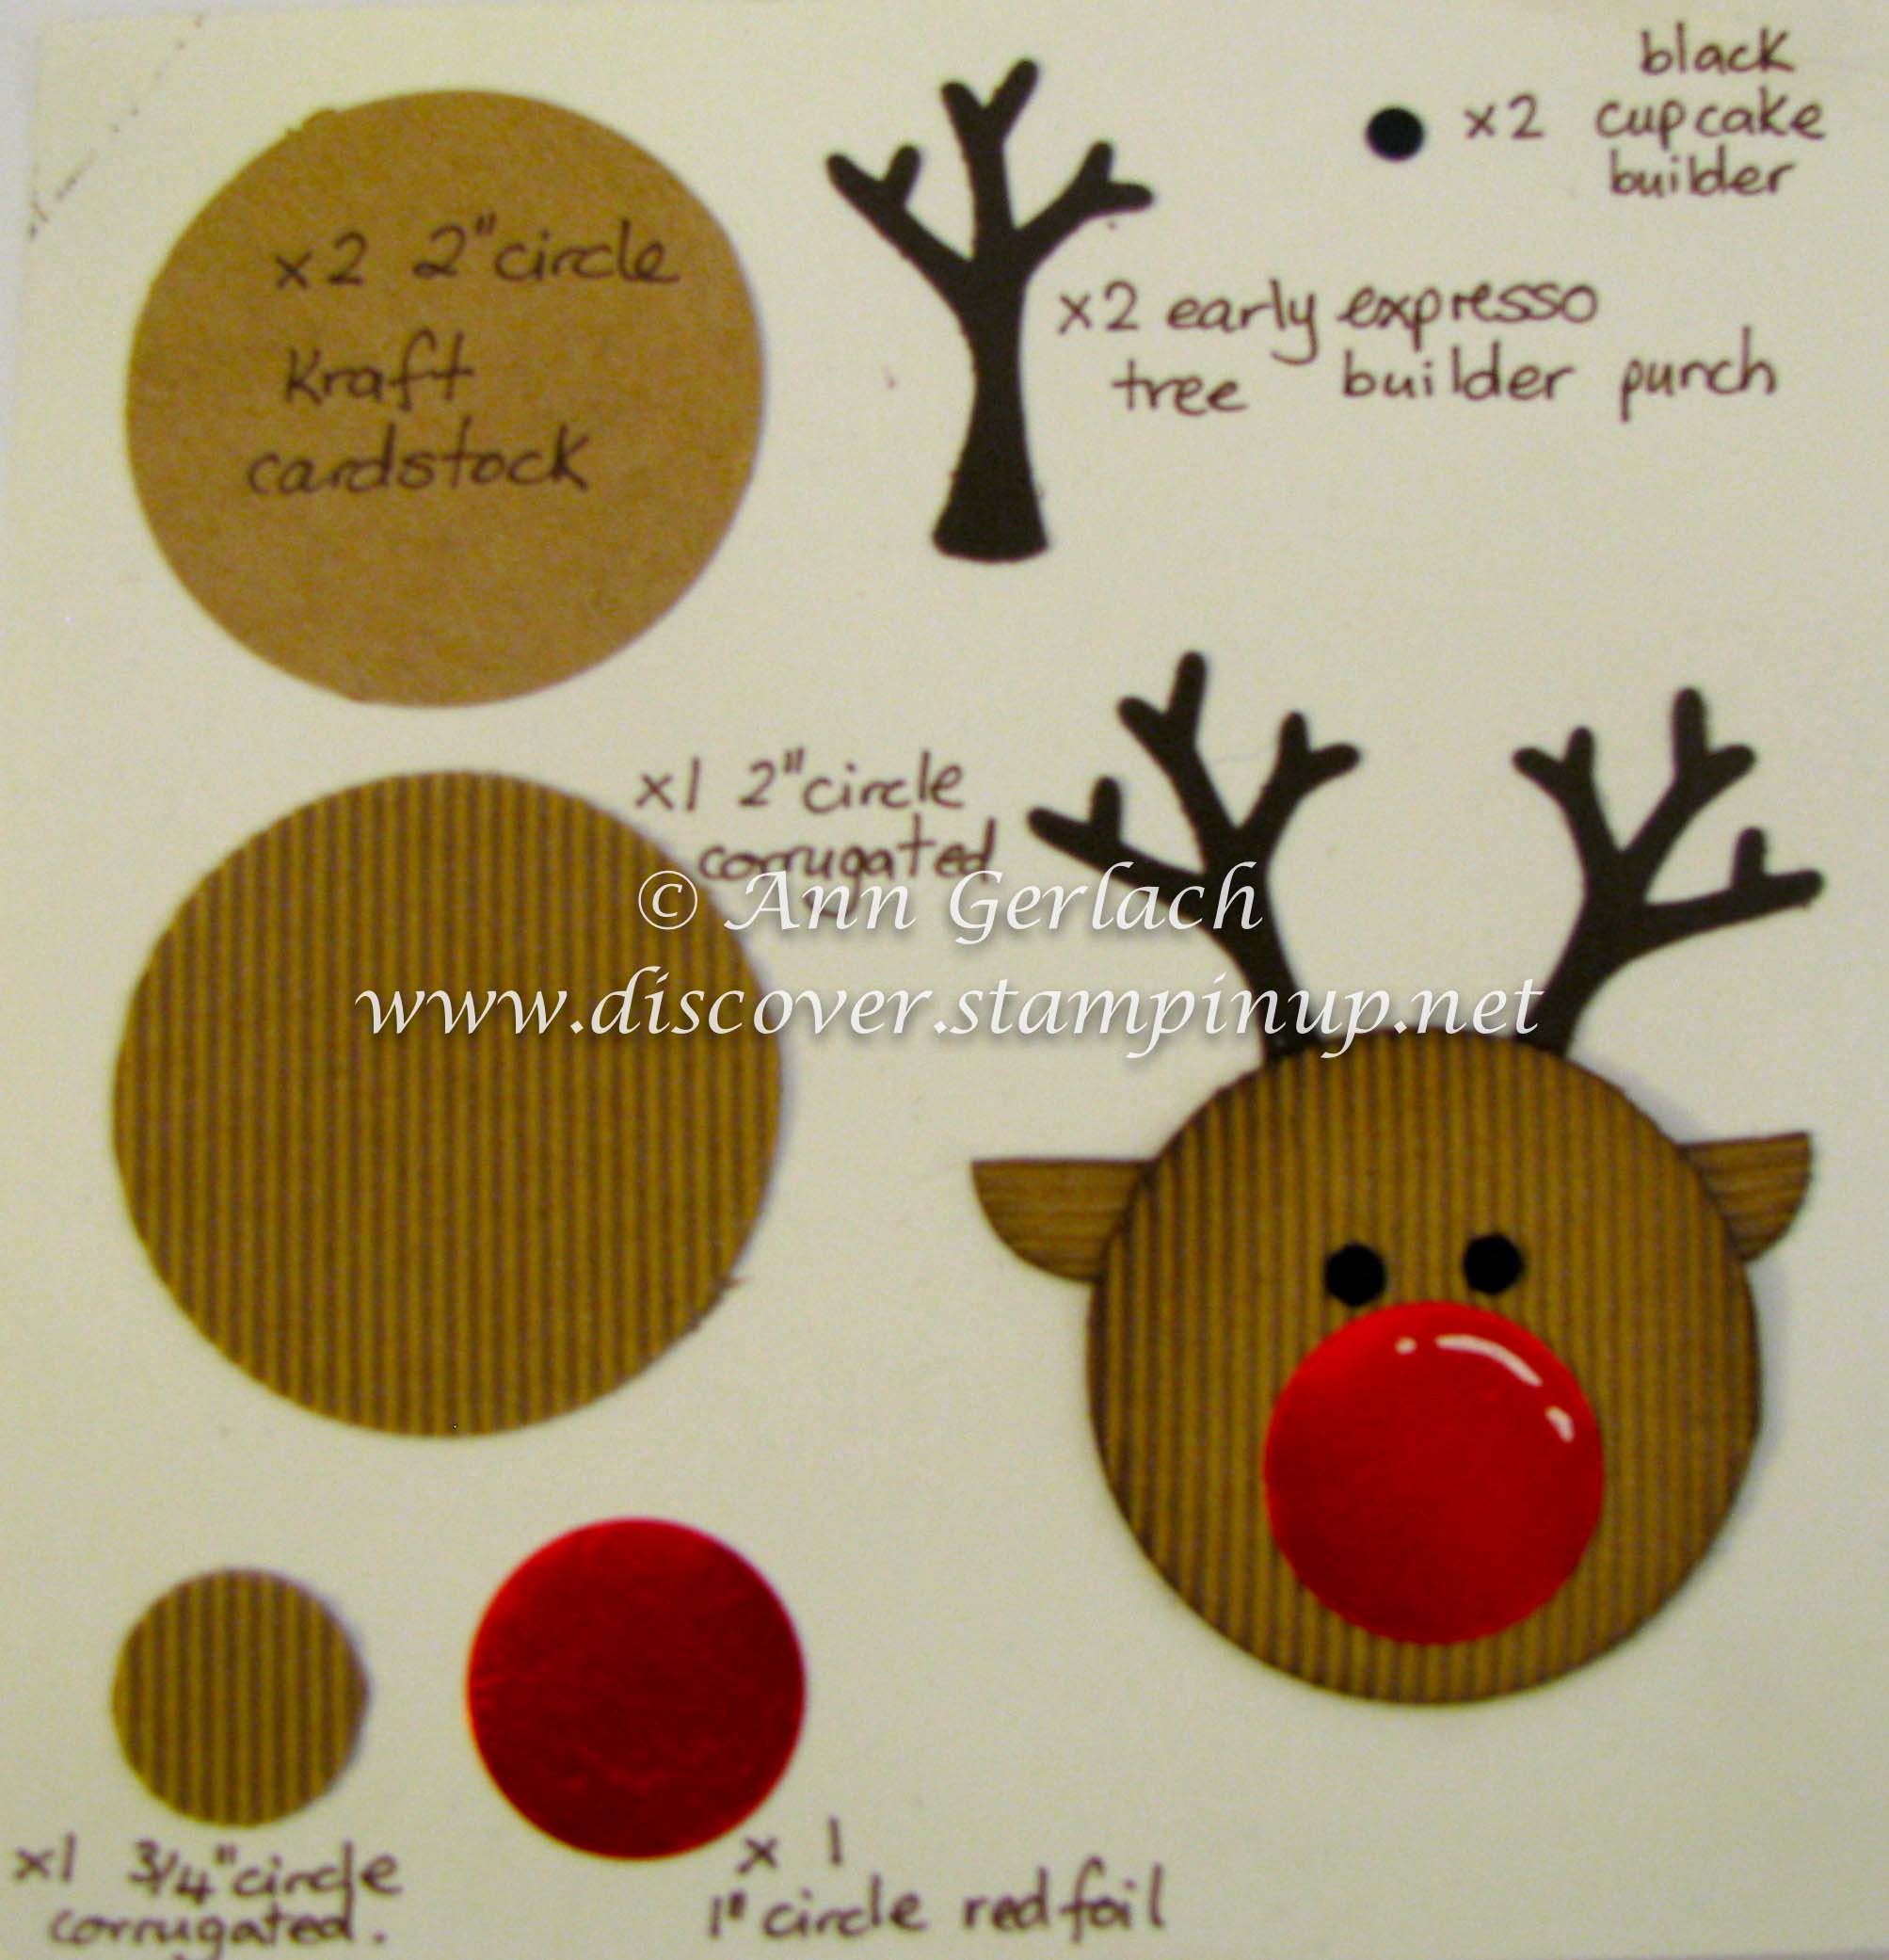
The reindeers are made using a variety of punches, and here is the direction sheet for making them (I create 6″x6″ punch art direction sheets when I remember so that I have them in a folder for future reference and ideas). The corrugated & one of the Kraft 2″ circles are glued together first and then the rest of the face added to it, the second Kraft 2″ circle sandwiches in the antlers & ears to make it a tidy creation if you just want to use it as is. The edges are all sponged with Chocolate Chip ink, the nose is ‘popped’ up on a Dimensional and the nose highlight added with white gel pen.

IMG_8697-2

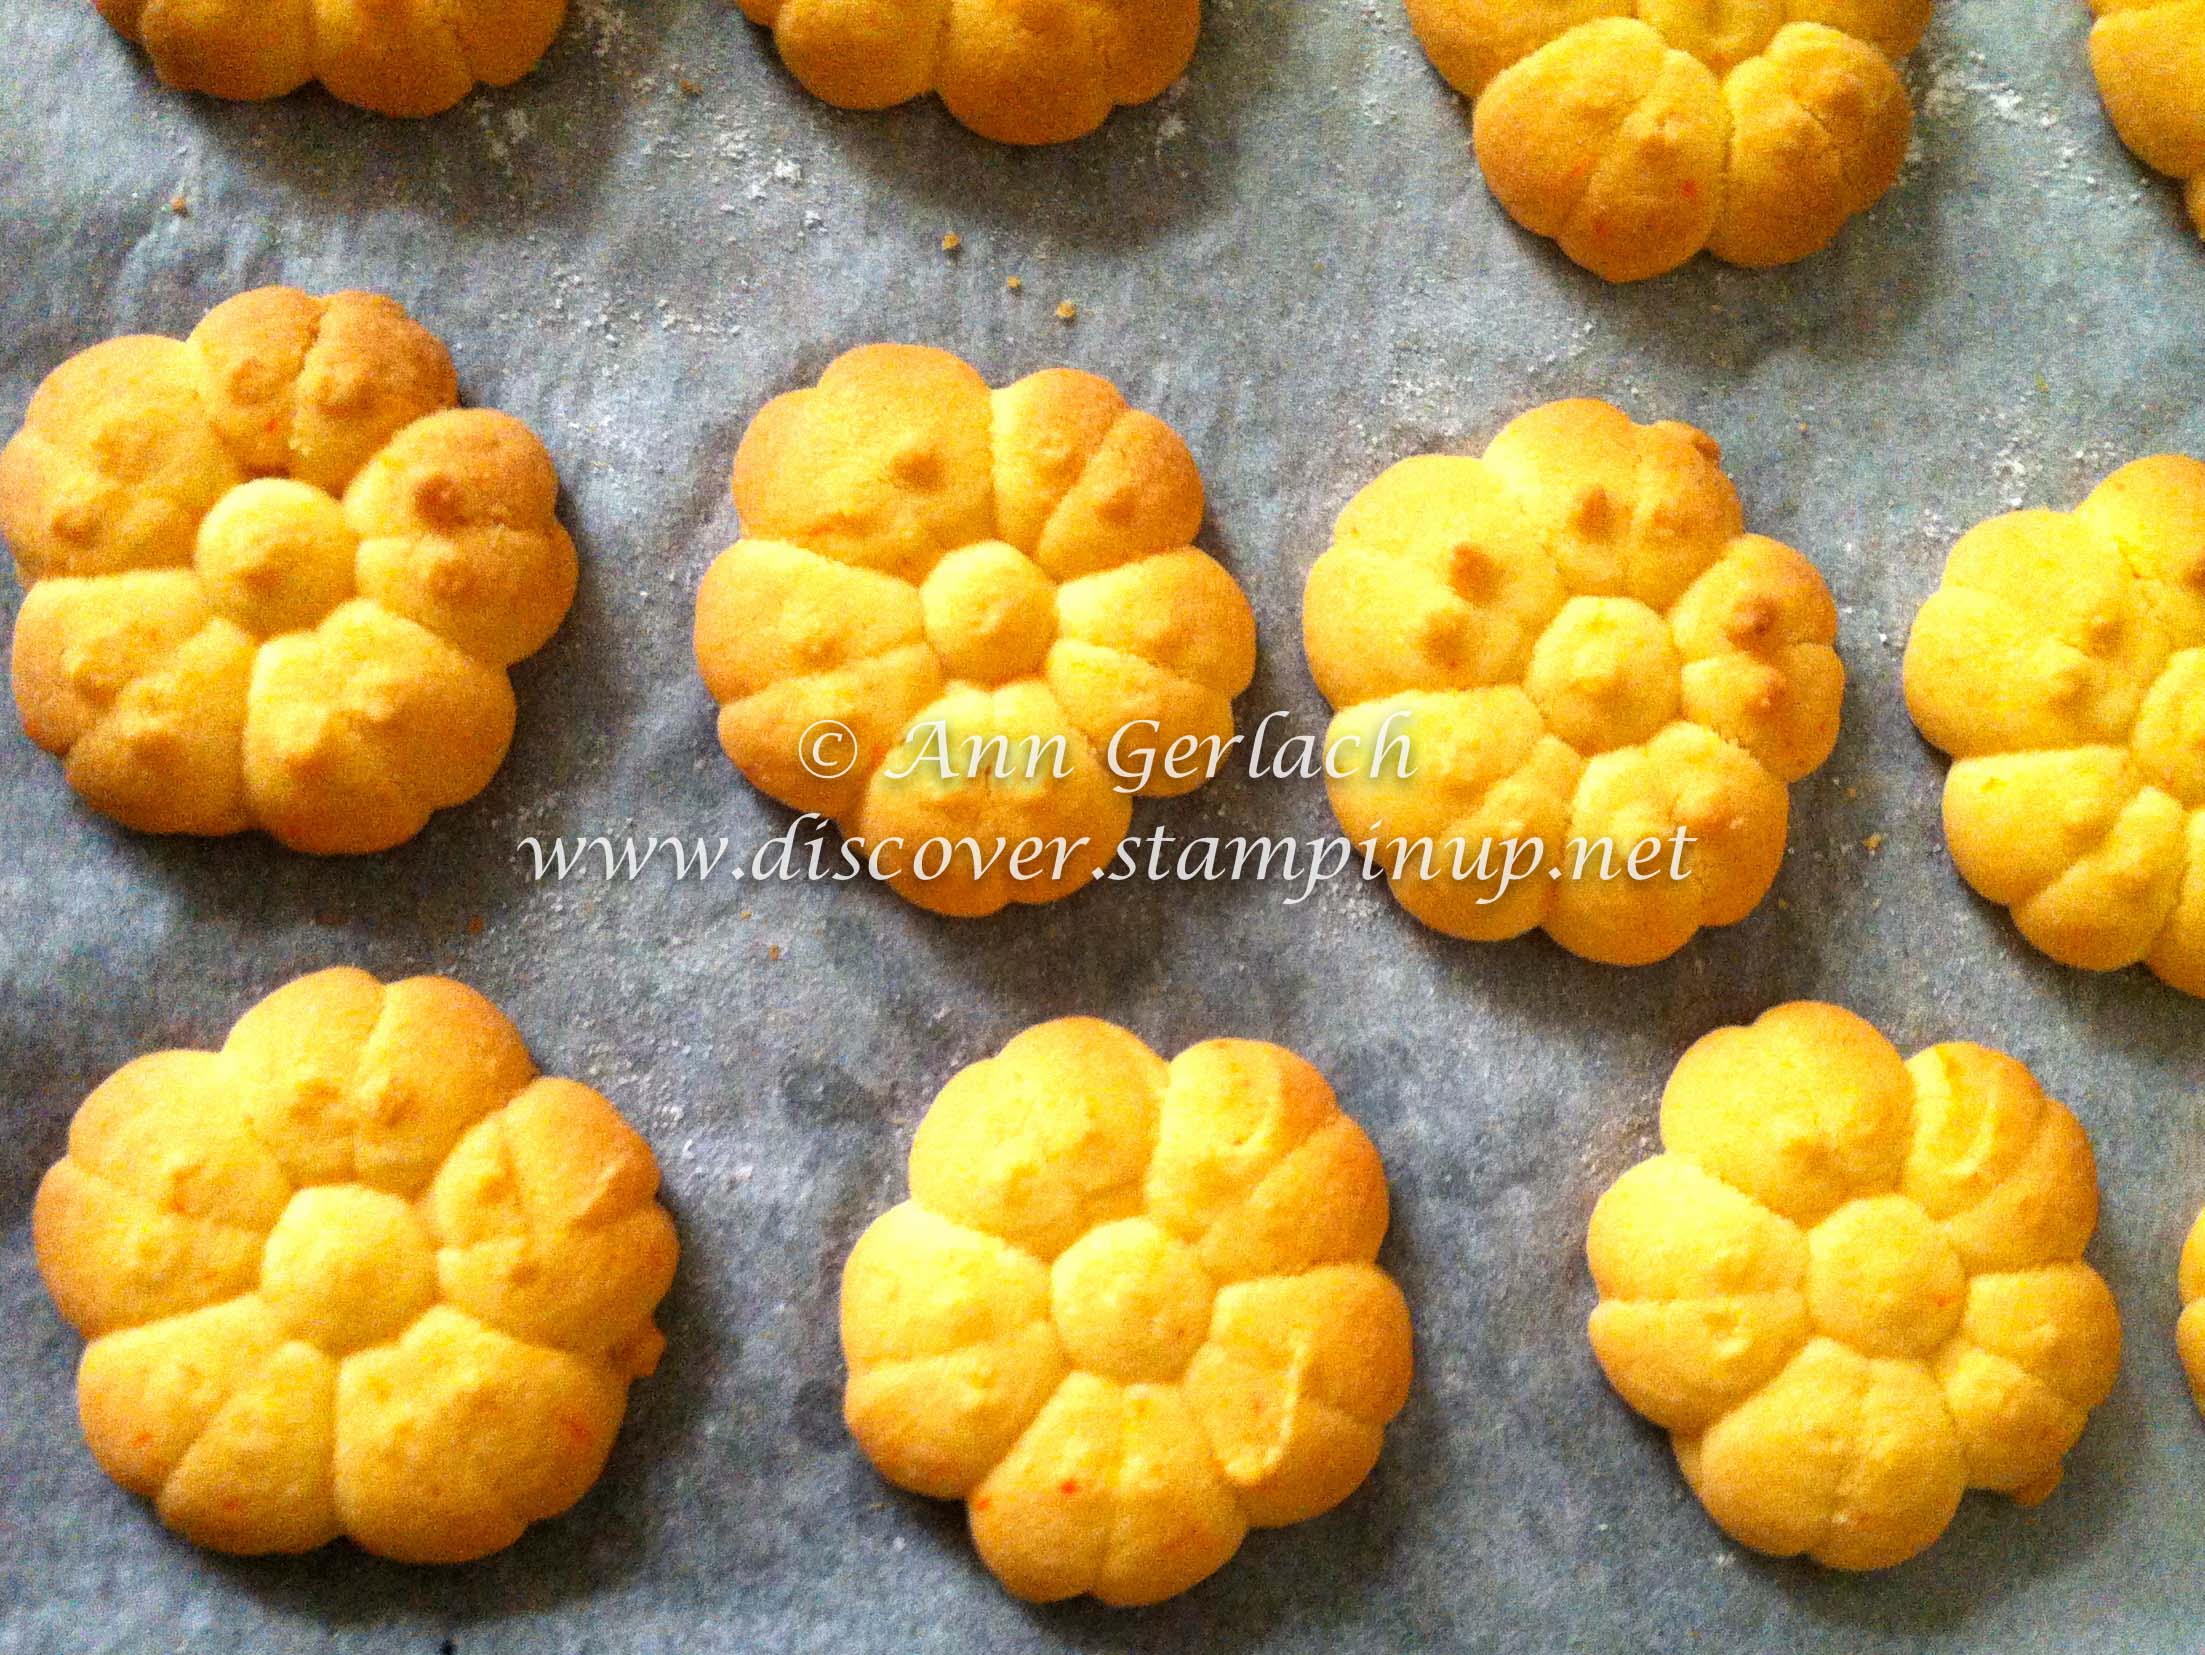
The contents were biscuits that I have been baking for well over 2 decades and this version of the recipe I have taken from the 1992 CWA cookbook recipe for Shortbread Biscuits (Fancy) and made approximately 68 biscuits before I sandwiched them together with butter icing (so fills 8 of the above boxes with a couple left over for quality control). I am a baking snob and have never made these with margarine or dairy free alternatives, so can’t say how they will turn out using those.

375g plain flour

125g pure icing sugar

125g custard powder

375g unsalted butter

Cream together the butter and sugar and add the flour and custard powder that have been previously well sifted. I use the Marcato biscuit press to make the biscuits into the chosen shape (I’ve had my biscuit press for about 25 years and it still looks brand new, so they last a lifetime). Bake in a 160’C fan forced oven for 10-12 minutes until pale golden brown. Allow them to cool completely before sandwiching together with vanilla butter icing and dusting each side with pure icing sugar.

IMG_8081-2

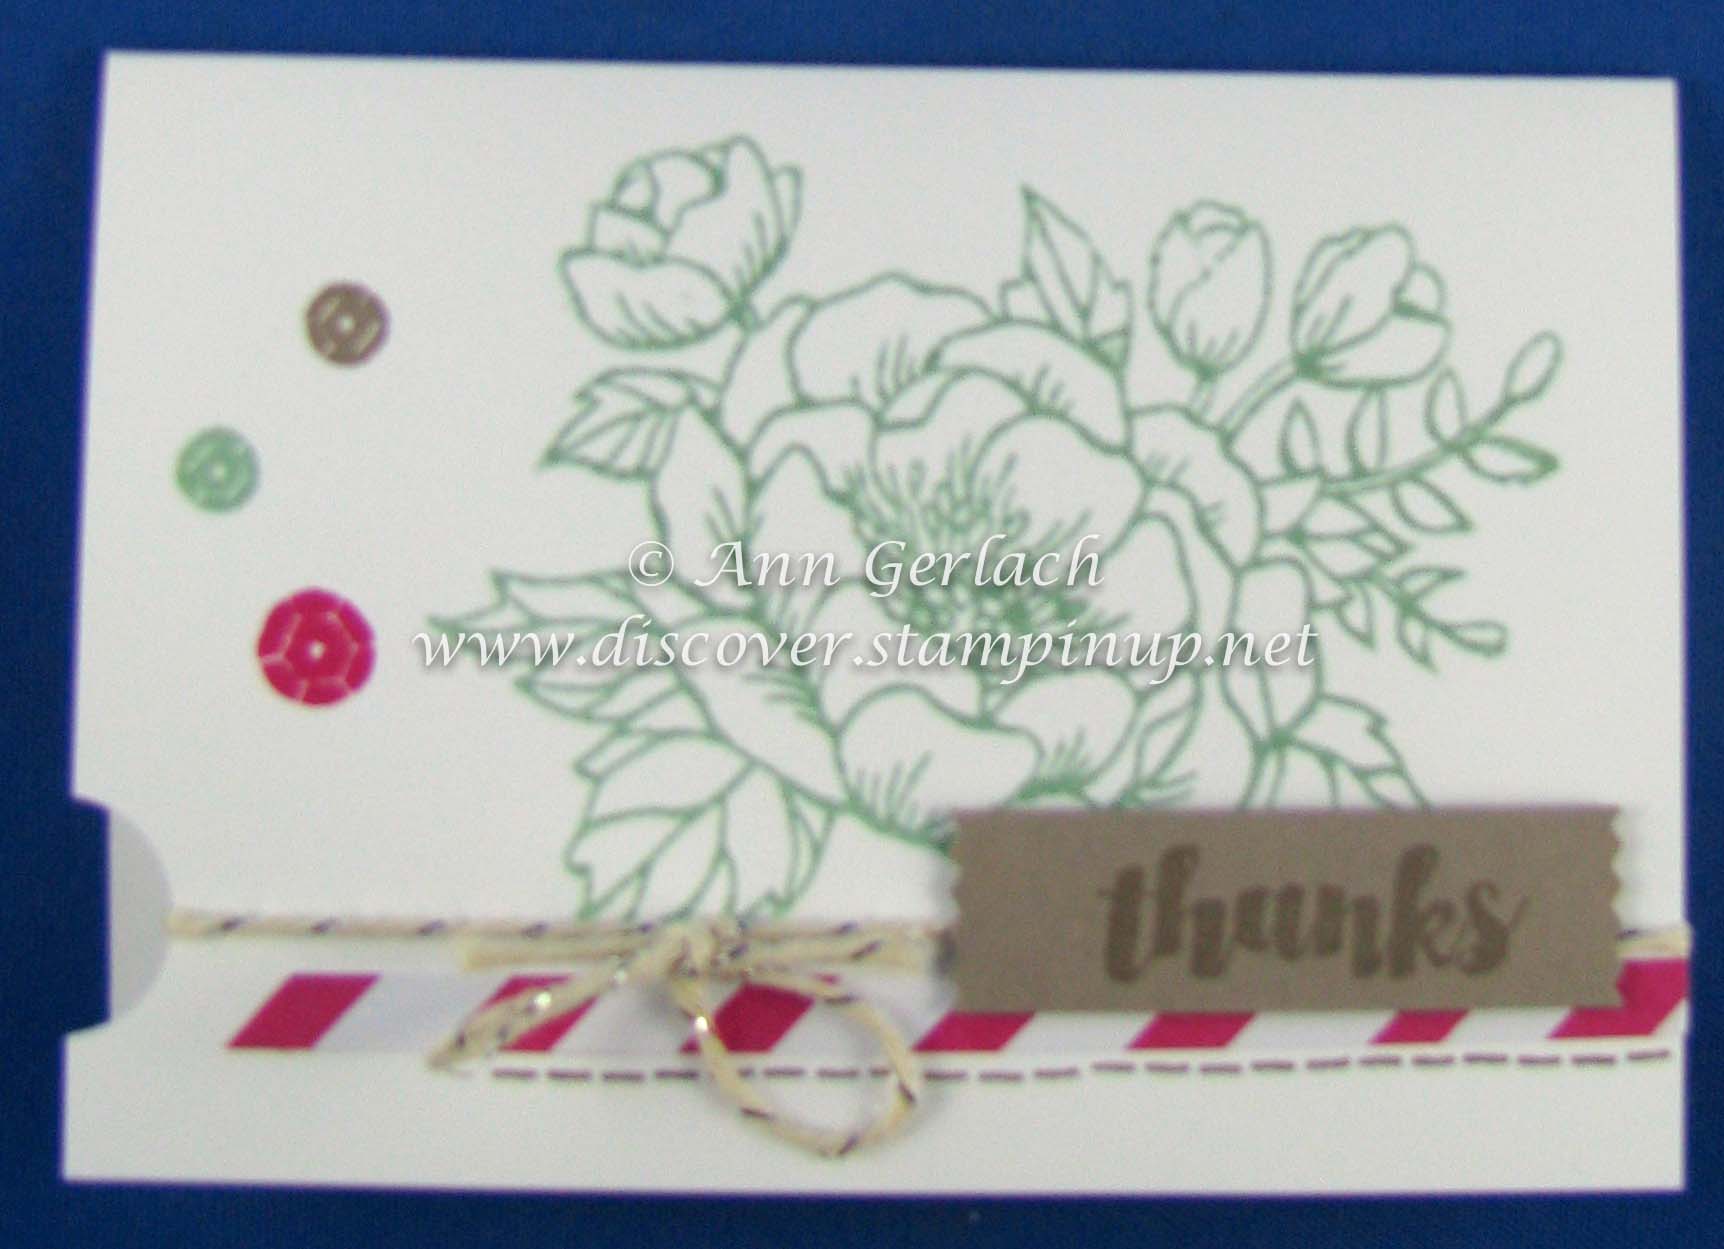
If you got this far, well done & if you are like me and loved Carolyn’s reindeer you might have used it on some other gift tags & gift card holders too!

IMG_8700-2

What clutter free Christmas gifts did you make this year?


Built for Free Using: My Stampin Blog


Posted in 3D, Christmas, Envelope Punch Board, Punch Art | Tagged , , , , , , , , , | Leave a comment

Sleigh Ride Edgelits bauble

Making Christmas cards in Australia is always a bit weird when the majority of the stamp images and designer papers incorporate snow, but sometimes I just don’t care!

This card was made using the Sleigh Ride Edgelits to cut out strips of different card and then re-cutting them with the Delicate Ornament Thinlit die – nice effect isn’t it?

IMG_8528-2

I did stamp the sentiment before dry embossing the Whisper White card stock. The bauble is popped up on Dimensionals to give it more dimension and suspended with the new thicker gold cord (loving this product – probably why I’m onto my second roll of it already!).

If you needed to see how to use these long edge lit dies, you can do so here:

Built for Free Using: My Stampin Blog

Posted in Big Shot, Christmas | Tagged , , , , | Leave a comment

Botanical Bloom sneak peek

IMG_8661-2

I was asked recently to make a thank you card for one of the teachers at school who was retiring, this request coincided with the arrival of my pre-order products from the upcoming Occasions Catalogue.

There are some amazing new product suites available and one I immediately loved is called Botanical Gardens, it consists of a co-ordinating stamp set, designer series paper & framelits.

IMG_8659-2

I hoped that she liked it. I can’t wait to share more items that I have made using the new products, if you would like to host a party to earn the items at a discount or free let me know or you can join my team and order them now as part of your starter kit!


Built for Free Using: My Stampin Blog

Posted in 3D, Big Shot | Tagged , , , , | Leave a comment

Weekly Deals

Wow – want to save 25% off the RRP of some terrific current Stampin’ Up! products each week? Then check out the Weekly Deals.

Built for Free Using: My Stampin Blog

These deals are changed each Wednesday morning and run for one week, if you would like to order any please contact me or you can order online yourself, don’t forget to use the current hostess code & every $50 order increment goes into a draw to win some awesome prizes!

Posted in Promotion, Weekly Deals | Tagged | Leave a comment

End Of Year Sale – up to 60% off RRP

q1_year-end-sale_1210_us

The Clearance Rack just got a big boost – there is a Year-End Sale 10 December 2015–4 January 2016! It is all whilst stocks last and discounts up to 60% off the RRP you can check out the bargains here and if you are ordering online, don’t forget the hostess code HPDQRRRP if you are ordering online.

There are lots of items in the sale rack – to give you an idea of some of the wonderful bargains check these out:

Built for Free Using: My Stampin Blog


Posted in Promotion | Tagged | Leave a comment

Lovely As A Tree Woodland

In Crafternoon recently we did a class with 4 different ways to use the textured impressions embossing folders. If you have never used the embossing folders you can see an older video on the basic how to here:

I would say that my acrylic plates do not look beautiful and clear like the ones in the video & all we did was use the White Vellum card stock instead of normal card stock with the Woodland embossing folder (which is on the retirement list from the Holiday Catalogue – so if you want it, you need to order it sooner rather than later as once it’s sold out that’s it!).

I CASEd this idea from LeeAnn Greff, so the card was basically a piece of Whisper White card stock sponged with Cajun Craze, Daffodil Delight and Tangerine Tango and then stamp the smallest leaf from Lovely As A Tree in Cajun Craze so it looks like this.

IMG_8619-2

I then layered over a piece of the woodland embossed White Vellum card stock and stuck it down by randomly adding dots of the fine tipped glue. I covered most of these dots up with gold sequins adhered with glue dots.

IMG_8618-2

I then added a banner of burlap ribbon, some gold cord. The White panel I stamped and water coloured in Cajun Craze and sponged the edges in Daffodil Delight before adding one of the wood accent sentiments using the fine tipped glue. If they ever retire Lovely As A Tree I will be very sad!

Built for Free Using: My Stampin Blog


Posted in Big Shot, Technique, Video | Tagged | Leave a comment

Baby Shower Lolly Buffet Boxes

I got asked on the fly recently if I could make some boxes for a lolly buffet at a baby shower – umm sure – what did you have in mind? Apparently a box that will hold treats was the answer with no real guidance to colour, size, shape etc. Anyway I had just received and order with the Bakers Box Thinlits & Homemade For You Bundle (saving 15%), so figured I’d give them a whirl.

The organiser was more than happy with the final result, I took the entire colour scheme from the mini pegs currently in the Clearance Rack and teamed with the In Color card stock and inks (if you haven’t got these yet I’d suggest buying the bundle as it works out that you get a free pack of card stock with the 5 coloured inks).

If you haven’t seen how easy it is to put together the Bakers Box you can see that here, I prefer to use Tombow Multipurpose adhesive for this type of 3D work as it is a little bit forgiving when it comes to lining up the two box pieces, which Fast Fuse isn’t. I did use my magnetic platform with the BigShot as I find it faster and easier for lining up the thin lit dies.

I don’t get the opportunity to do many custom orders, but when I do get them I generally have a lot of fun. Don’t forget to check out the Clearance Rack as it does change and you can pick up some real bargains!

Built for Free Using: My Stampin Blog

Posted in 3D, Big Shot, Punch Art, Video | Tagged , , , | Leave a comment

OnStage Perth 2015 – swap

One of the wonderful things about a Stampin’ Up! event is the opportunity to swap ideas and meet new people. Each event I attend I try to create about 20 swap items to exchange with people, however my intentions don’t always translate into reality, fortunately this time they did!

I had my badge maker out recently to make new sport faction badges for my Cherub’s school and for the Girls Night in fundraiser, so I thought they would make cute swap exchange items as I also had 8 of my wonderful downline attending the OnStage event this time and I wanted to make them a little gift as well. If you follow me on FaceBook or Instagram you have seen a couple of these pictures before, but basically I stamped normal copy paper with a sentiment and then used the Stamp-a-ma-jig to position the flourish in So Saffron around it, punched it out with the 2.5″ circle punch and made them into a badge. I created a double sided Whisper White card piece printed on the computer with the directions and my details and then packaged them into the cute little gift card envelopes made with the dies and secured it with a belly band.

If you haven’t seen how easy it is to use the dies to create these cute gift card sized envelopes you can see that here:

I will photograph and share some of the swaps I received soon.

Built for Free Using: My Stampin Blog

Posted in 3D, Big Shot, OnStage, Video | Tagged , , , , , , | Leave a comment

OnStage Local Perth – Day 2


header_OnStage2015_demo_111015
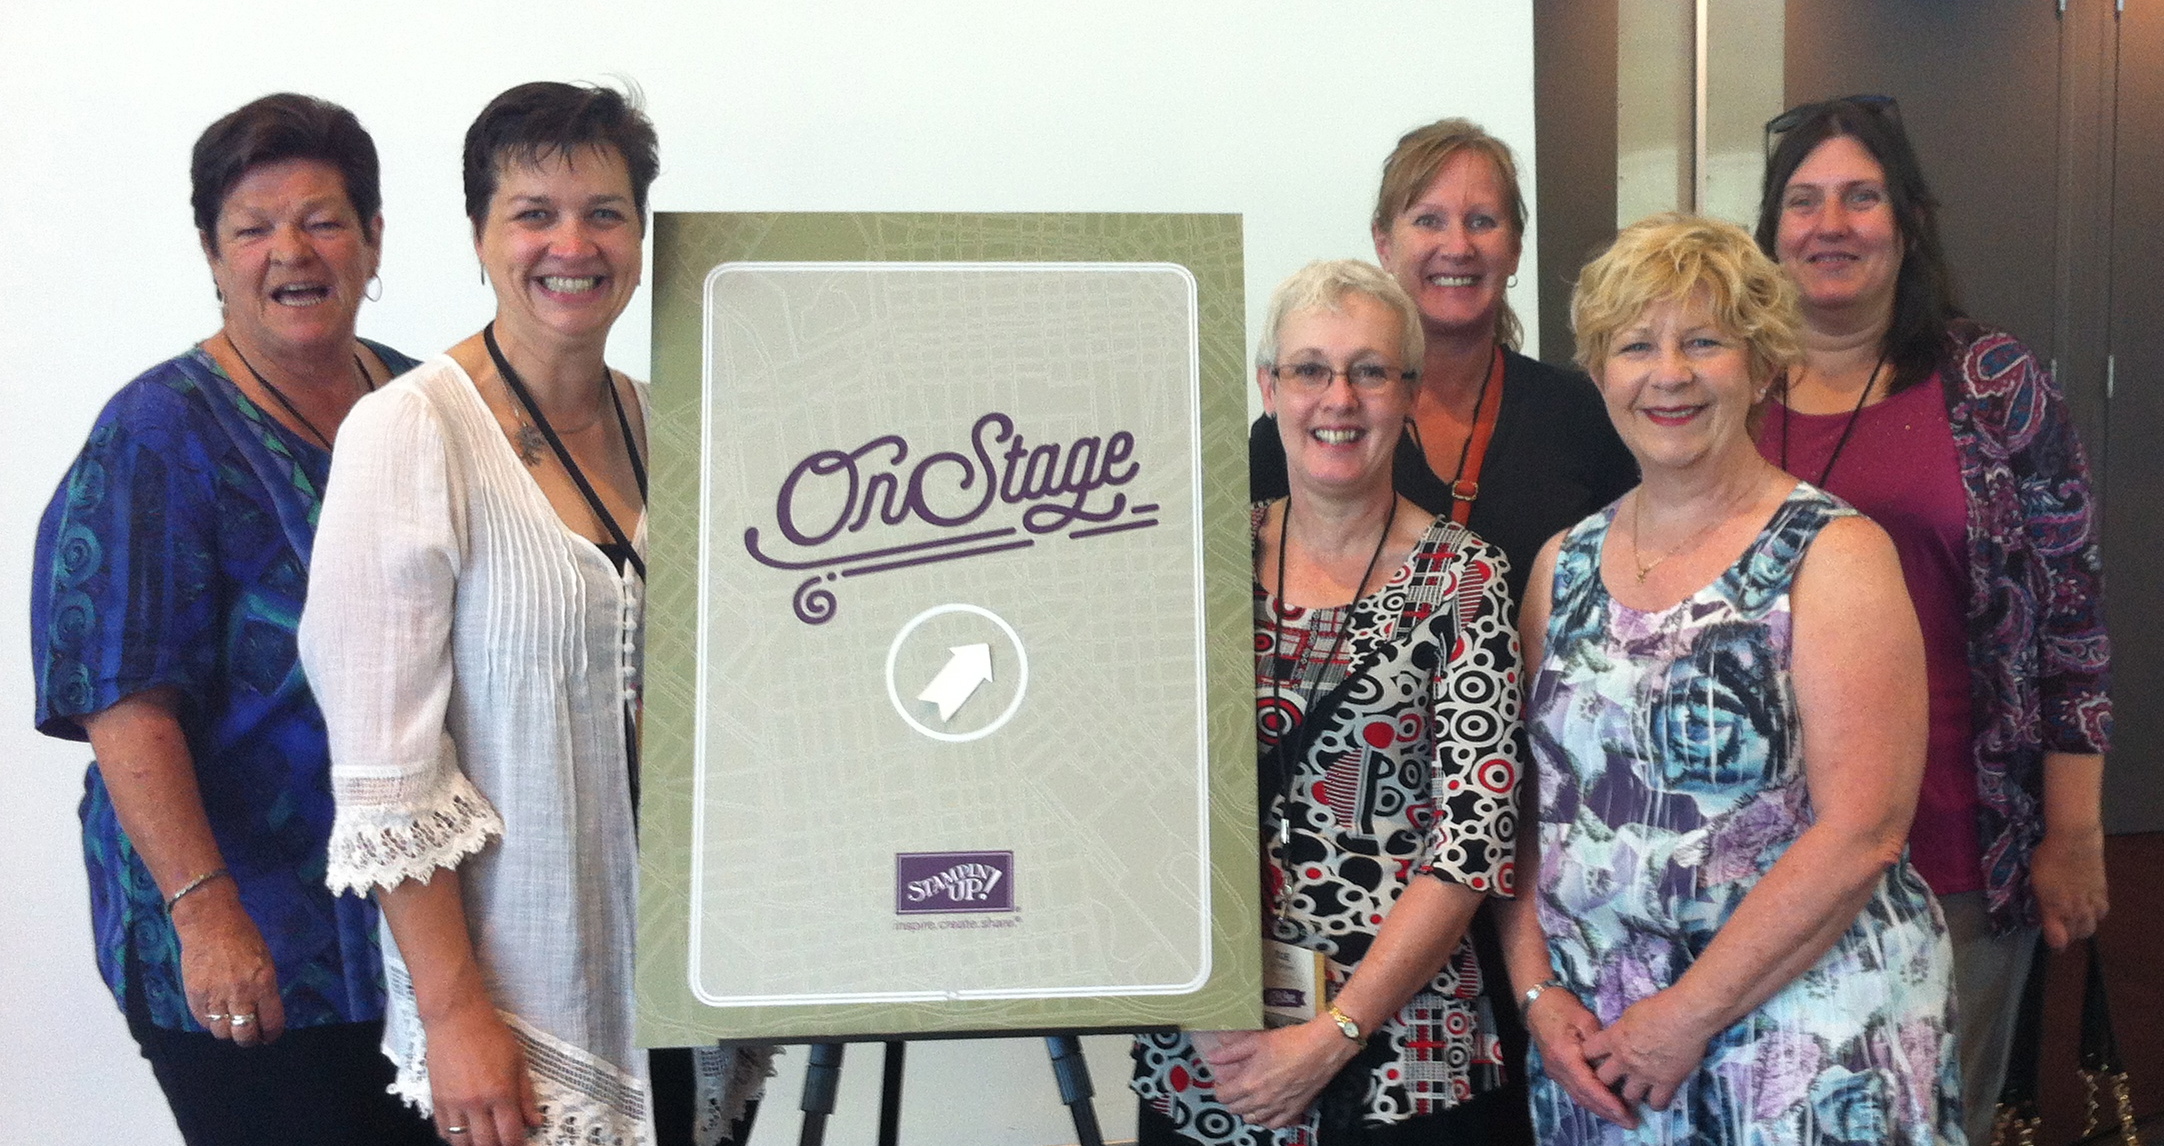
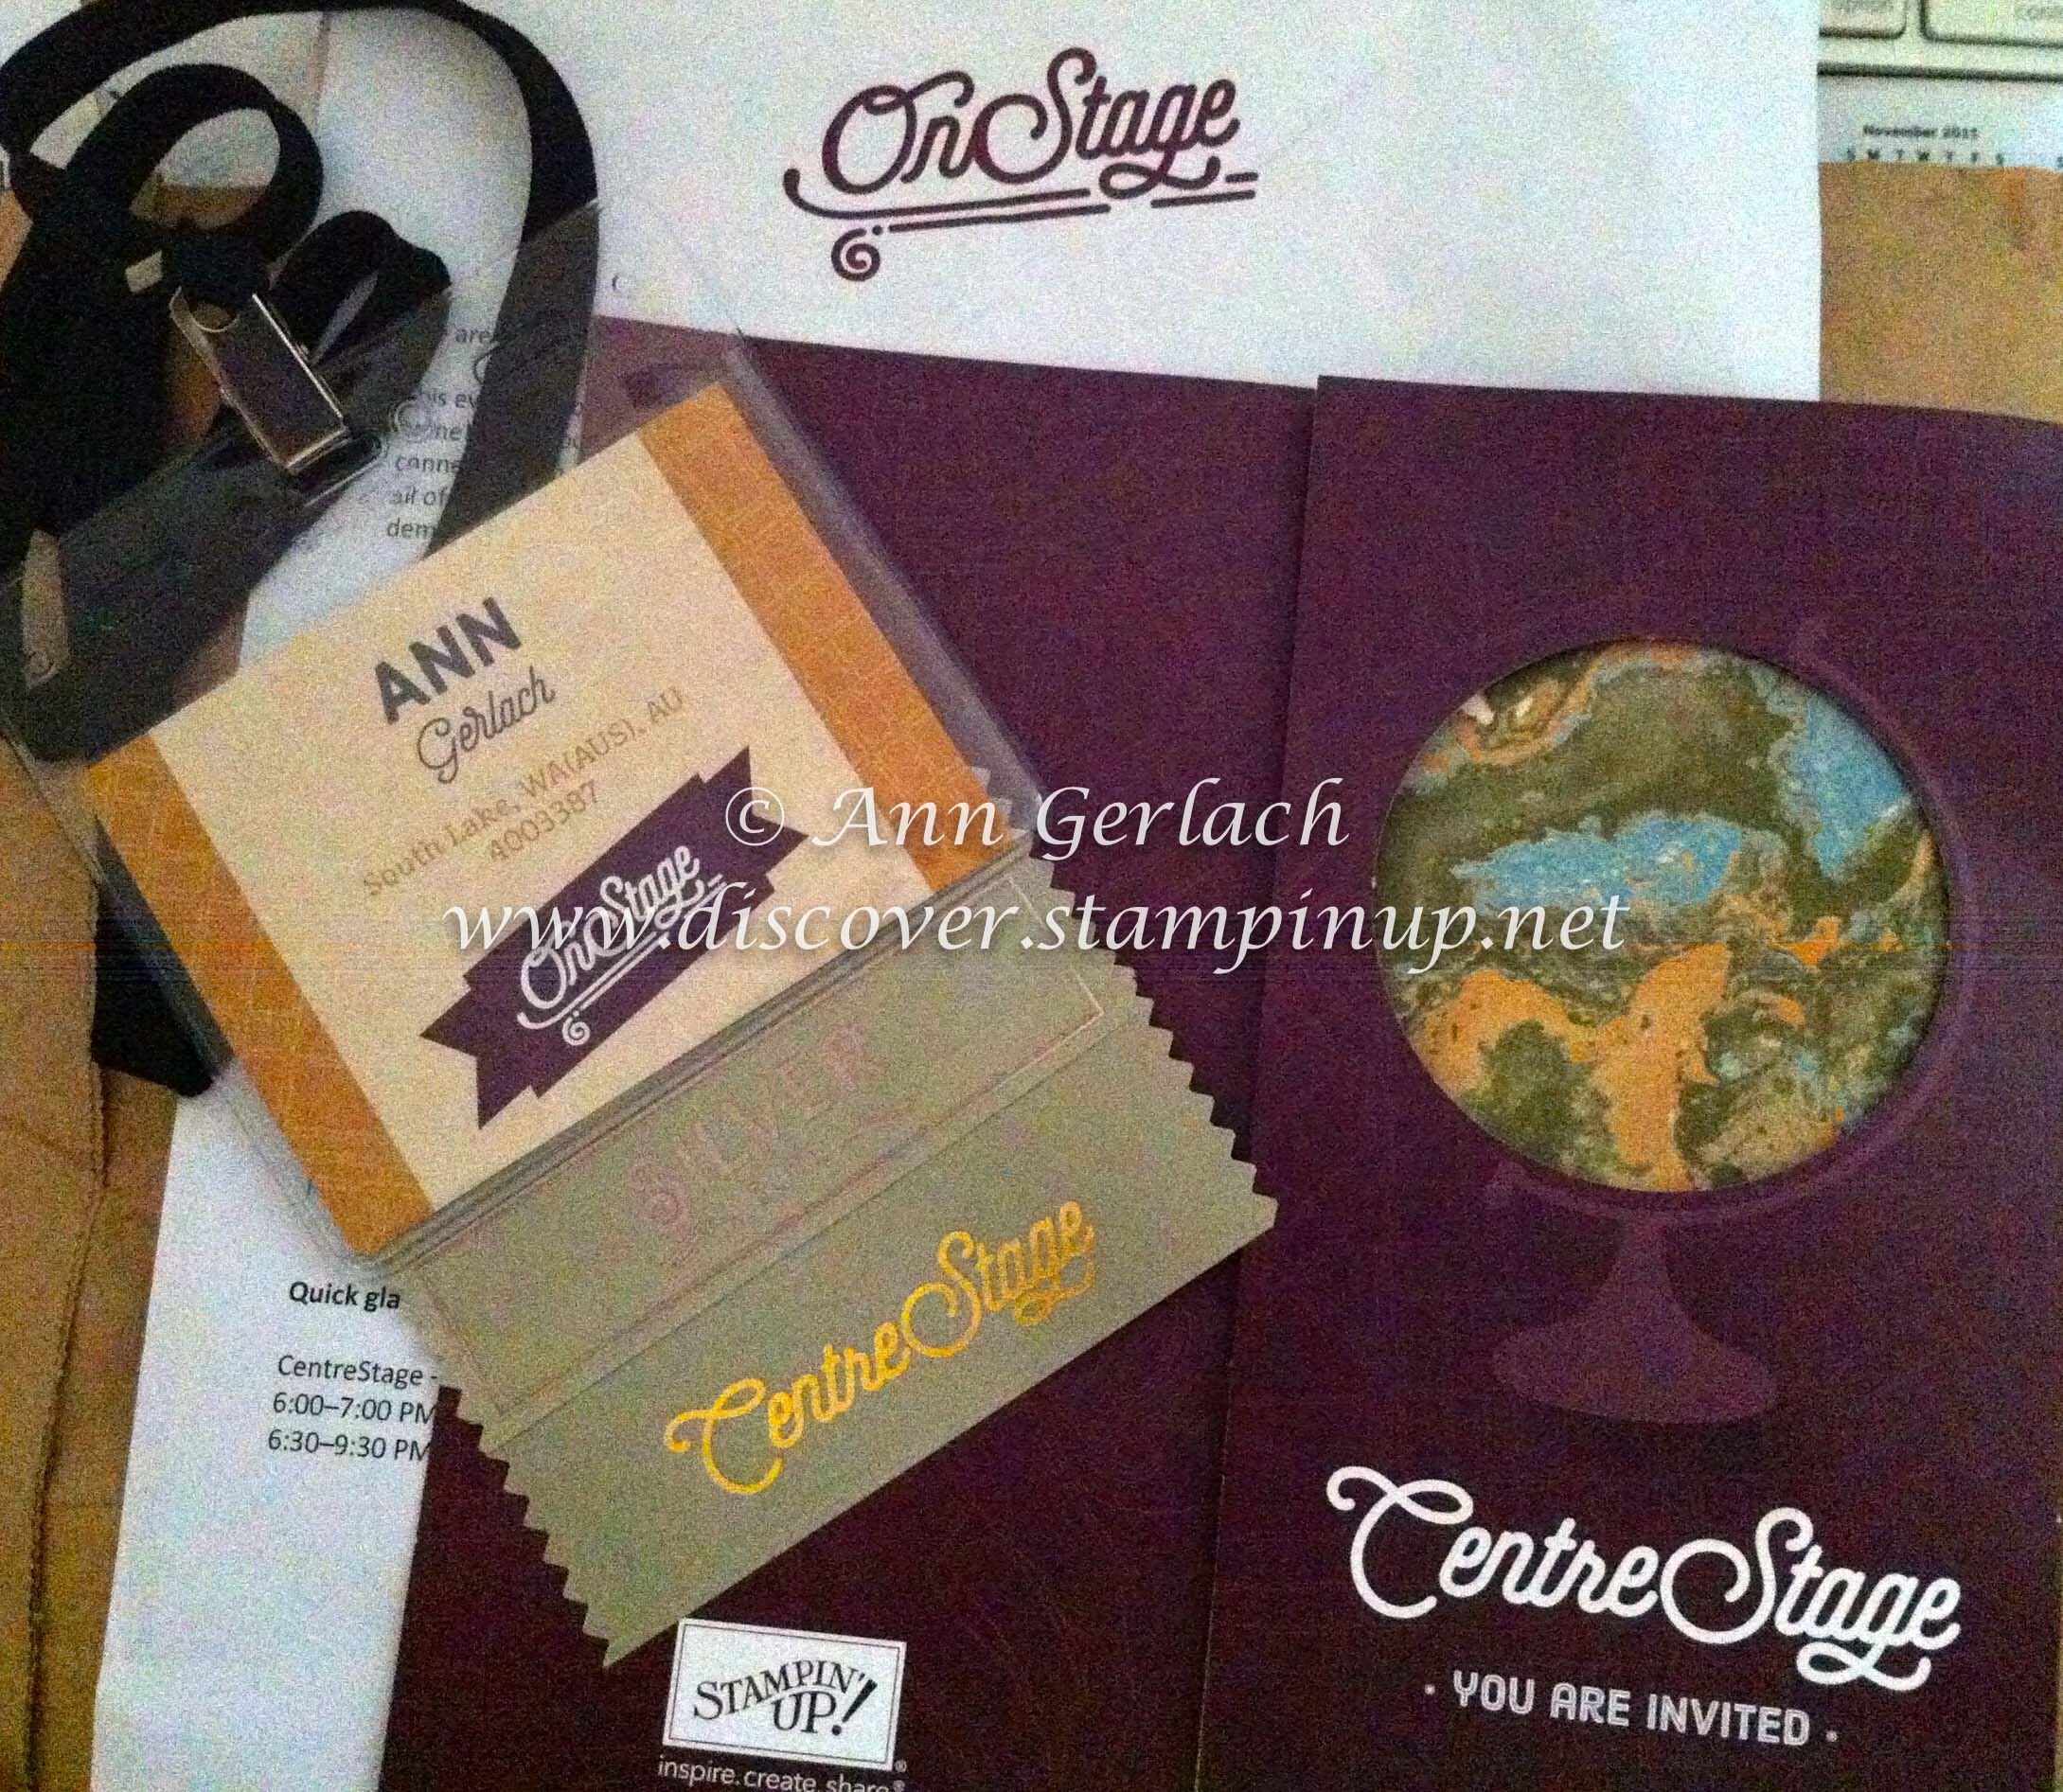
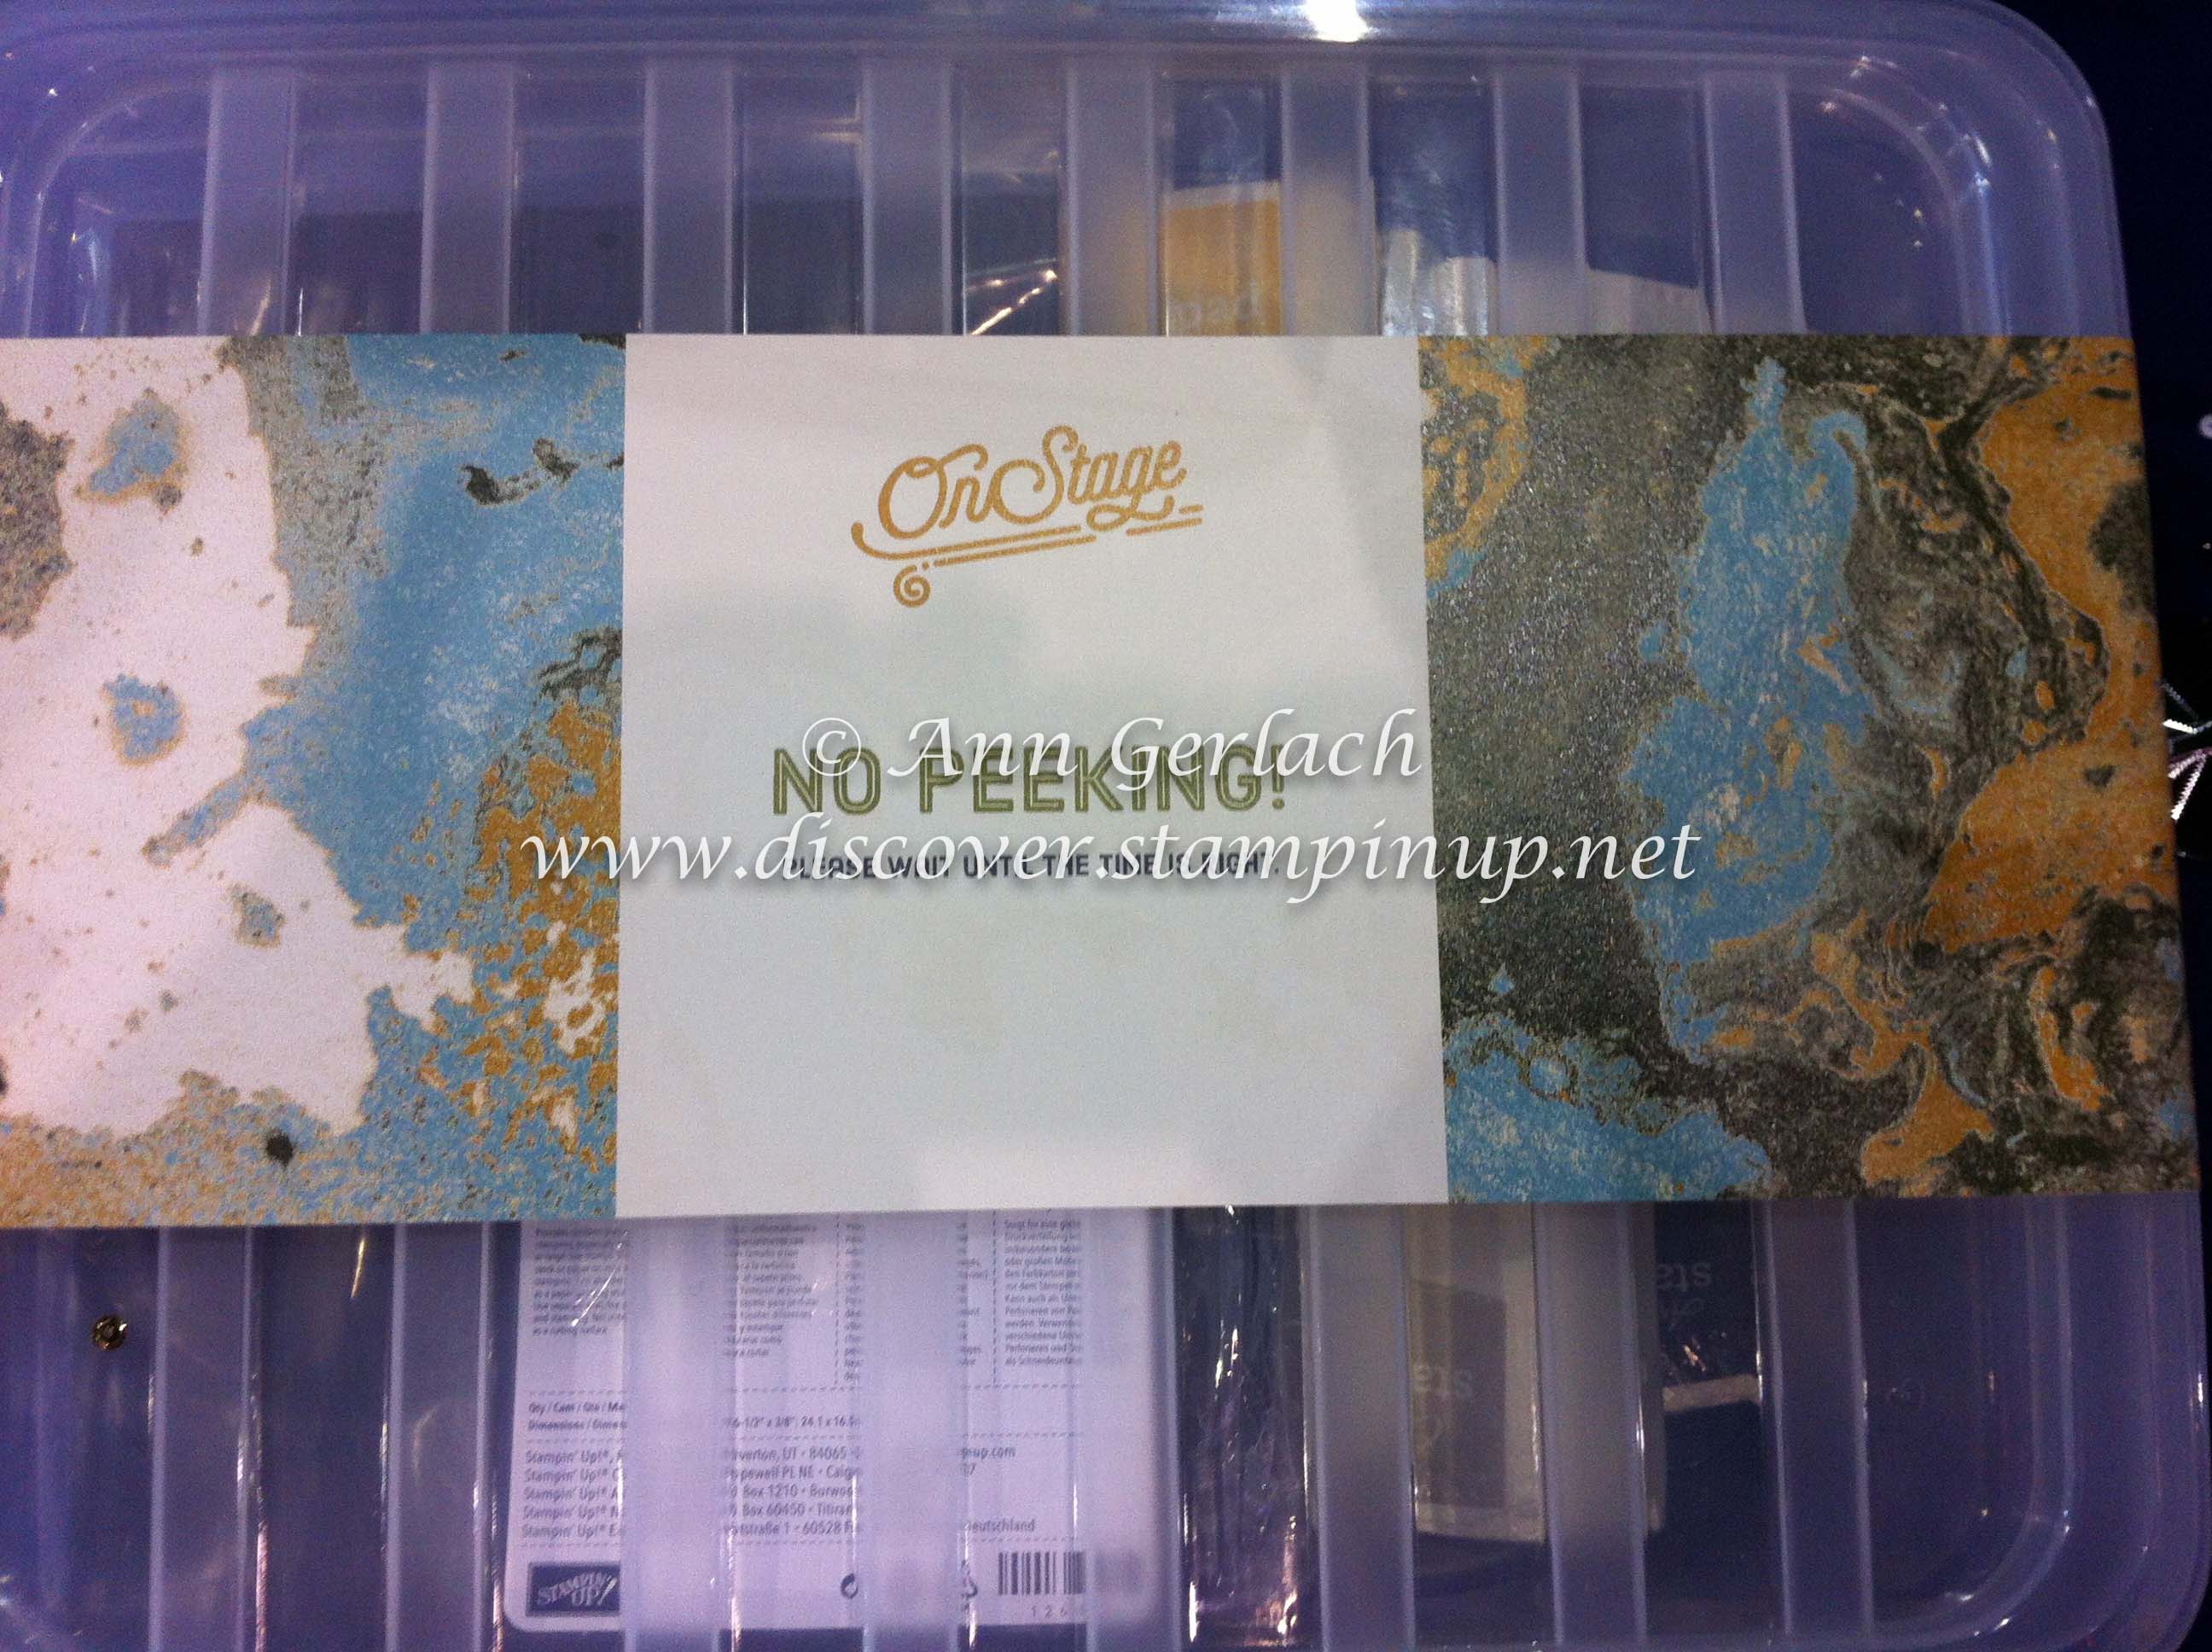
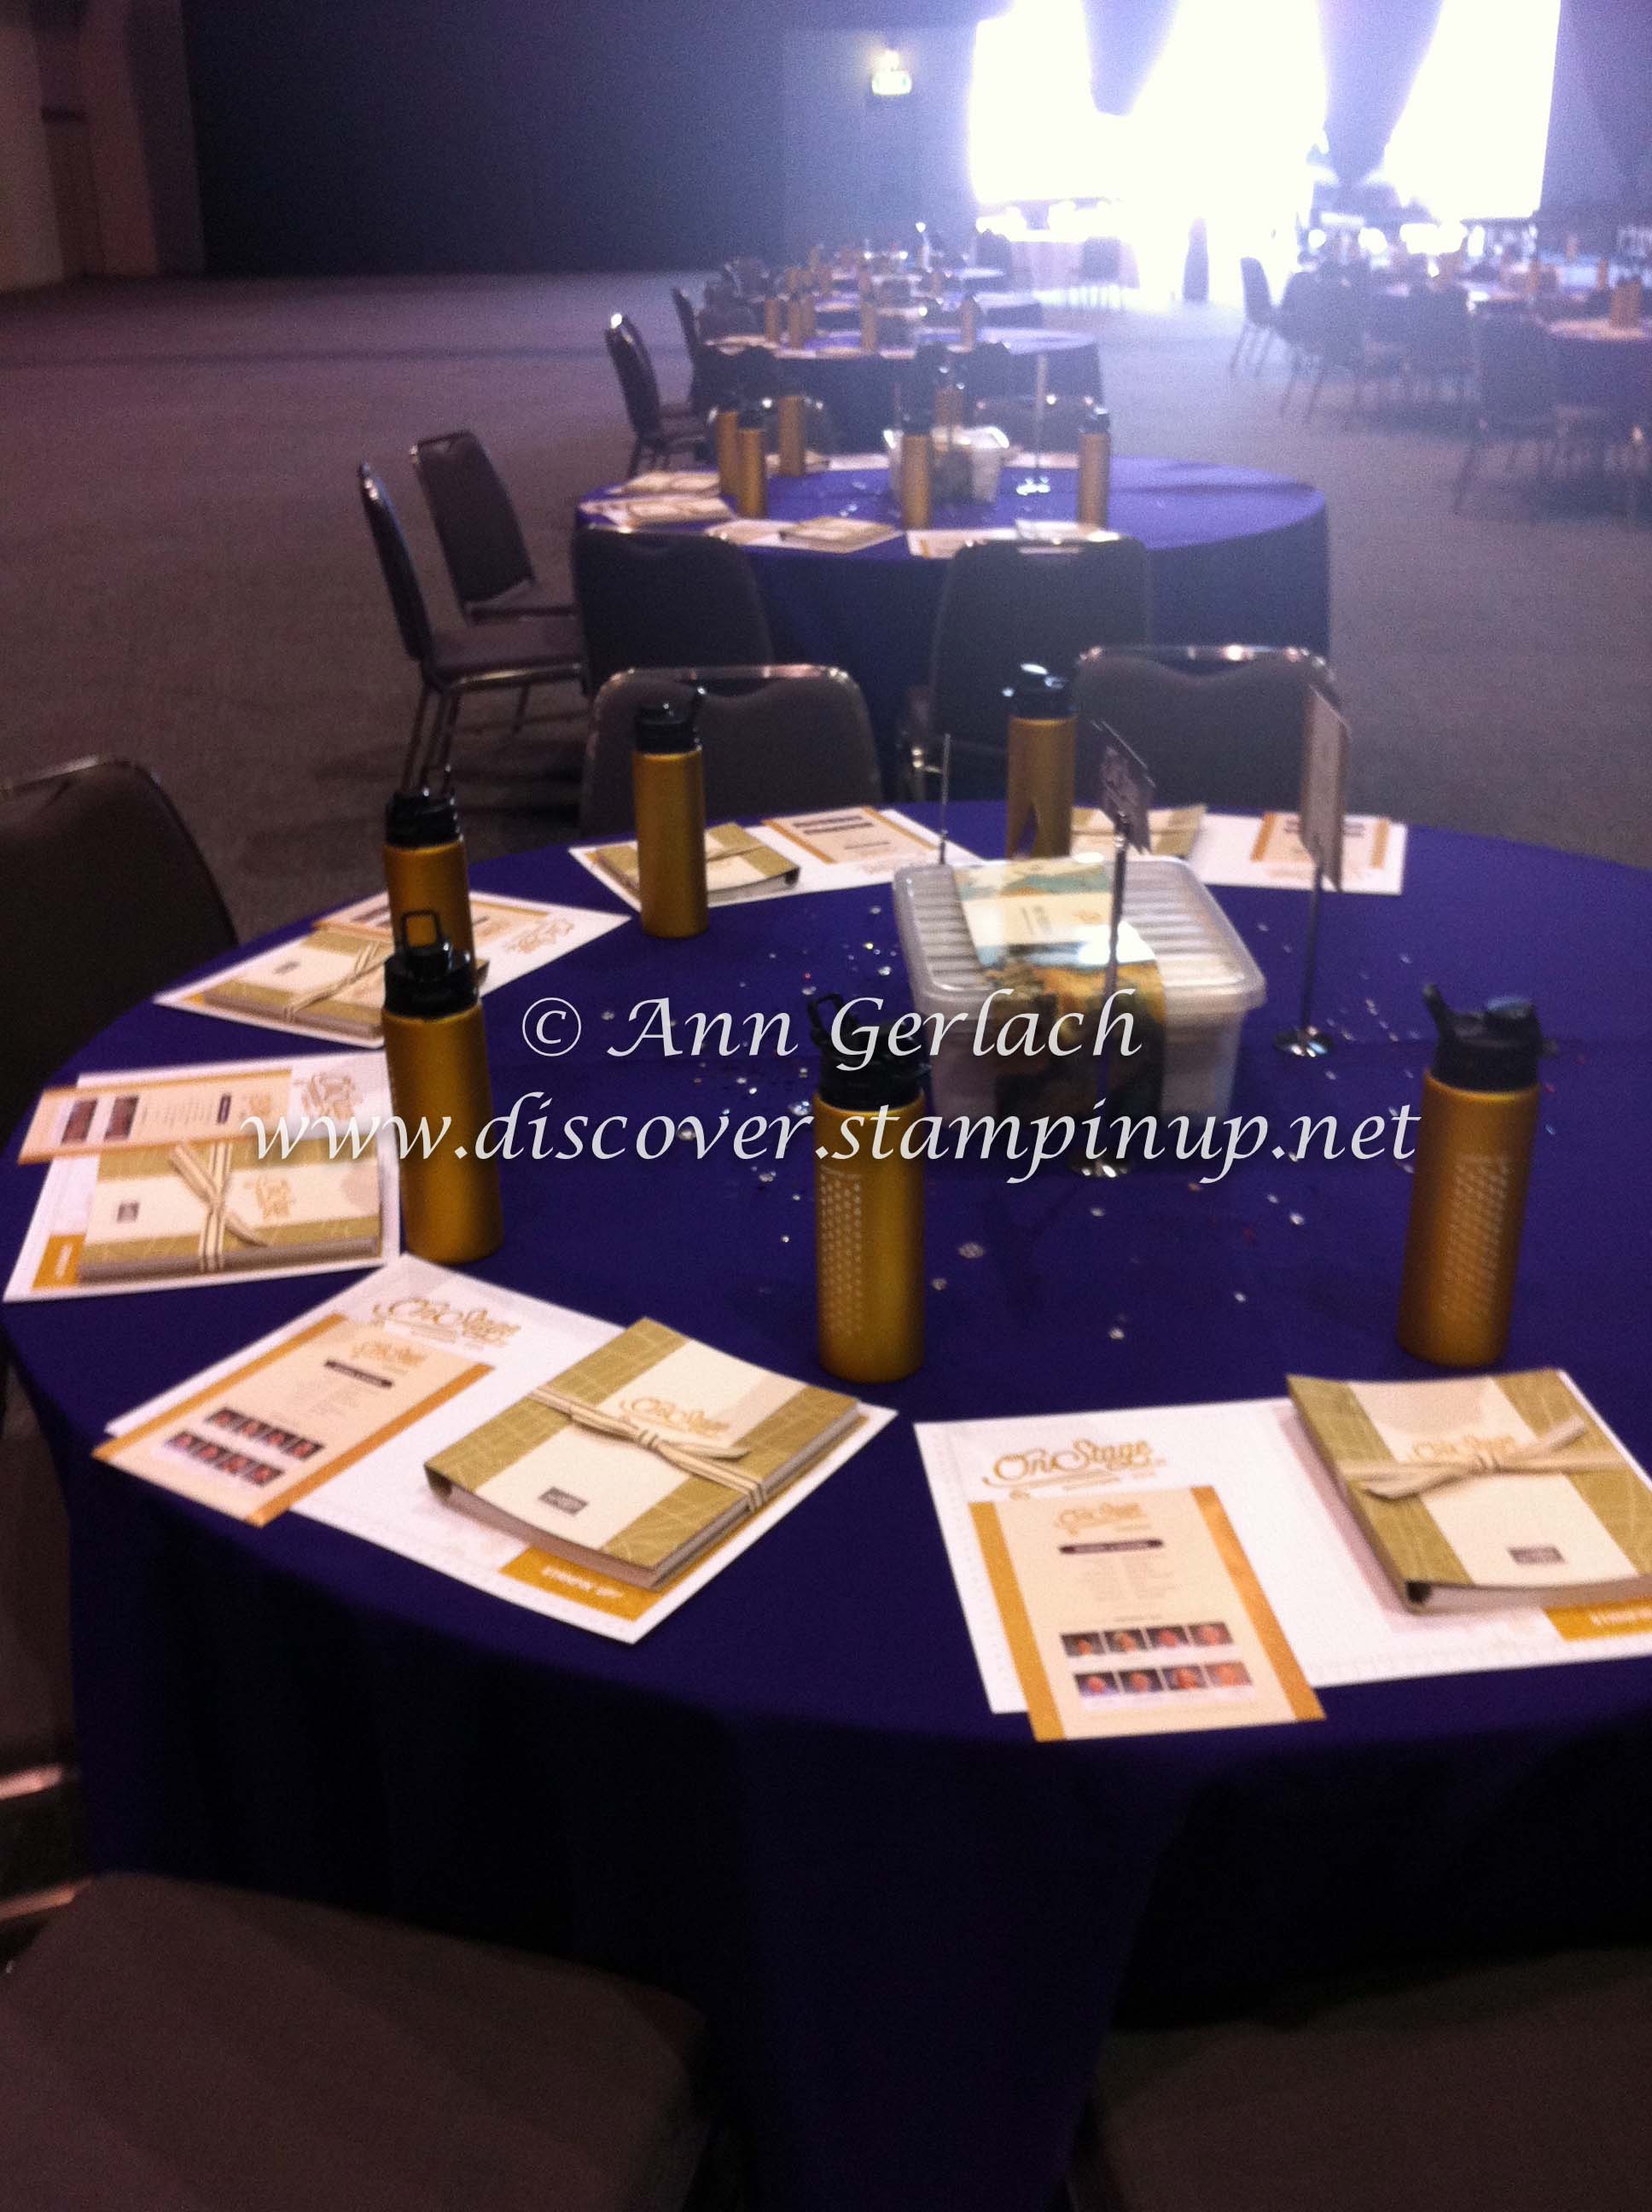
What a fun filled 1o hours we had – yes we got there at 7.30am (for an 8.30am start) and didn’t finish until 5.30pm (and then a couple of us stayed to help pack down everything as well). I was fortunate this year to have 8 of my team join me at the event (Nikki, Denise & Myleigh weren’t there quite as early as the rest of us were!)

IMG_7654

We didn’t waste the hour we were there before the event started as there was registration to do (and collect our fabulous canvas tote bags), swaps to do, old friends to catch up with  & new ones to make (I will share my swap tomorrow in a separate post).

Bag

Whilst we received a lot of generic business training applicable to any stamping business, the event itself was focused around the launch of the upcoming Occasions and Sale-a-bration catalogues that will be released to demonstrators to order from December 3rd (unless you attended the OnStage event and then we got to order on the 15th of November) and to everyone else the catalogues will go live on January 5th (so great reason to join my team and/or attend OnStage events!).

IMG_8642-2

Let me know if you want to receive a copy of the new catalogues, attend the catalogue launch party or just stay up to date with things the easiest way to do so is to click the “subscribe” button to my email newsletter. There are restrictions about what we can share with you at the moment, but below is a sneak peek of some inspiring ideas and a couple of samples made by fellow demonstrators who did presentations on stage.

As part of the day we received three brand new stop sets from the catalogues, a pack of designer paper, four make & takes and enough ideas to keep us going for the next few months! I had to share one last photo with you from the day – a friends tagged catalogue, all I can say is thank goodness she gets the demonstrator discount otherwise she might be broke soon.

IMG_7786


Don’t forget to subscribe to my newsletter or leave me a comment if you want to be among the first to get copies of the new catalogues and an invitation to the launch party in January.

Posted in 3D, Big Shot, Birthday, OnStage | Tagged , , , , , | Leave a comment

OnStage Local Perth 2015 – Day 1

IMG_7518-2

One of the fantastic perks of being a demonstrator with Stampin’ Up! is the exclusive live events that are now happening globally every 6 months, with local, national and international attendees. Perth had their first On Stage event last week (we were the only local event globally to sell out, we must all be keen stampers here in the most remote capital city in the world!) and I had the added bonus of being asked to help set up for the event with staff on the Friday, so I enjoyed an extra 5 hours with like minded, fun people playing with lots of new things!

We packed up boxes & boxes of fantastic new stamping products for the make & takes.

IMG_7535-2

Made sure each place setting included a awesomely functional and beautiful new notebook/diary gift & a gold water bottle to celebrate the first OnStage events globally.

IMG_7534-2

The tablecloths for the event were Elegant Eggplant, sprinkled with sequins & vintage buttons.

IMG_7532-2

Check out this beautiful handmade card that I received for helping to set up – lots of new goodies on that lovely creation that I can’t wait to order for myself!

IMG_8643-2

For those demonstrators performing at a certain level (Silver Elite and above) we got invited to attend the Centre Stage dinner and training session. The Perth event was very intimate with only a dozen of us being able to attend, plus the interstate and overseas staff. We got to enjoy a scrumptious dinner, receive a beautiful exclusive gift (oops forgot to take a photo of that, but I assure you it is lovely), spend time with fellow demonstrators and get training from the effervescent Clare from the Sydney office.


I will post again tomorrow and share some of the amazing things from Day 2 of OnStage – we aren’t allowed to share too much as the catalogues don’t go “live” until January 5th – unless of course you want to join my team and then you can order from the new catalogues on December 3rd, plus join us on December 10th for the next team meeting if you are able to.

Posted in OnStage | Tagged , , , | Leave a comment